Free Pattern · Crochet Tutorials
Easy Amigurumi Cat Pattern: A Friendly First Soft Toy
Crochet a simple sphere-body cat with two triangle ears, a slim tail, and embroidered facial details using exact stitch counts and a beginner-friendly assembly order.
Start here
Build one simple cat with clear shaping and soft details
This amigurumi cat is built from one round body, two small triangle ears, one narrow tube tail, and embroidered facial details. The construction stays intentionally simple so a beginner can focus on counting, stuffing, placement, and finishing rather than juggling many separate pieces.
The visual palette is consistent from start to finish: apricot-ginger is the hero color, warm ivory and soft oatmeal or mushroom beige are the alternate cat colors, and muted sage appears only as a calm styling accent in the photography.
For a soft finish, this version uses embroidered eyes, nose, mouth, and whiskers instead of detachable hard facial pieces.
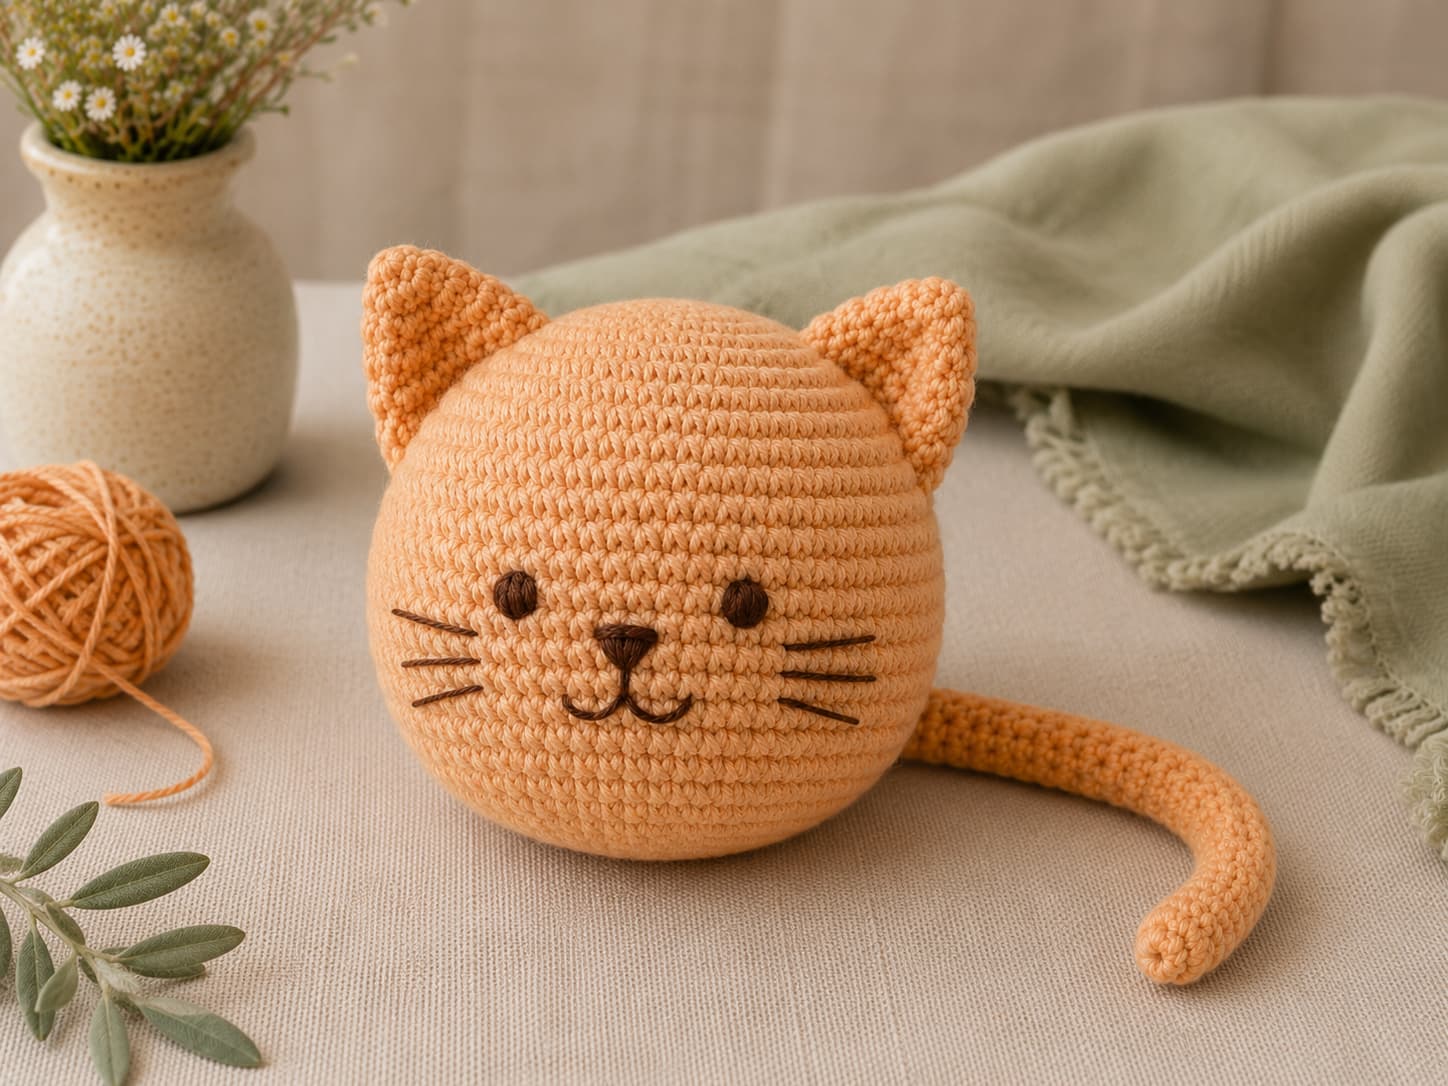
Best after you can make a magic ring and single crochet.
Approximately 13 cm tall including the ears; yarn and tension can change the result.
Smooth cotton or acrylic makes the stitches easy to see.
Use a firm fabric with no obvious stuffing gaps.
One simple sphere-body pattern with three attached parts.
Plus seaming, stuffing, and face embroidery.
Why this beginner construction works
Amigurumi becomes easier when each piece has one job. The body teaches even increases, straight rounds, decreases, and gradual stuffing. The ears teach simple flat shaping. The tail teaches a narrow tube. Assembly then brings those parts together without introducing arms, legs, or complicated color changes.
Consistency target: Keep the final cat close to a single rounded body shape. A little handmade asymmetry is natural, but avoid changing the basic silhouette between the tutorial images and the finished piece.
Materials and tools
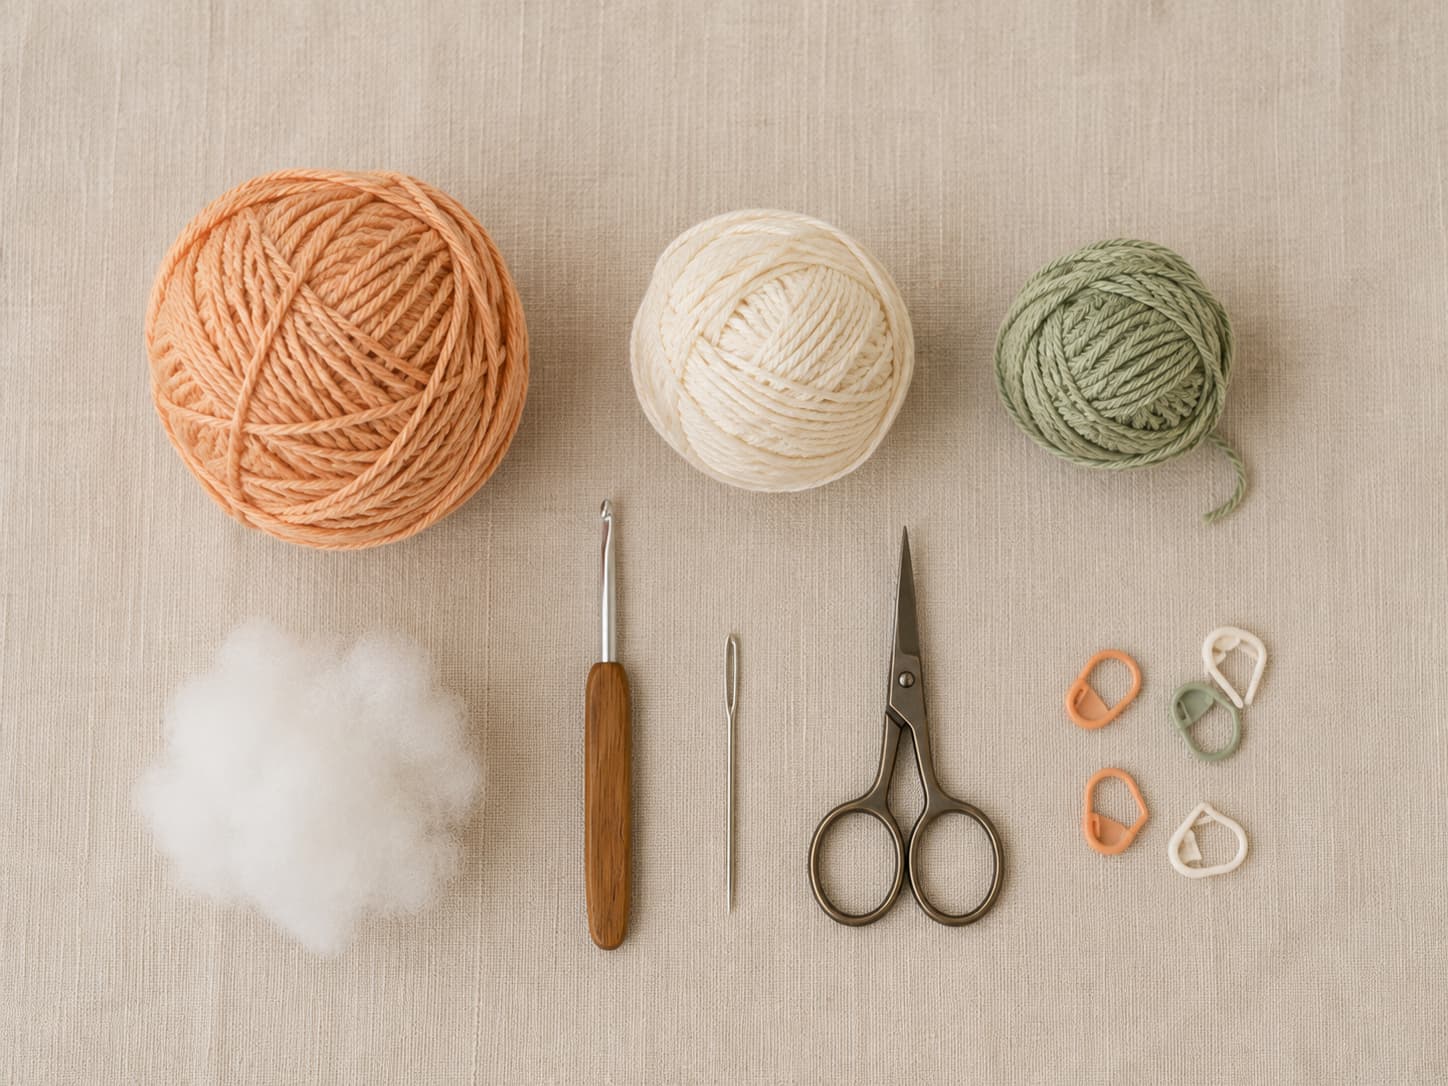
- Worsted-weight (#4) smooth yarn: about 80 yd / 73 m in apricot-ginger for the main cat
- Optional alternate colors: warm ivory and soft oatmeal or mushroom beige
- 3.5 mm crochet hook
- Polyester fiberfill
- Locking stitch marker
- Tapestry needle
- Small sharp scissors
- Dark brown embroidery thread or fine yarn for the face
- 4–6 straight pins for placement
Stitches and abbreviations
| Abbreviation | Meaning | Use |
|---|---|---|
| MR | Magic ring | Starts body and tail |
| ch | Chain | Starts each ear |
| sc | Single crochet | Main stitch |
| inc | Increase: 2 sc in one stitch | Widens the body and tail |
| dec | Invisible decrease | Shapes the body and tail |
| sc2tog | Single crochet 2 together | Shapes ear rows |
| FO | Fasten off | Finishing |
Work the body and tail in a continuous spiral. Mark the first stitch of every round and move the marker up as you go.
Part 1
Body pattern: one firm sphere
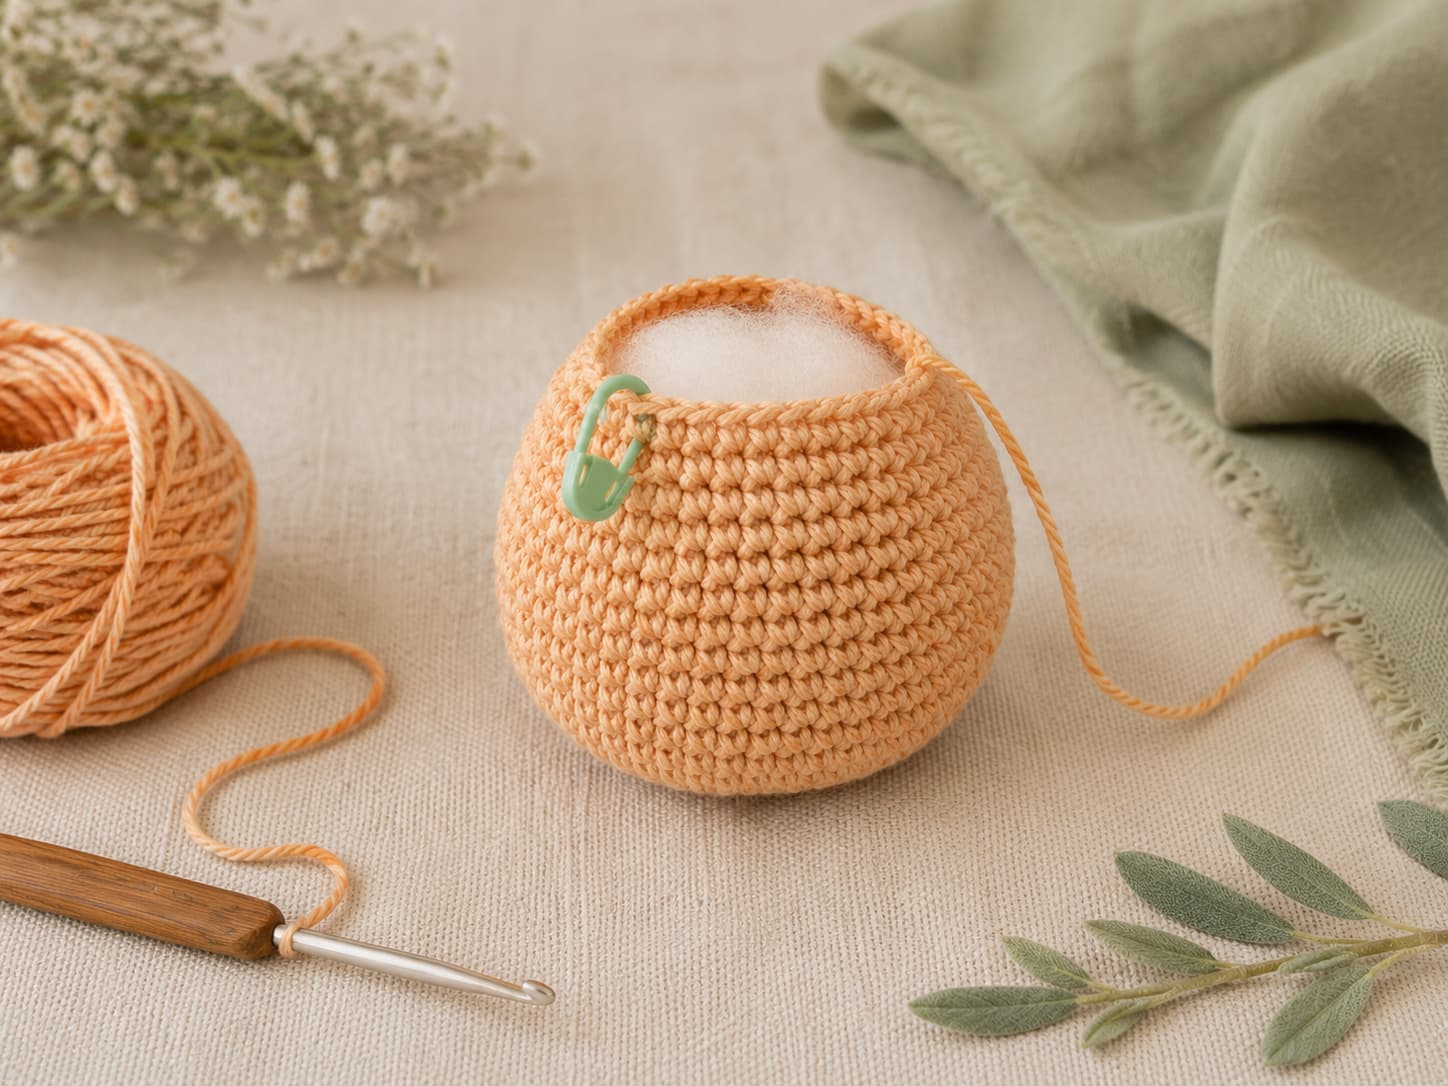
The body is worked from the bottom upward. Increase to 42 stitches, work eight even rounds, then decrease while adding stuffing gradually.
Cat Body
Continuous rounds · Worsted #4 · 3.5 mm hook
- R1MR, 6 sc.6 sts
- R2Inc in each st around.12 sts
- R3(Sc 1, inc) × 6.18 sts
- R4(Sc 2, inc) × 6.24 sts
- R5(Sc 3, inc) × 6.30 sts
- R6(Sc 4, inc) × 6.36 sts
- R7(Sc 5, inc) × 6.42 sts
- R8–15Sc in each st around for 8 rounds.42 sts
- R16(Sc 5, dec) × 6. Begin adding small amounts of stuffing.36 sts
- R17(Sc 4, dec) × 6.30 sts
- R18(Sc 3, dec) × 6.24 sts
- R19(Sc 2, dec) × 6. Add more stuffing and shape the sphere evenly.18 sts
- R20(Sc 1, dec) × 6.12 sts
- R21Dec × 6. FO, leaving a sewing tail. Weave through the front loops of the final 6 stitches and pull closed.6 sts
Part 2
Ear pattern: make two matching triangles
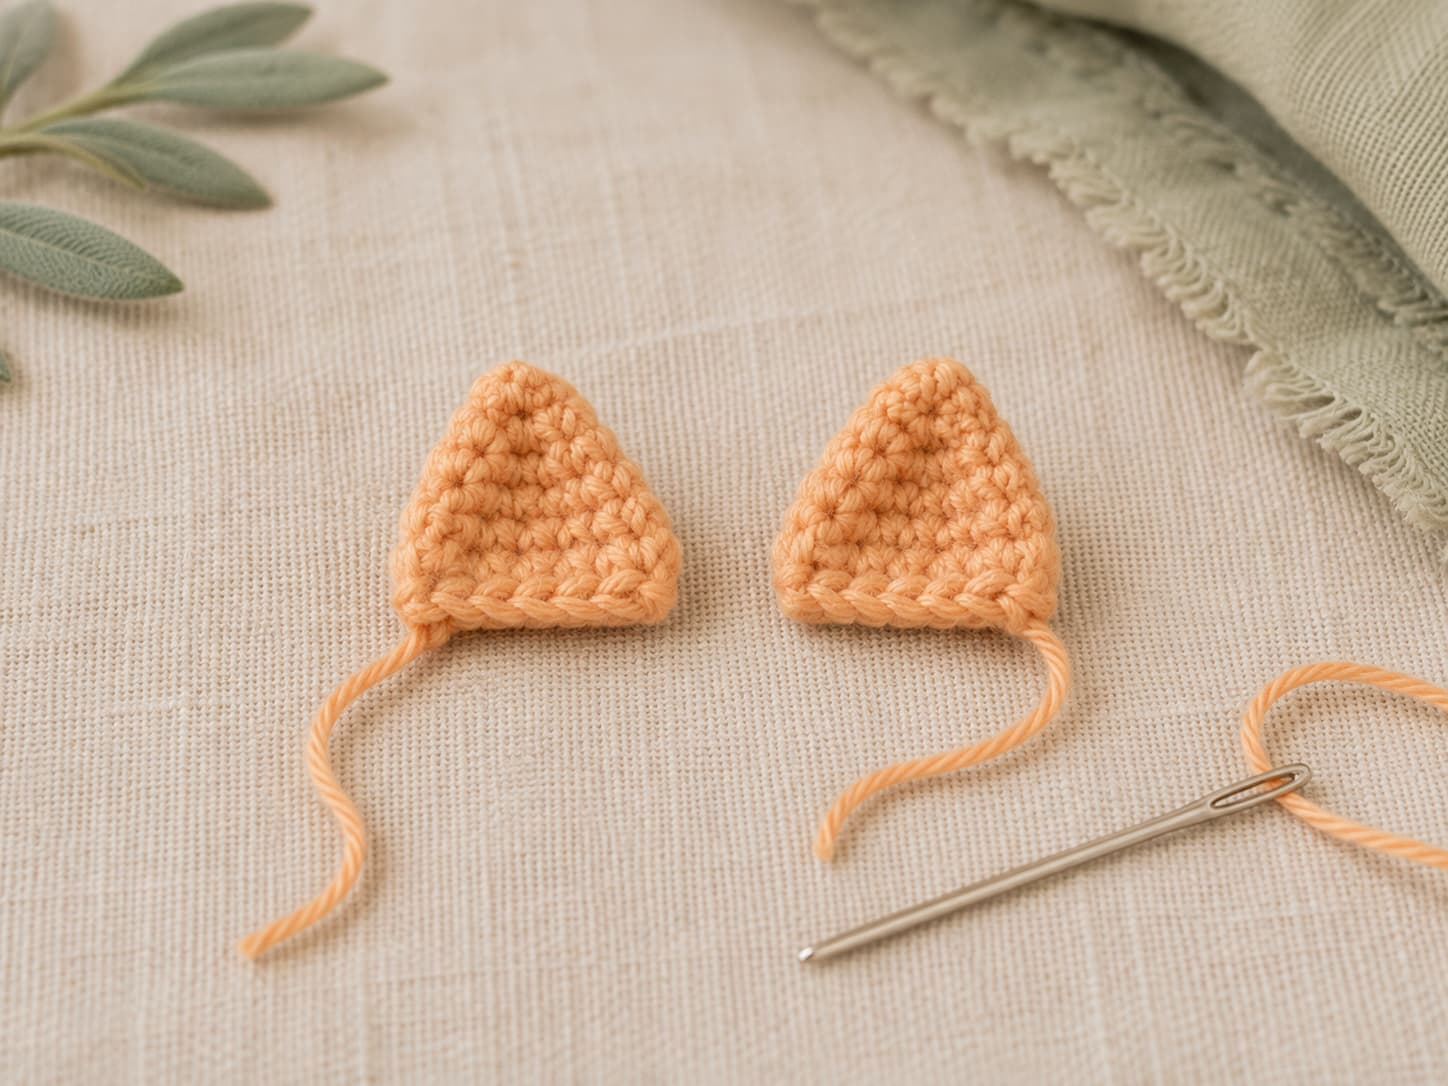
Make two single-layer apricot-ginger triangles so the construction matches the finished cat shown in the photos.
Triangle Ear — Make 2
Worked flat in rows
- Row 1Ch 7. Starting in 2nd ch from hook, sc 6. Ch 1, turn.6 sts
- Row 2Sc2tog, sc 2, sc2tog. Ch 1, turn.4 sts
- Row 3Sc2tog twice. Ch 1, turn.2 sts
- Row 4Sc2tog. FO, leaving an 8-inch / 20-cm tail for sewing.1 st
Part 3
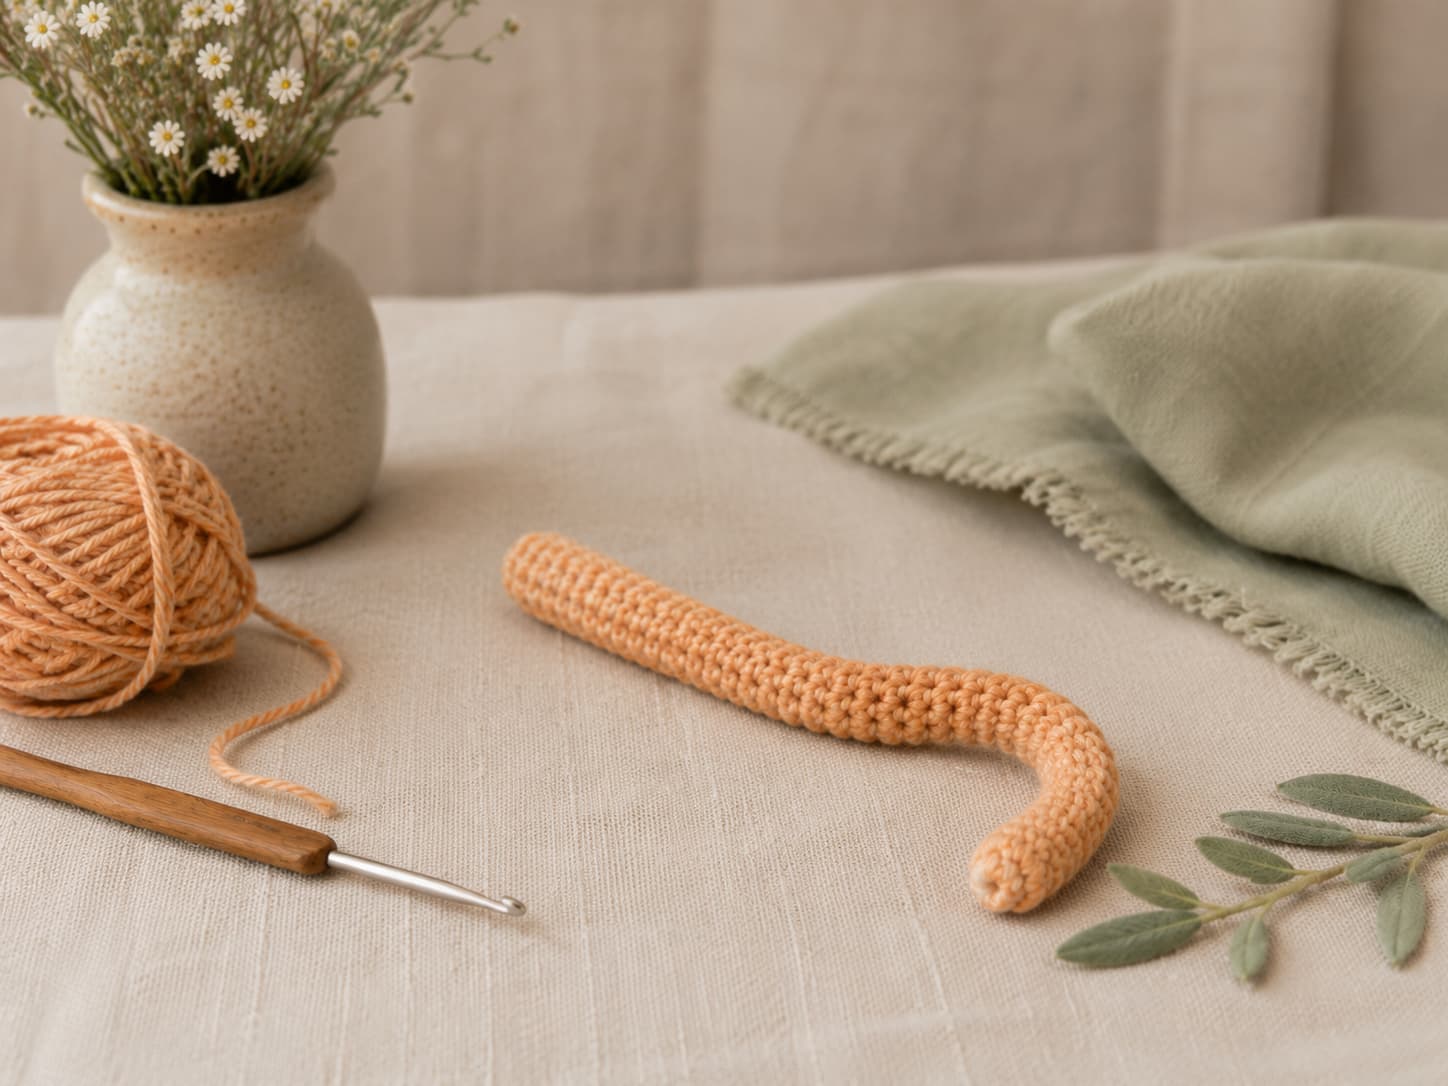
Tail pattern: one narrow crochet tube
The tail is worked in continuous rounds and left soft rather than reinforced with wire or a pipe cleaner.
Cat Tail
Continuous rounds · no hard internal support
- R1MR, 6 sc.6 sts
- R2(Sc 1, inc) × 3.9 sts
- R3–18Sc in each st around for 16 rounds.9 sts
- R19(Sc 1, dec) × 3. FO, leaving a 12-inch / 30-cm tail for sewing.6 sts
- FinishWeave the yarn through the front loops of the remaining 6 stitches and pull closed.—
Part 4
Assembly: pin first, then sew
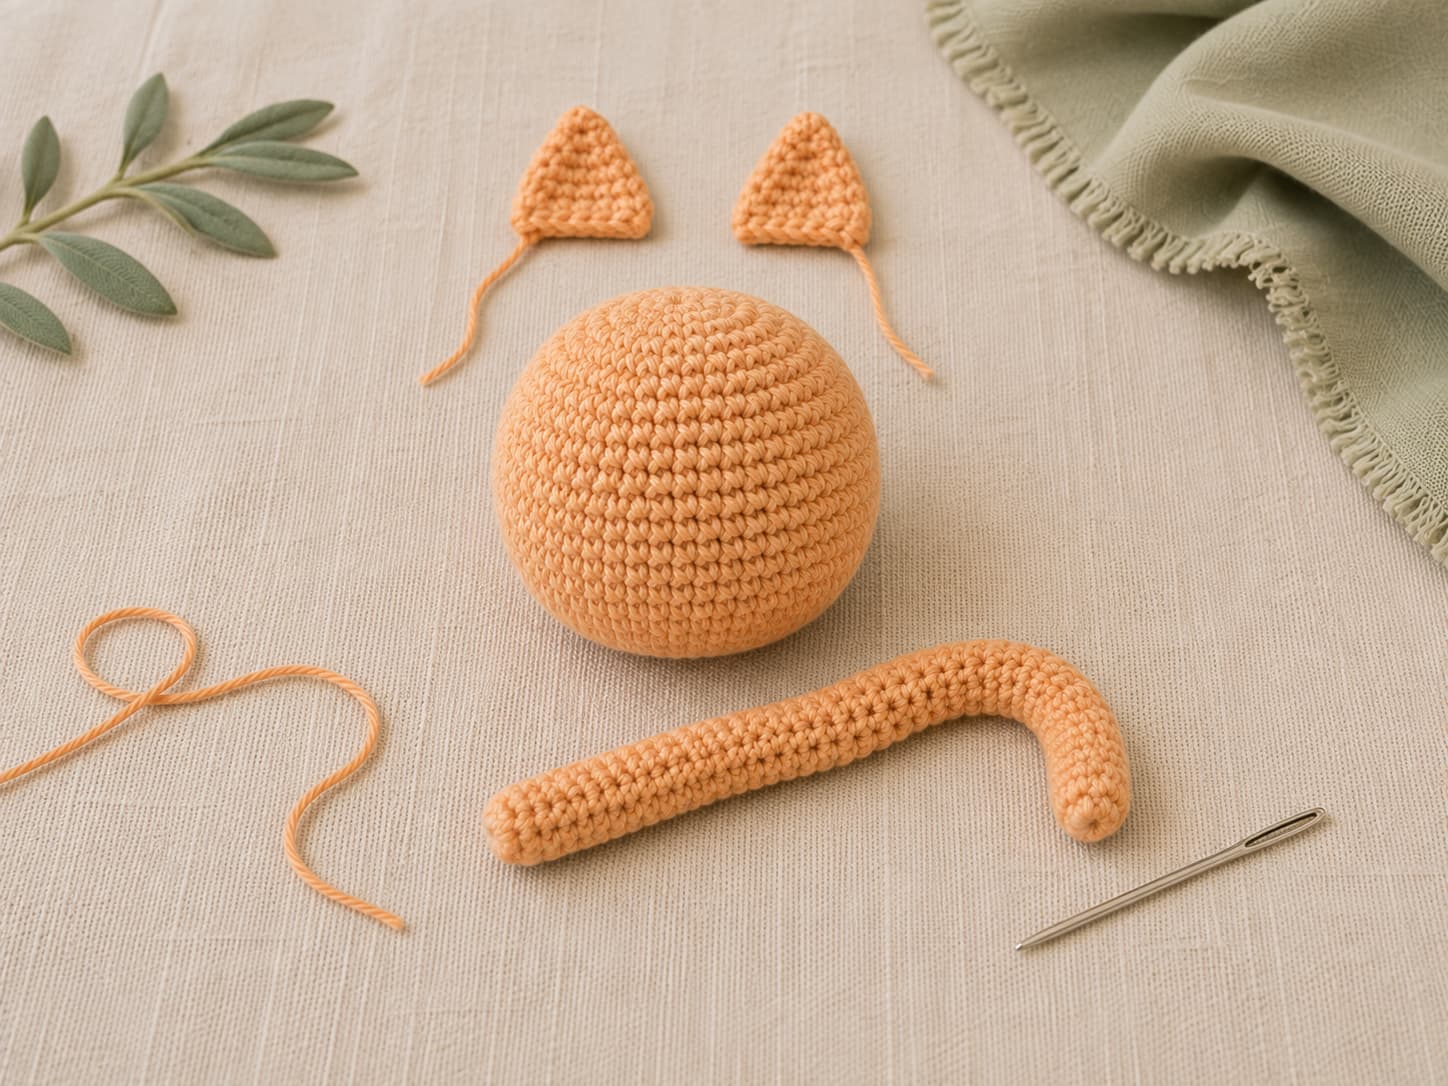
- Position the ears. Set the closed end of the sphere at the top. Pin the ears roughly four stitches apart and angle them slightly outward.
- Sew the ears. Whipstitch across each ear base with 4–5 secure stitches, keeping the edge flat against the body.
- Attach the tail. Pin the tail at the lower back of the sphere, about three rounds above the starting center, then sew around the base with 6–8 secure stitches.
- Hide the ends. Weave the remaining yarn through the stuffed body in more than one direction and trim close so the end retracts inside.
Part 5
Face embroidery: keep the expression soft and simple
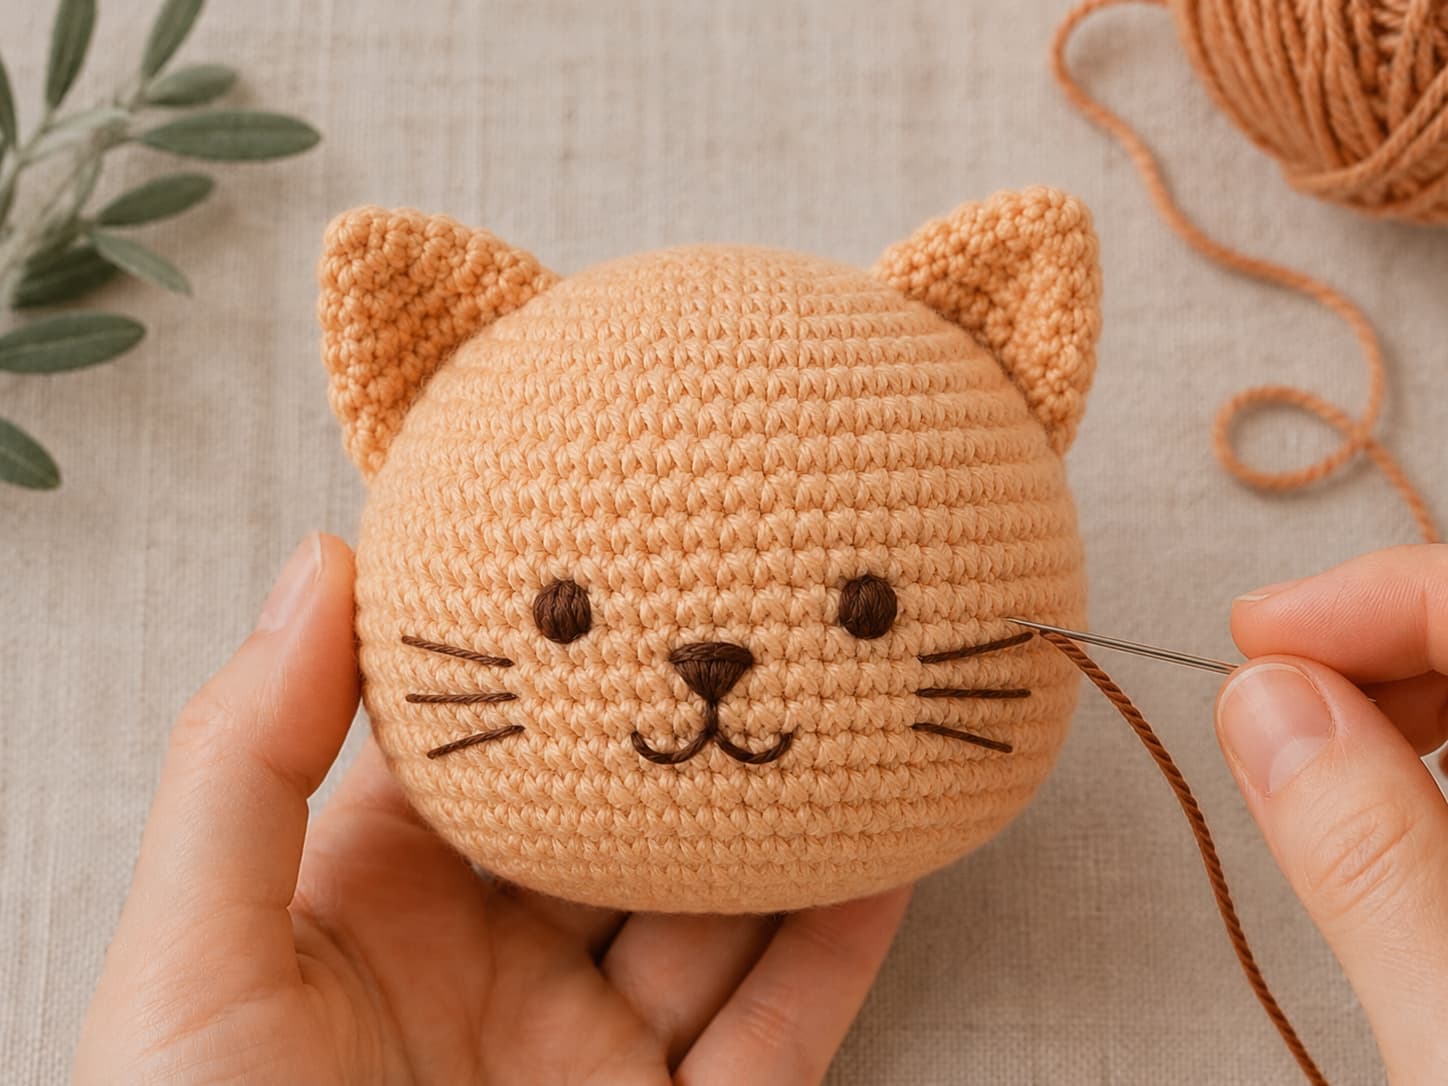
Mark the face with pins before stitching so the eyes and nose stay centered. Use dark brown thread or fine yarn for a softer look than pure black.
- Eyes: Place two small embroidered eyes about six stitches apart around the middle-front of the sphere.
- Nose: Stitch a small dark-brown triangle centered between and slightly below the eyes.
- Mouth: Add a short vertical line from the nose, then two small curved or diagonal stitches to form a gentle mouth.
- Whiskers: Add three short straight stitches on each side. Let the lengths vary slightly so the face does not look machine-perfect.
Optional detail: Image 07 includes a few short forehead stripes. Treat these as an optional decorative variation, not a required part of the base pattern.
Safety and secure finishing
This version keeps the toy soft by using embroidered facial features and a flexible crochet tail. Before gifting, check that the ears and tail are firmly attached, the yarn ends are hidden, and no stuffing is visible through the fabric.
Child-safety reminder: Inspect any handmade toy for loose seams, yarn ends, or detachable components before giving it to a child, and choose materials appropriate for the intended recipient.
Troubleshooting six common problems
- Stuffing shows through: switch to a slightly smaller hook or tighten your single crochet tension.
- The sphere looks lumpy: add smaller amounts of stuffing and redistribute it before the final rounds close.
- The ears look uneven: compare both triangles row by row before sewing.
- The tail feels bulky: keep the 9-stitch tube narrow and do not overstuff it.
- The face looks off-center: pin the eye and nose positions before embroidering.
- The cat no longer matches the pattern: avoid adding separate arms, legs, or a second body section if you want the same sphere-body result shown here.
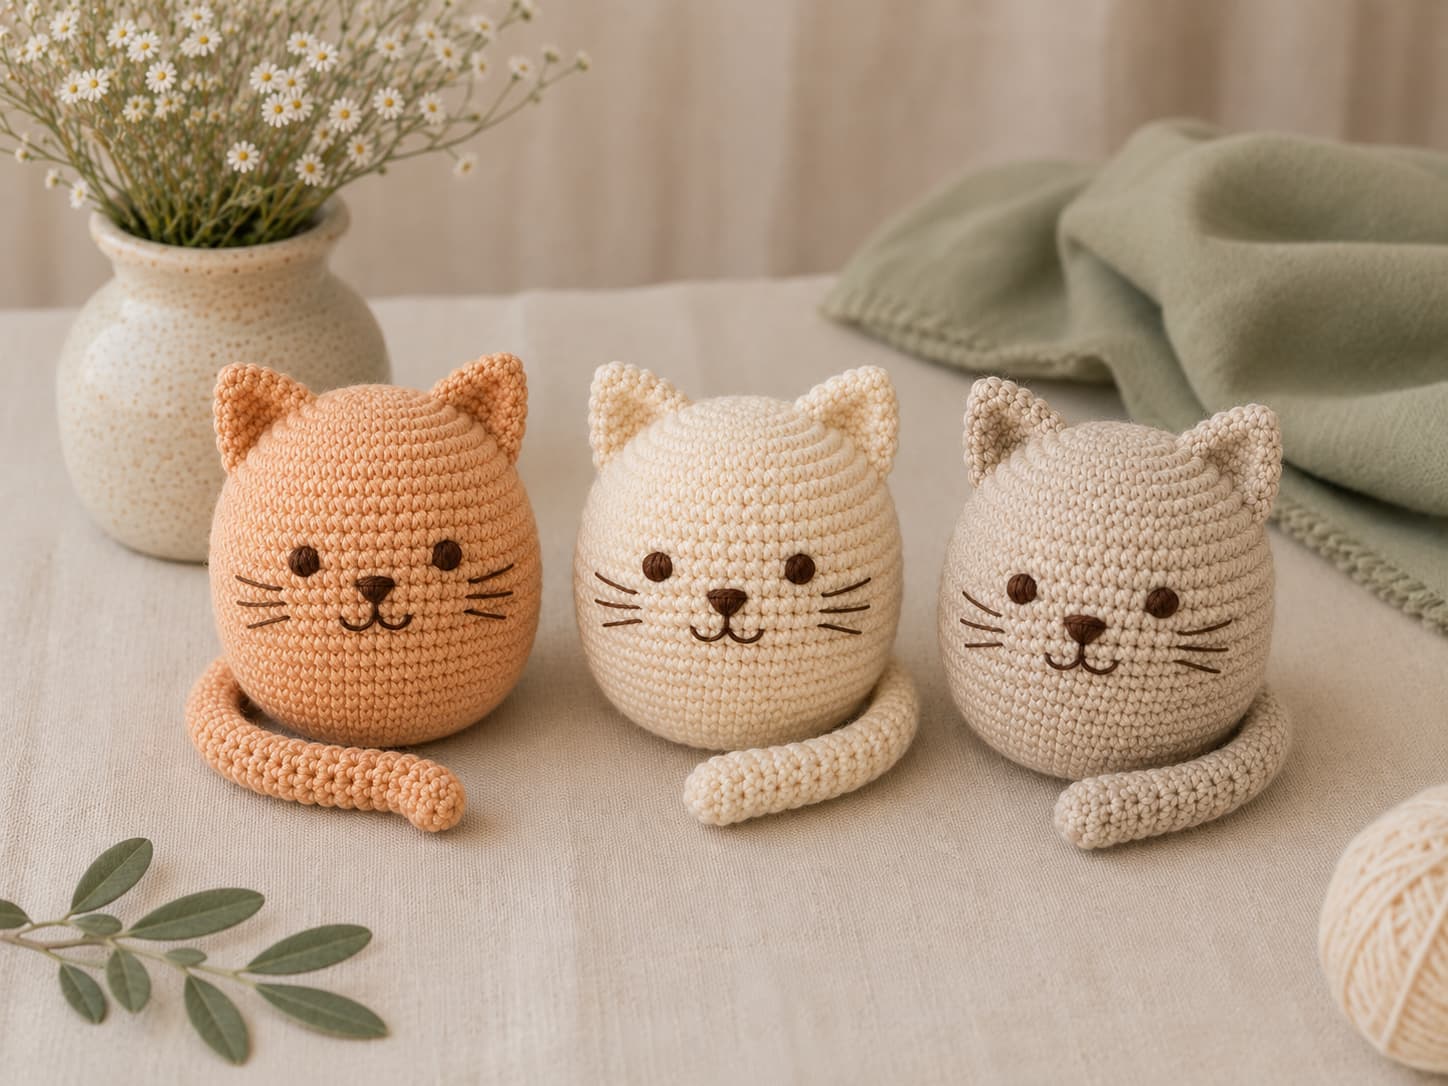
Make the same cat in three soft neutral palettes
Keep the stitch counts, body shape, ear proportions, and tail construction unchanged. Change only the main yarn color so every finished cat clearly comes from the same base pattern.
| Variation | Main yarn | Face | Styling |
|---|---|---|---|
| Apricot cat | Apricot-ginger | Dark brown embroidery | Warm and playful |
| Ivory cat | Warm ivory | Dark brown embroidery | Clean and classic |
| Oatmeal cat | Soft oatmeal / mushroom beige | Dark brown embroidery | Quiet and modern |
Frequently asked questions
1.Is an amigurumi cat good for beginners?
Yes. This pattern uses one sphere body, two small triangle ears, one narrow tail, and embroidered details, so the construction stays manageable for an early amigurumi project.
2.What yarn is best for an amigurumi cat?
Smooth DK or worsted yarn works well because the stitches remain easy to see and the fabric can be made dense enough to contain stuffing.
3.Why does my amigurumi fabric look loose?
The hook may be too large for the yarn or the tension may be too relaxed. Use a slightly smaller hook and aim for compact single crochet stitches without straining your hands.
4.How much stuffing should I use?
Add stuffing gradually until the body holds a rounded shape without stretching the stitch gaps. The finished cat should feel supported rather than rock-hard.
5.Should I use safety eyes or embroidery?
This pattern uses embroidered eyes, nose, mouth, and whiskers so the face stays soft and avoids detachable hard facial pieces.
6.How do I keep the ears symmetrical?
Count every row, compare both finished triangles before sewing, and pin the ears in place before making permanent stitches.
7.Can I make the same pattern in other cat colors?
Yes. Keep the construction unchanged and swap only the main yarn color. Apricot-ginger, warm ivory, and soft oatmeal or mushroom beige create a cohesive neutral set.
Final thoughts
This cat works because the construction stays simple from the first round to the final photograph. One sphere, two matching ears, one slim tail, and a soft embroidered face are enough to create a recognizable toy while teaching the core skills that carry into more advanced amigurumi.
Pattern notes and references
- Knitsoul: How to Crochet Amigurumi for Beginners — magic ring, continuous rounds, stuffing, and invisible decreases.
- Knitsoul: How to Crochet for Beginners — foundational crochet stitches and tension.
- This article’s stitch counts for the sphere body and tube tail are based on the earlier Knitsoul Article 25 pattern draft and have been reorganized here to match the final image sequence.
Want the printable cat pattern checklist?
Get a compact printable with the materials list, round counts, assembly order, and face-placement reminders for offline crocheting.
Send me the amigurumi cat checklist