How to Read Knitting Patterns: A Beginner’s Step-by-Step Decoder
Decode materials, gauge, abbreviations, row instructions, repeats, charts, sizing, regional terminology, and finishing before the first stitch goes on your needle.
Written by Sophie Lane•Published •About 11 minutes to read
A pattern is a set of decisions written in shorthand
A knitting pattern tells you what to make, which materials and size to use, how many stitches to begin with, what to do on each row or round, and how to finish the fabric. The shorthand becomes manageable when you read the pattern in layers instead of trying to decode the entire page at once.
Begin with the project overview and finished measurements. Check the yarn, needle sizes, notions, gauge, and skill level. Read the abbreviation and special-stitch notes. Only then move into the row-by-row instructions or chart. Finish by reading the seaming, blocking, and assembly directions before casting on.
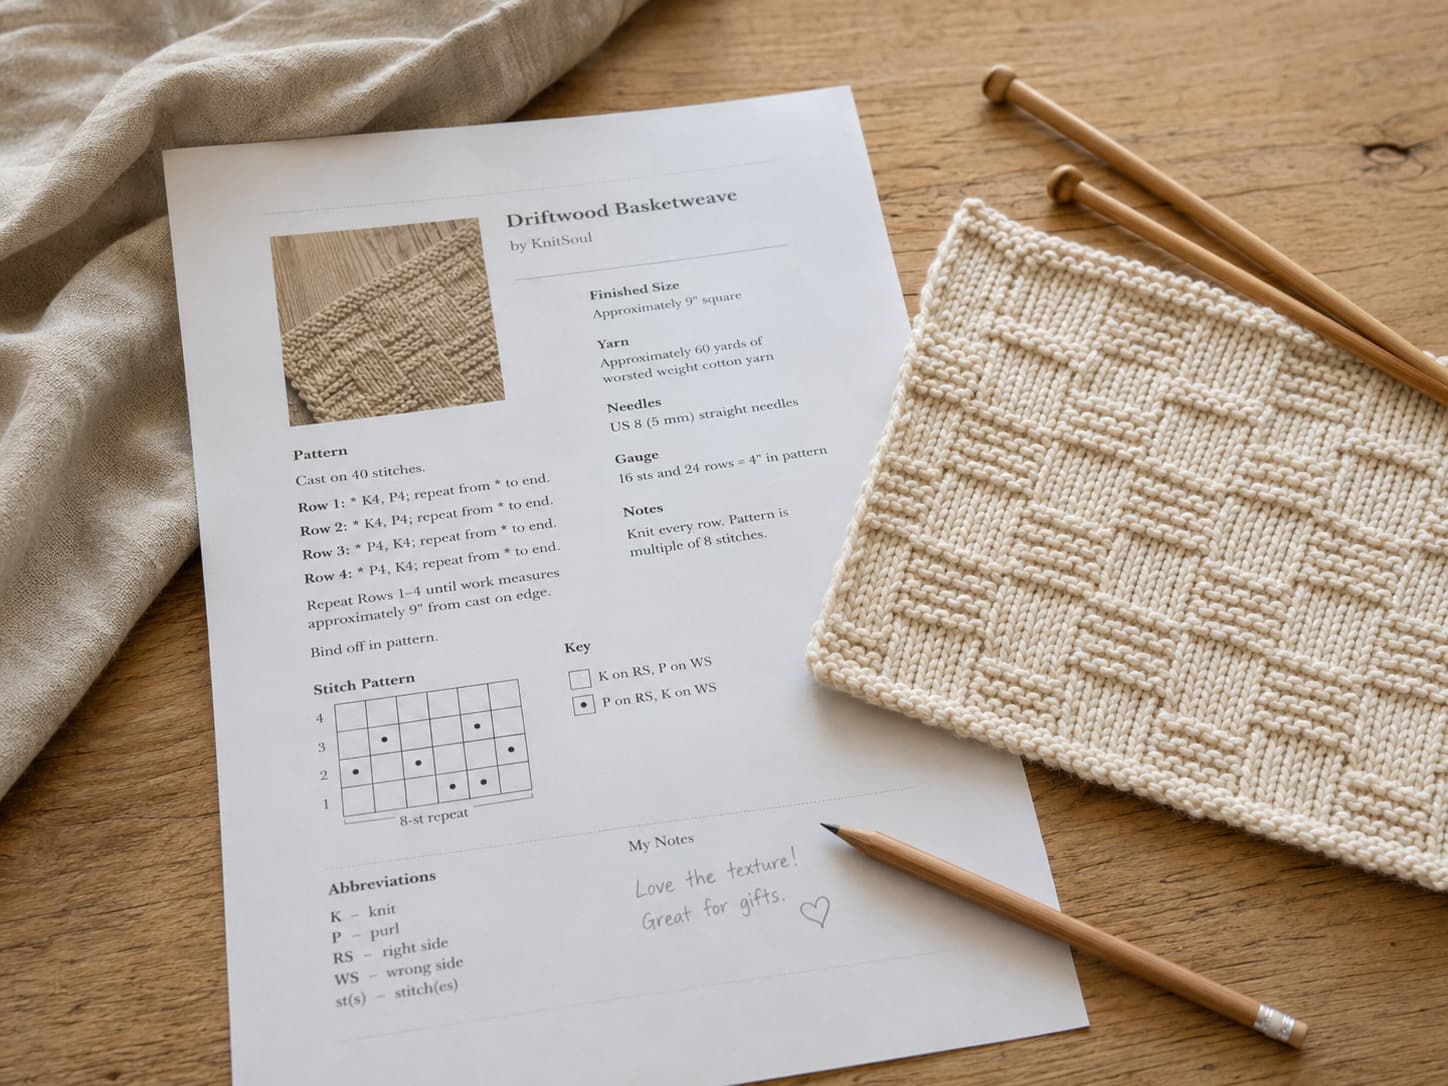
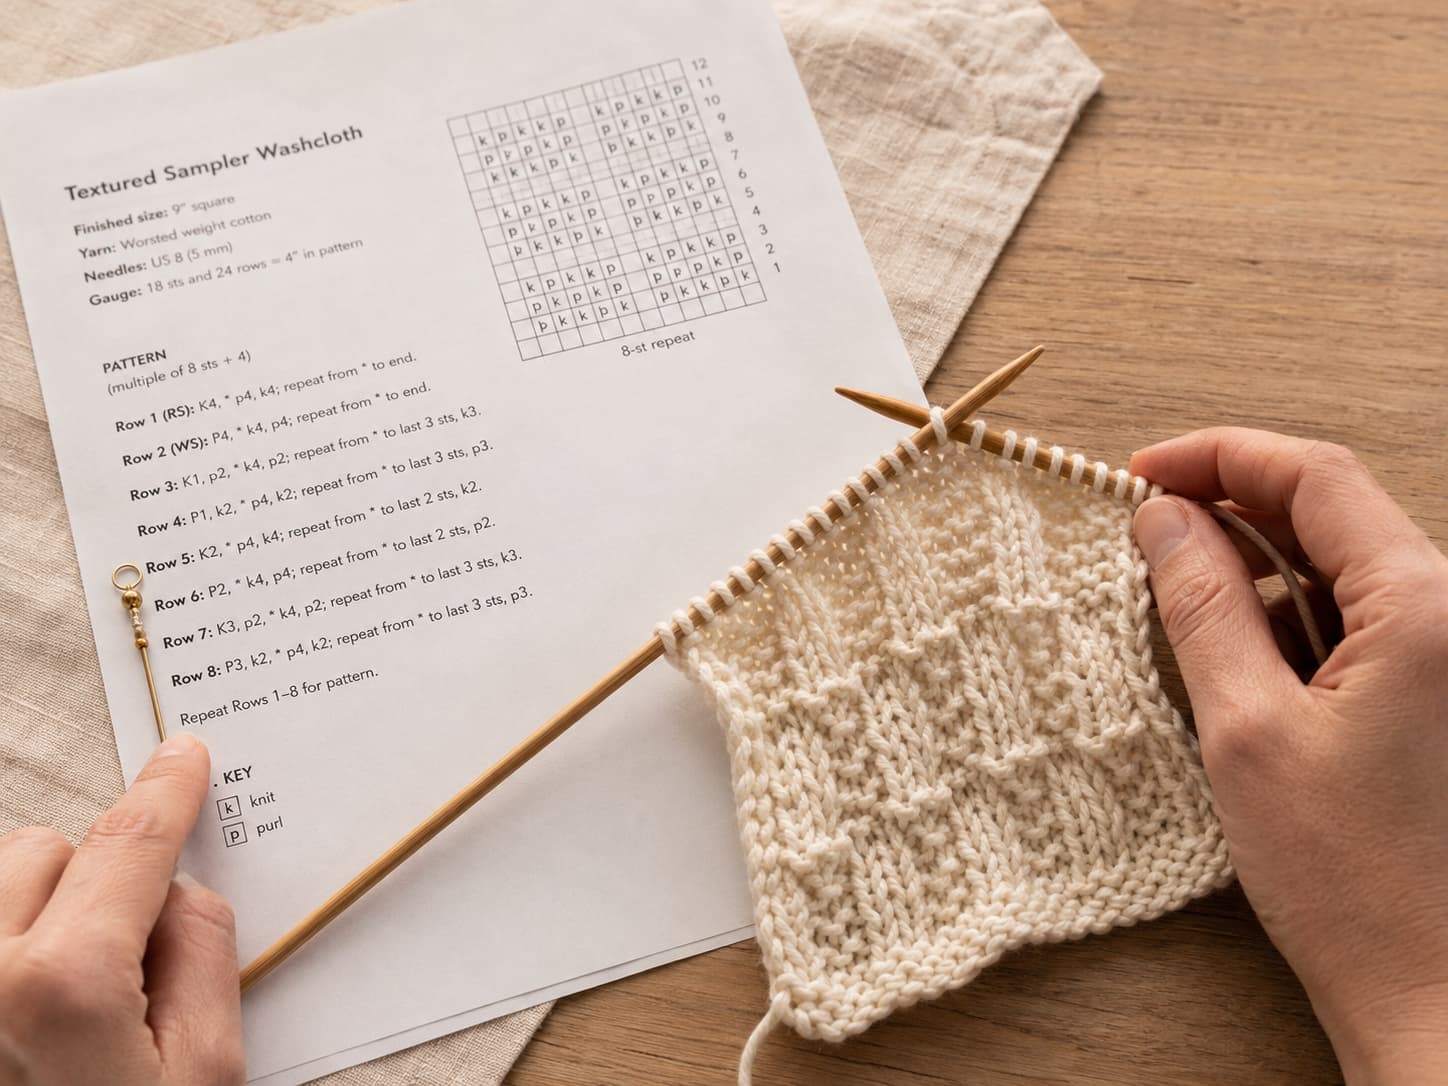
Image 01 · Pattern page and swatchSuggested file: knitsoul-how-to-read-knitting-patterns-hero.jpgReplace only the img src value above with the full HTTPS WordPress Media URL.
A pattern becomes easier to follow when the instructions, swatch, and row tracker stay together.
Pattern structureSix information layers
Overview, sizing, materials, gauge, instructions, and finishing.
Foundation termsCO, BO, k, p, st(s)
Learn the frequent terms and use the pattern key for everything else.
Match the pattern gauge and follow one size column consistently.
Best habitRead before casting on
A five-minute pre-read prevents late surprises.
On this page
Part 1
Find the information before following the instructions
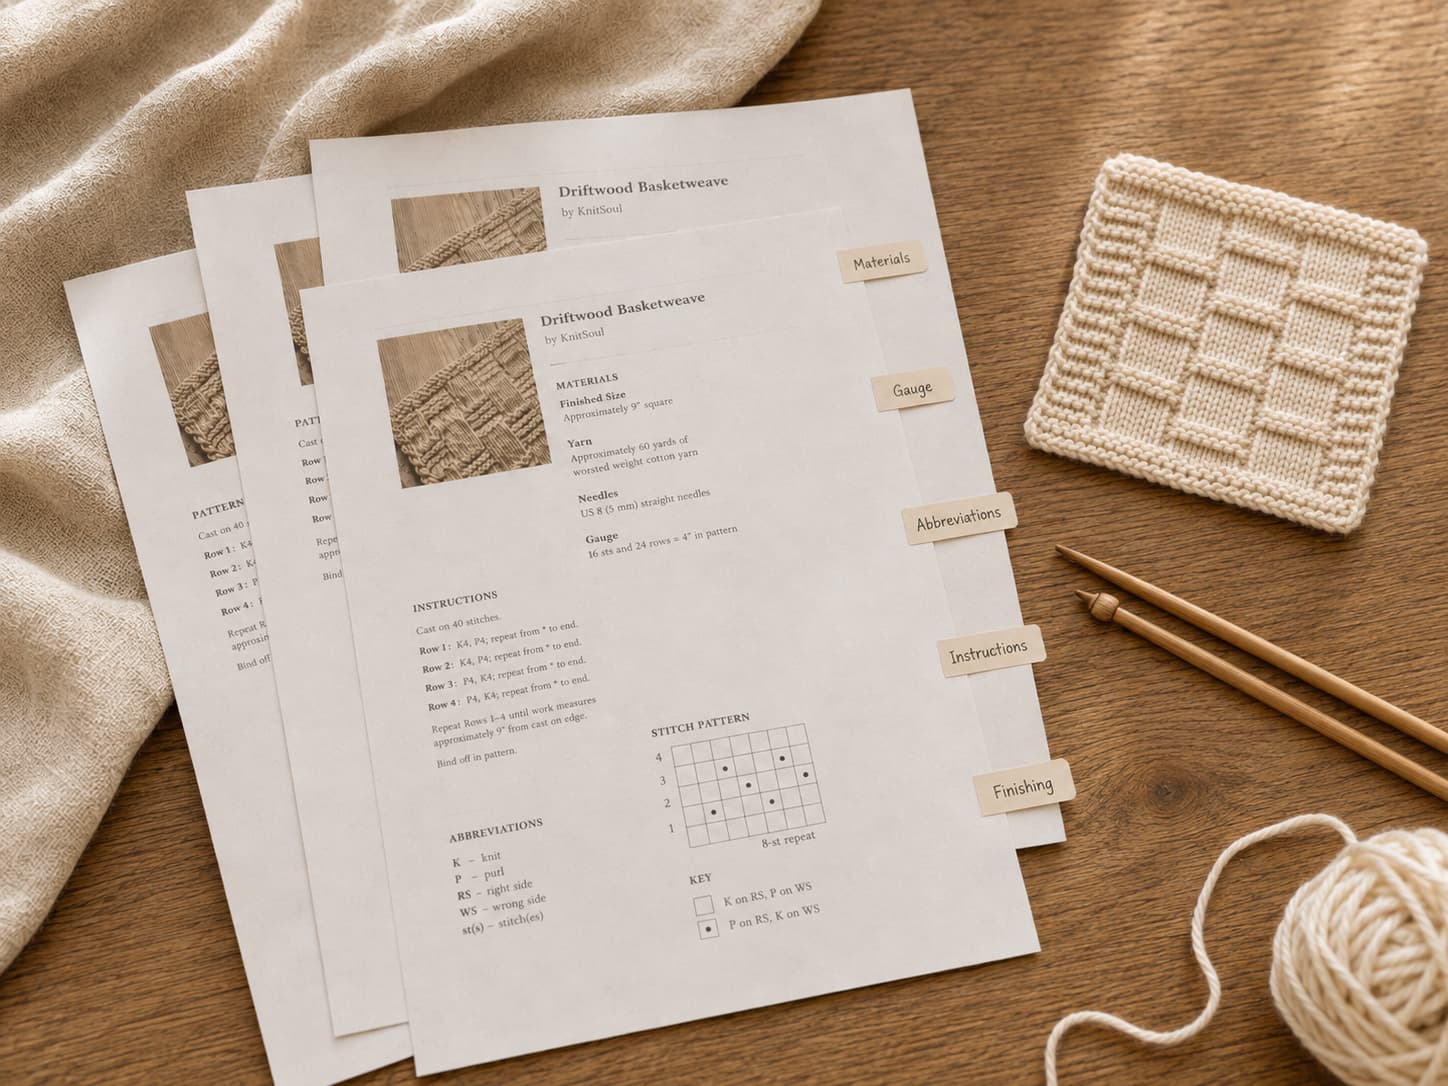
Image 02 · Pattern anatomySuggested file: knitsoul-knitting-pattern-anatomy-sections.jpgReplace only the img src value above with the full HTTPS WordPress Media URL.
Most patterns repeat the same information architecture even when the project looks completely different.
Section
What to confirm
Why it matters
Overview and skill level
Construction, techniques, intended difficulty
Shows whether the project matches your current skills.
Sizes and finished measurements
Actual garment or object dimensions, ease, length
Prevents choosing a size from a body label alone.
Materials
Yarn weight, meterage, needle sizes, notions
Reveals extra needles, holders, markers, buttons, or waste yarn.
Gauge
Stitches, rows, measurement, stitch pattern, blocked or unblocked
Controls size and fabric density.
Abbreviations and notes
Special stitches, chart conventions, turning or joining method
The pattern’s definitions override assumptions.
Instructions and finishing
Rows, rounds, charts, shaping, seaming, blocking
Shows the full construction sequence before you commit.
Part 2
Learn the abbreviations that control most beginner patterns
Abbreviation
Meaning
Action or purpose
CO
Cast on
Place starting stitches on the needle.
BO
Bind off
Finish an edge and remove live stitches.
k
Knit
Work a knit stitch.
p
Purl
Work a purl stitch.
st(s)
Stitch(es)
The live loops or counted units.
RS / WS
Right side / wrong side
Public face and reverse face of flat knitting.
rep
Repeat
Work a stated sequence again.
rnd
Round
A complete circuit in circular knitting.
yo
Yarn over
Create an extra loop, usually an increase and eyelet.
k2tog
Knit 2 together
Single right-leaning decrease.
ssk
Slip, slip, knit
Common single left-leaning decrease.
M1L / M1R
Make 1 left / right
Directional increases; follow the pattern definition.
sl1
Slip 1
Move one stitch without working it; check knitwise or purlwise.
wyif / wyib
With yarn in front / back
Position yarn before slipping or working a stitch.
pm / sm
Place marker / slip marker
Add or move a marker without counting it as a stitch.
tbl
Through back loop
Work through the back loop, often twisting the stitch.
beg / rem
Beginning / remaining
Location or stitches left.
patt
Pattern
Continue the established stitch pattern.
Part 3
Read one line as row, side, sequence, endpoint, count
CO 18 sts. Row 1 (RS): *K2, P2; rep from * across, end K2.
CO 18 sts establishes the row width. Row 1 identifies the row. (RS) marks the public side. The asterisk begins a repeat. Work K2, P2 until only two stitches remain, then K2. The repeat consumes 16 stitches and the final K2 consumes the last two, for 18 stitches total.
When a row ends with a stitch count—such as (42 sts)—count before continuing. That number is a checkpoint, not an optional note. After an increase or decrease row, it is often the fastest way to catch a missed shaping instruction.
Part 4
Repeat symbols save space but must preserve the stitch count
Notation
Typical meaning
What to check
* ... ; rep from *
Repeat from the asterisk as directed.
Look for “to end,” “to last N sts,” or a stated number of repeats.
[ ... ] × 5
Repeat the bracketed group exactly five times.
Multiply the stitches inside by five.
{ ... } × 3
Another grouped repeat used by some publishers.
Follow the publisher’s convention.
( ... )
May group a repeat, show stitch counts, or hold size numbers.
Read the notes and surrounding sentence before deciding.
Part 5
Treat the chart as a map of the fabric
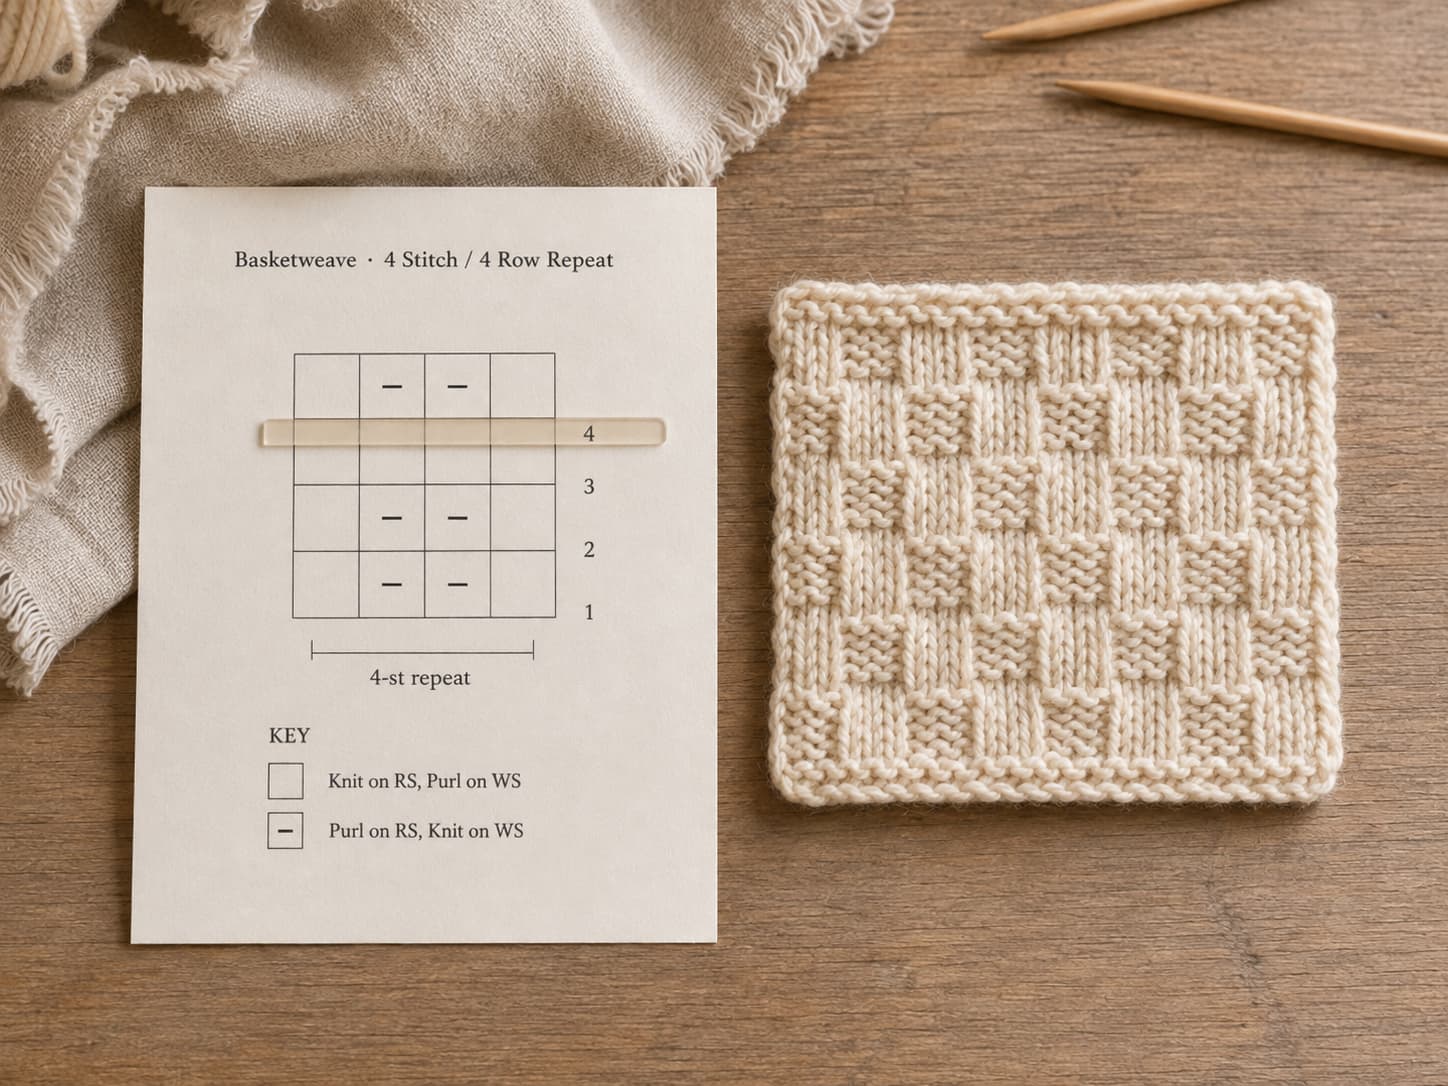
Image 03 · Chart beside fabricSuggested file: knitsoul-knitting-chart-beside-finished-swatch.jpgReplace only the img src value above with the full HTTPS WordPress Media URL.
Read the chart from the bottom upward and let the pattern key define every symbol.
Start at the bottom. Chart Row 1 is normally the lowest numbered row.
Flat knitting alternates direction. Read RS rows right to left and WS rows left to right unless the pattern states another convention.
Circular charts usually stay right to left. Every round is worked from the public side.
The key controls the action. A blank box can mean different things in different charts.
Repeat borders matter. Heavy lines or colored outlines often mark the section repeated across a row.
Part 6
Check regional wording and publisher-specific conventions
Term A
Common alternative
Meaning
Bind off
Cast off
Finish an edge and remove live stitches.
Gauge
Tension
Stitches and rows per stated measurement.
Stockinette stitch
Stocking stitch
Knit on RS and purl on WS when worked flat.
Yarn over
yfwd, yon, or yrn in some patterns
Yarn movement varies with stitch context; use the key.
BO
Cast off written in full or other abbreviation
Do not assume the abbreviation without checking.
Part 7
Use gauge and measurements to protect the final size
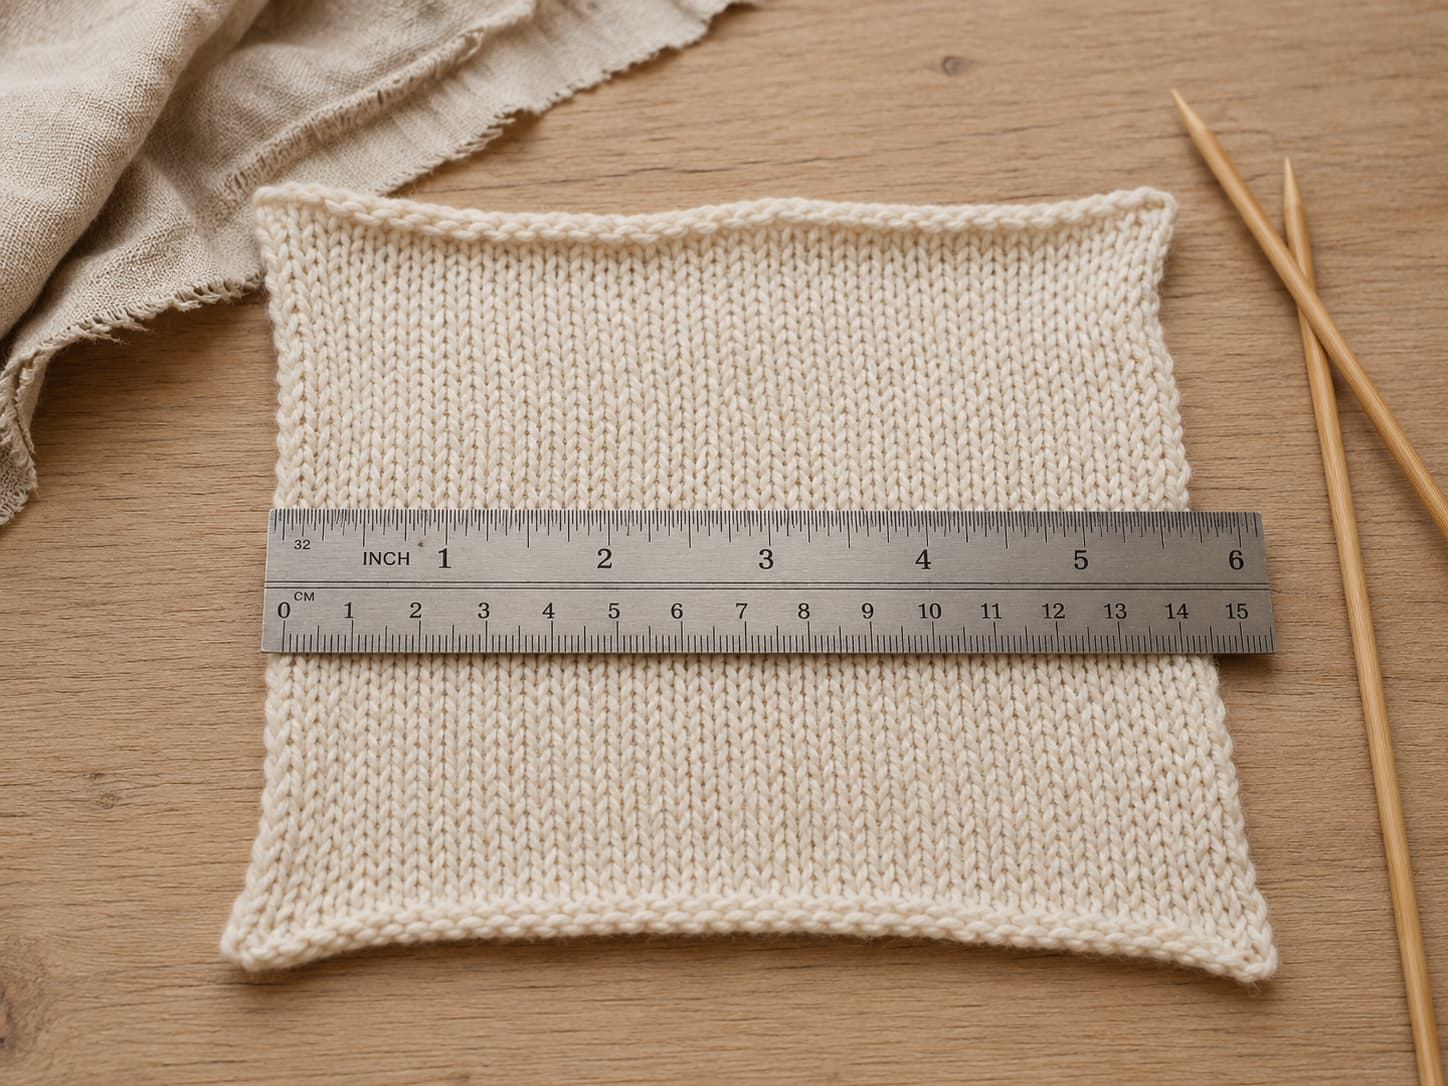
Image 04 · Blocked gauge swatchSuggested file: knitsoul-knitting-gauge-swatch-ruler-measurement.jpgReplace only the img src value above with the full HTTPS WordPress Media URL.
Measure a relaxed, blocked swatch away from the cast-on, bind-off, and side edges.
Make the swatch larger than the measurement area.
Use the stitch pattern named in the gauge note.
Wash or block it as the finished project will be treated.
Measure the center, away from edges and needles.
Change needle size when stitch gauge is wrong, then swatch again.
Record the needle, yarn, washed gauge, and fabric feel.
More stitches per measurement means your stitches are smaller than the target; test a larger needle. Fewer stitches means your stitches are larger; test a smaller needle. Row gauge matters especially when shaping is written by row count rather than by length.
Part 8
Track shaping, pattern rows, and “at the same time” instructions separately
Image 05 · Following a pattern rowSuggested file: knitsoul-hands-following-knitting-pattern-row.jpgReplace only the img src value above with the full HTTPS WordPress Media URL.
Mark the active row and record the last completed row before putting the project away.
1
Write the active row number. Mark the row before knitting it, then mark it complete afterward.
2
Use separate counters. One can track a cable or lace repeat while another tracks shaping rows.
3
Record stitch counts. Write the expected count beside every increase or decrease row.
4
Pause at construction changes. Re-read before dividing sleeves, placing stitches on hold, picking up edges, or joining in the round.
Troubleshooting
Six errors that make a correct pattern look impossible
Starting before reading the notes
Special stitches, chart direction, and size conventions may be defined before the instructions.
Following the wrong size column
Highlight one position in every multi-size group and confirm it against the finished measurements.
Skipping stitch-count checkpoints
Count after every shaping row before the error is repeated across later rows.
Assuming a familiar abbreviation
A designer may define a special increase, decrease, or cable differently.
Reading a flat chart in one direction
Wrong-side rows usually reverse direction; circular charts normally do not.
Ignoring published errata
When the arithmetic remains impossible after careful checking, look for an official correction.
Smart reading
Five habits that make every pattern calmer
Keep a working copy. Mark a printout or permitted digital copy without altering the original file.
Highlight only your size. Reduce visual noise before casting on.
Keep an abbreviation reference nearby. Look up terms instead of guessing.
Write the last completed row before stopping. Do not rely on memory.
Choose a short repeat first. A scarf or washcloth lets you practise pattern language without complicated shaping.
1. What should I read first in a knitting pattern?
Read the overview, size information, finished measurements, materials, gauge, abbreviation key, and notes before the first instruction row. Then scan the finishing section. This pre-read reveals special needles, held stitches, charts, seaming, or techniques that may not appear until later.
2. Do I need to memorize every knitting abbreviation?
No. Learn the common foundation terms such as CO, BO, k, p, st(s), RS, WS, and rep. Keep the pattern’s own abbreviation and special-stitch notes nearby because designers may define project-specific terms.
3. How do asterisks, brackets, and parentheses work?
An asterisk usually marks the beginning of a repeat that continues as directed. Brackets or braces normally group instructions to repeat a stated number of times. Parentheses may group a repeat, show stitch counts, or contain size-specific numbers. The pattern’s notes control when a publisher uses these symbols differently.
4. Which direction do I read a knitting chart?
For flat knitting, charts are usually read from the bottom upward, right to left on right-side rows and left to right on wrong-side rows. For circular knitting, every chart round is generally read right to left. Always use the chart key because symbols may describe how a stitch appears from the public side rather than the physical action on every row.
5. What does “work even” mean?
Work even means continue in the established stitch pattern without adding or removing stitches. Maintain the current stitch count until the piece reaches the stated row count or measurement. “Work straight” is often used with the same meaning.
6. What does “at the same time” mean?
It means two instruction tracks overlap. You may need to continue armhole decreases while also beginning neckline shaping, for example. Mark both schedules separately and check them at the end of every row so one sequence does not replace the other.
7. How can I tell whether a pattern is suitable for a beginner?
Look for a Basic or Easy skill level, a short abbreviation list, a small number of repeating rows, familiar cast-on and bind-off methods, minimal shaping, and clear stitch counts. Read the full technique list rather than relying only on the finished photograph.
You can read this
Translate one instruction, check one count, and finish one row at a time
A knitting pattern is not a test of memory. It is a reference document. Use the abbreviation key, circle your size, check the chart key, count after shaping, and write down your progress.
Start with a short pattern whose techniques you already know. The language becomes familiar through repeated use, not through memorizing every abbreviation before you begin.