Learn the knitting motions first, then turn them into a useful project
Learning how to knit for beginners starts with four core actions:
casting on, making knit stitches, making purl stitches, and binding off.
Knitting holds a row of live loops on one needle while the second needle
forms a new loop through each stitch and transfers it to the other side.
The first rows often feel slow because both hands are learning unfamiliar
movements at the same time. Loose, visible stitches are more useful than
tight, perfectly even stitches during this stage. Speed and consistent
tension develop through repeated relaxed practice rather than force.
This guide uses smooth, light-colored #4 cotton yarn and 5 mm needles.
You will learn the long-tail cast on, the knit stitch, the purl stitch,
a knitwise bind off, and a garter-stitch washcloth that can be completed
over several short practice sessions.
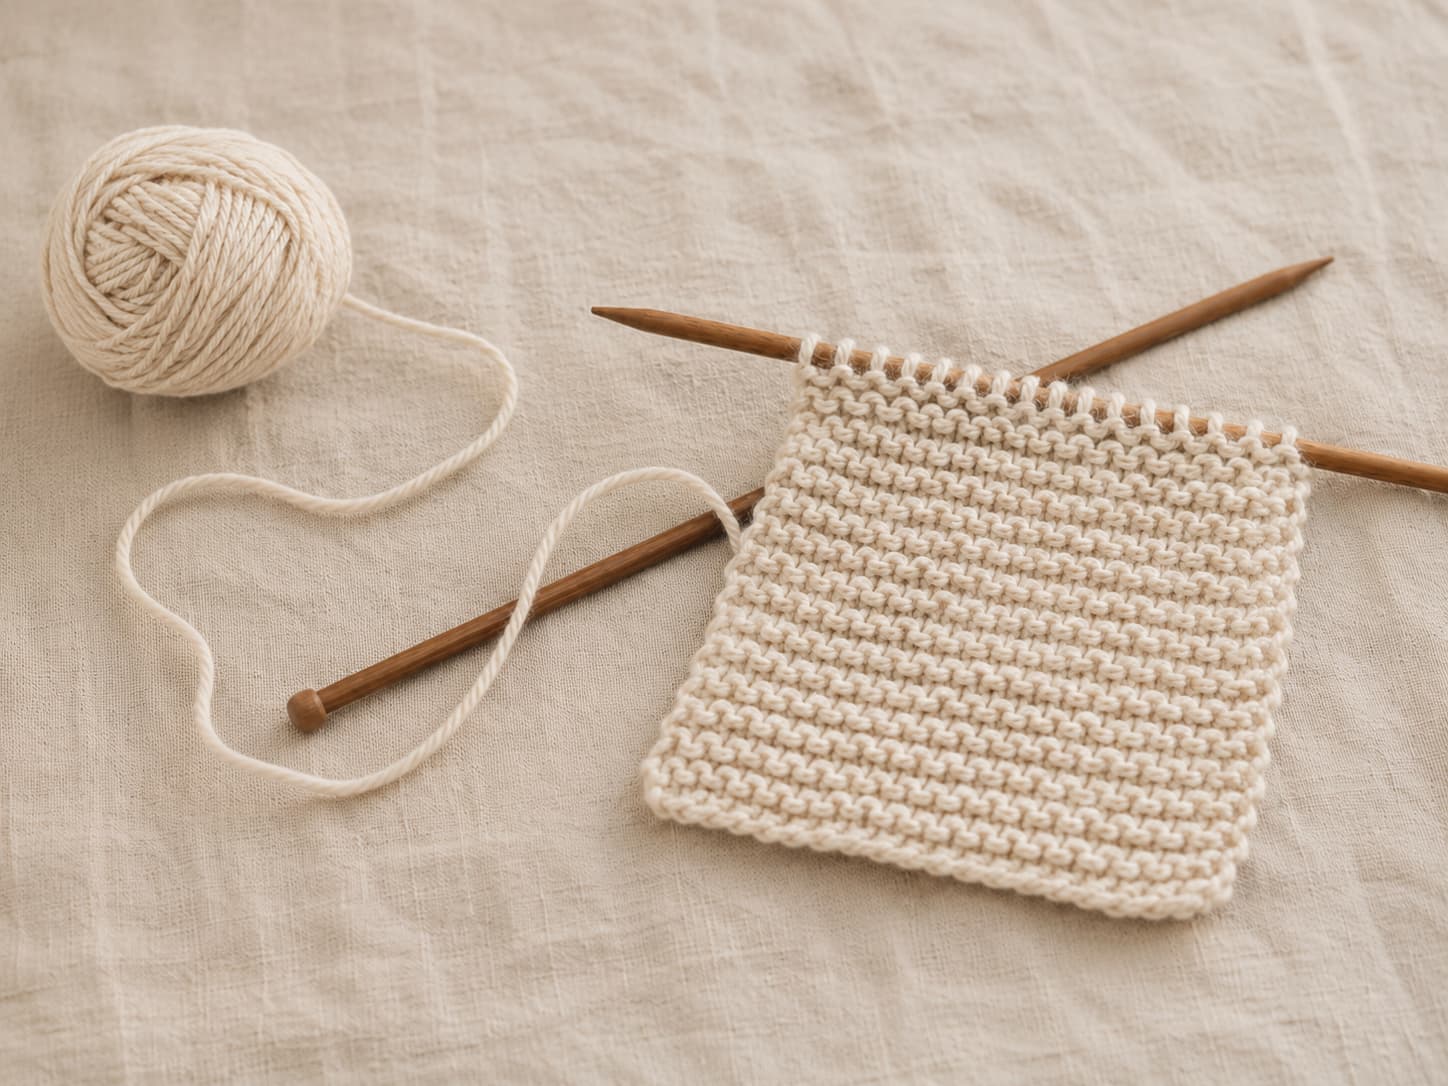
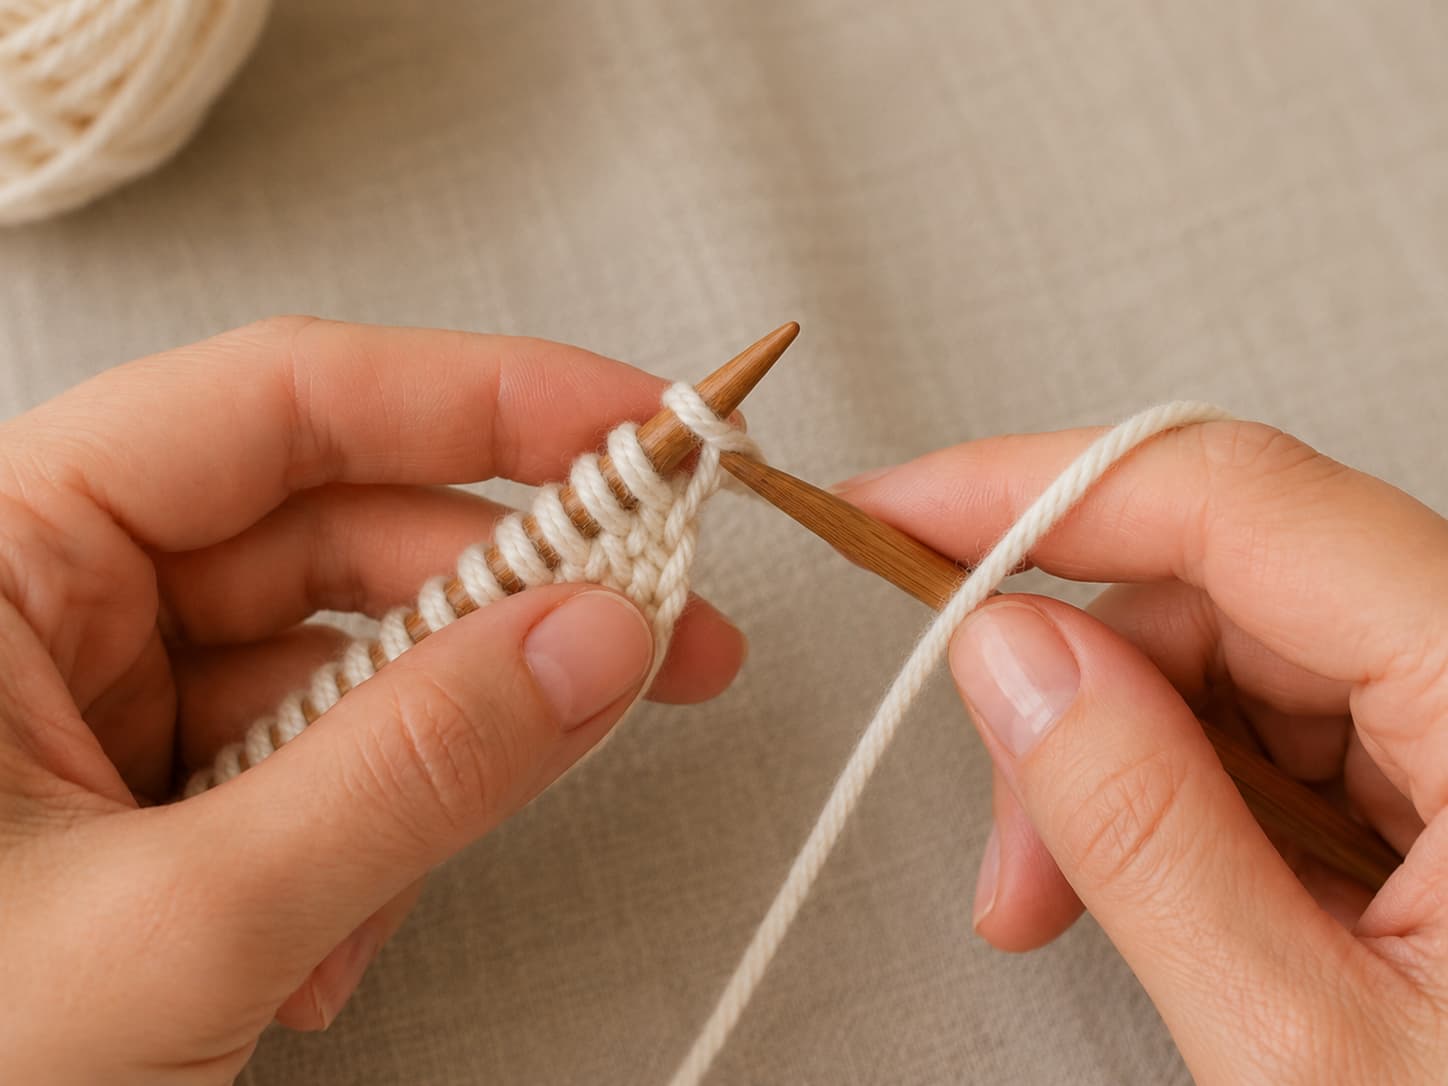
Two wooden needles, cream cotton yarn, and a small garter-stitch swatch are enough to begin knitting.
Skill levelComplete beginner
No previous knitting or crochet experience is required.
Core techniquesCast on, knit, purl, bind off
Four foundations used throughout written knitting patterns.
NeedlesU.S. 8 / 5 mm
Straight or circular needles can both be used for flat knitting.
YarnSmooth #4 cotton
A light solid shade makes stitch legs and mistakes easier to see.
First projectGarter-stitch washcloth
Knit every row until the length matches the width.
Typical beginner time4–8 hours
Best divided into several relaxed sessions.
On this page
Step 1
Choose a small set of tools that makes each stitch easy to control
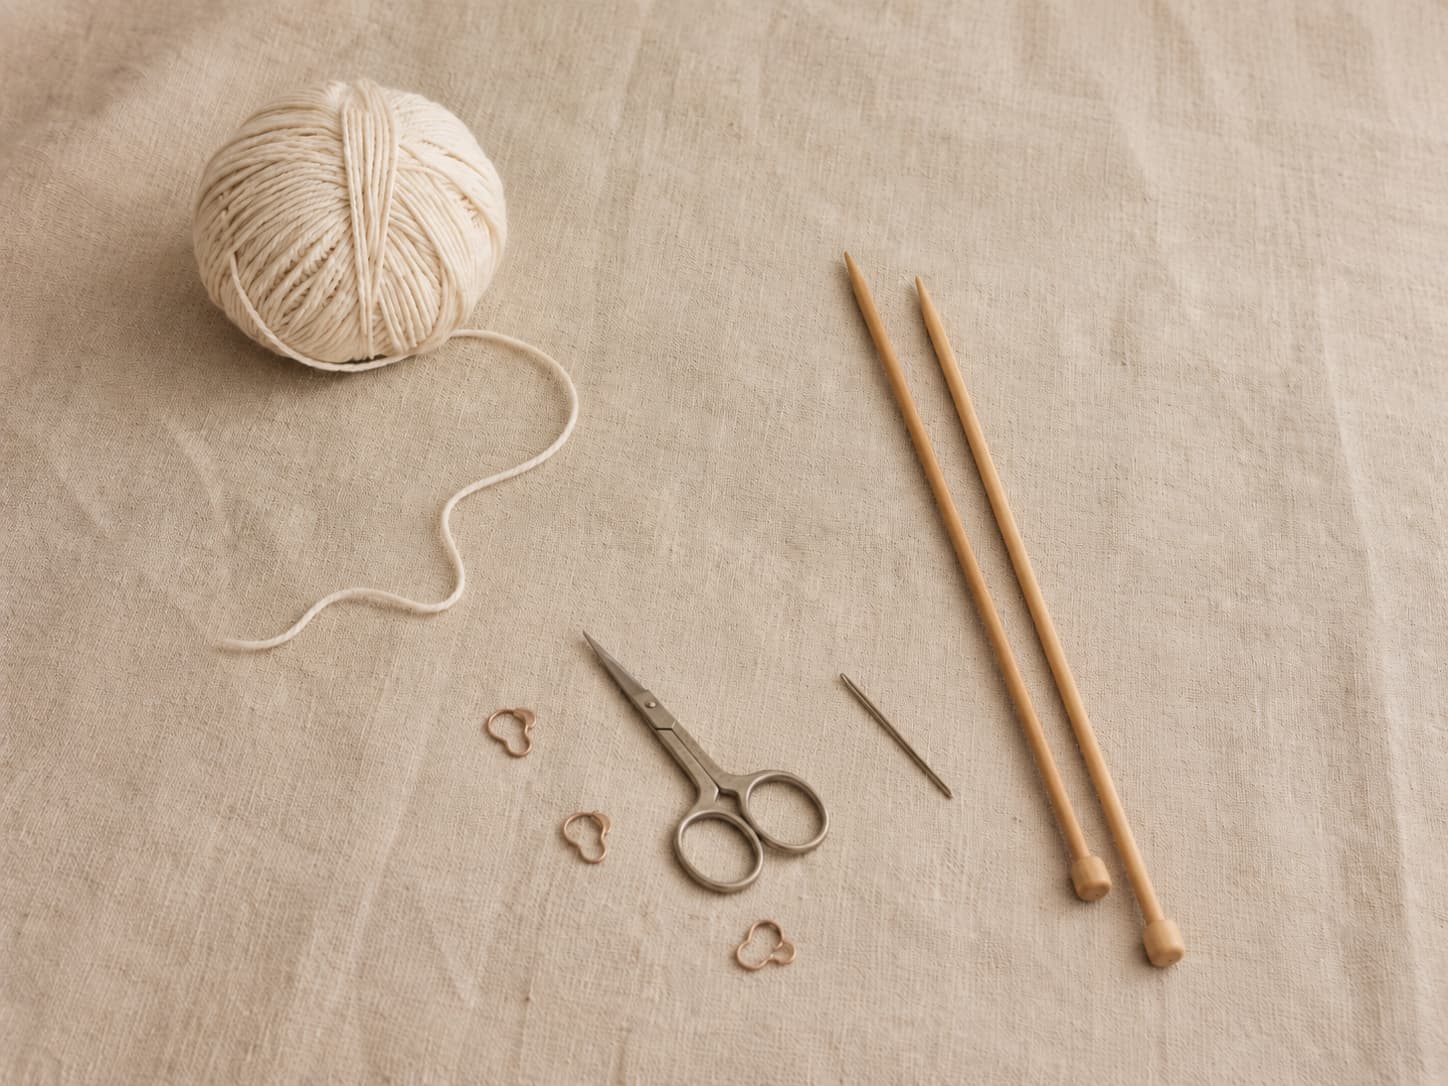
You do not need a complete needle set or a large yarn collection. One pair
of suitable needles, one ball of smooth cotton yarn, scissors, and a blunt
tapestry needle are enough for every exercise and the washcloth pattern.
A focused beginner knitting kit keeps the essential tools together while
your hands learn the basic motions.
U.S. 8 / 5 mm needles
Choose wood or bamboo if you want a little surface grip. Straight
needles around 25 cm long are simple, but a 60 cm circular needle can
also work flat and keeps more of the project weight off your wrists.
Either style is appropriate for this washcloth.
Smooth #4 cotton yarn
Use roughly 80–110 yd (73–100 m) of light, solid, worsted-weight cotton.
Cotton suits a washable kitchen cloth, while the smooth surface makes
the stitch structure visible. Avoid fuzzy, very dark, or loosely spun
yarn for the first practice project.
Small sharp scissors
Use clean craft scissors to cut the yarn after binding off. Leave a tail
of at least 15 cm so it can be woven securely into the fabric.
Blunt tapestry needle
Choose a needle with an eye large enough for the yarn. A blunt point
passes between knitted loops without splitting the cotton while you
weave in the cast-on and bind-off tails.
Before the first stitch
Learn four terms that make the instructions much easier to follow
Live stitches
Every loop sitting on a needle is live. It can unravel if it falls off,
so keep the needle tips level and avoid pulling the work away from them.
Working yarn and tail
The working yarn is connected to the ball and forms new stitches. The
tail is the free end left from casting on and is woven in after finishing.
Front and back legs
A stitch on the needle has two legs. In standard Western mounting, the
front leg is closer to you. The knit stitch in this guide enters that
front leg from left to right.
Beginning a new row
After completing a row, turn the work. Place the needle holding all
stitches in your left hand and the empty needle in your right hand.
The working yarn should be attached near the right end of the left needle.
Step 2
How to make a slip knot
This tutorial begins with an adjustable slip knot. In the long-tail cast on used below, the loop on the needle counts as the first cast-on stitch.
1
Make a loop. Hold the yarn tail in your left hand and the working yarn (the strand connected to the ball) in your right hand. Cross the working yarn over the tail to form a loop about 2 inches in diameter, with the working yarn on top.
2
Pull a loop through. Reach through the loop from behind, grab the working yarn, and pull it partially through the loop — creating a new loop. Do not pull it all the way through; you want a loose knot with a loop sticking out.
3
Tighten onto the needle. Slide the new loop onto your left needle. Pull the working yarn gently to snug the knot against the needle — not too tight. The loop should slide easily along the needle. You now have one stitch on your needle.
Step 3
The long-tail cast on: your first row of stitches
Casting on creates the foundation row of stitches on your left needle. The
long-tail method is the most versatile cast on — it produces a stretchy,
neat edge that works for nearly every project. It looks complicated on the
first try and feels natural by the tenth stitch. Give yourself permission
to be slow.
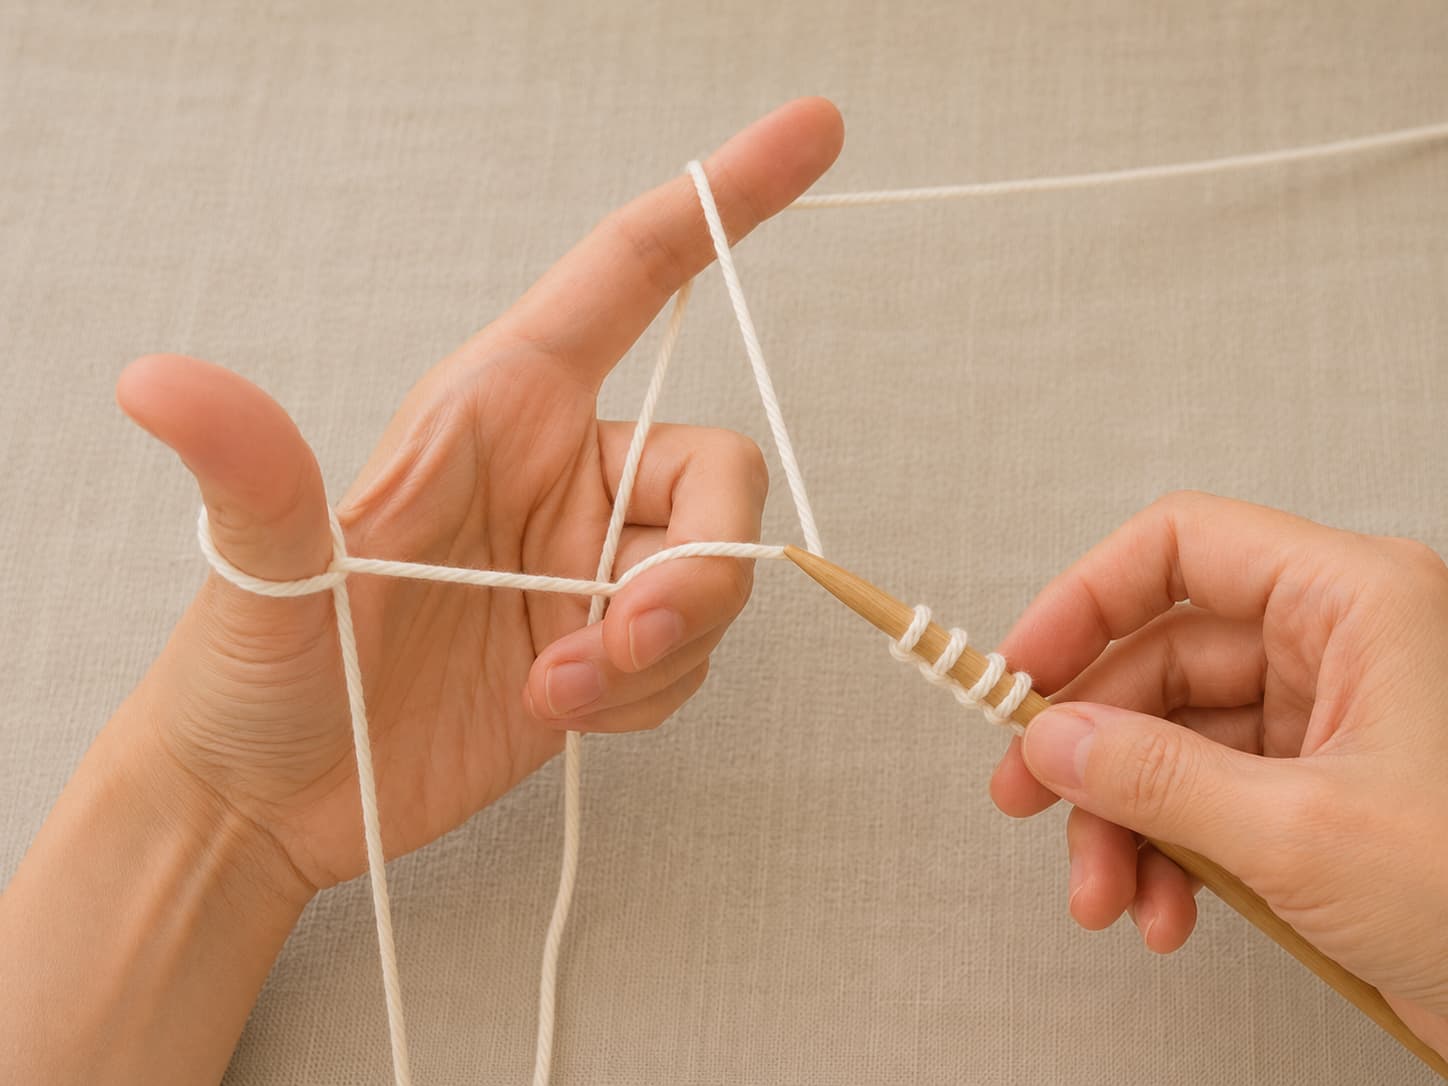
The long-tail cast on begins with the yarn tail over the thumb and the
working yarn over the index finger.
Estimate the tail length
For a dependable estimate, allow about three times the expected
cast-on width, plus 15 cm for weaving in. Another practical method
is to wrap the yarn loosely around the needle once for each stitch, then add
the extra tail. For 30 stitches in #4 yarn on 5 mm needles, a tail of roughly
75–90 cm is usually comfortable.
1
Position the yarn. Hold the needle with the slip knot in your right hand. Drape the tail over your left thumb and the working yarn over your left index finger. Grip both strands against your palm with your remaining three fingers. The yarn should form a V shape between your thumb and index finger, with the needle at the base of the V.
2
Go under the thumb loop. Bring the needle tip down and under the outside strand of yarn on your thumb, moving from the base of your thumb toward the tip. The needle enters the thumb loop from below.
3
Catch the index finger yarn. Keeping the needle in the thumb loop, bring the needle tip over and behind the yarn on your index finger. The needle should now be pointing upward, with the index finger yarn resting across the top of the needle.
4
Pull through and drop. Pull the needle and the index finger yarn back through the thumb loop. Drop your thumb out of the loop. Place your thumb back under the tail strand and gently pull to tighten the new stitch against the needle. You now have one more stitch on your needle.
5
Repeat. Repeat steps 2 through 4 until you have the desired number of stitches on your needle. For the washcloth, cast on 30 stitches total (the slip knot counts as stitch 1). Do not count the slip knot twice.
Step 4
The knit stitch: the foundation of all knitting
The knit stitch is the most fundamental stitch in knitting. When you knit
every row, the resulting fabric is called garter stitch —
a bumpy, stretchy, reversible fabric that lies flat and does not curl at
the edges. The washcloth at the end of this guide is entirely garter stitch.
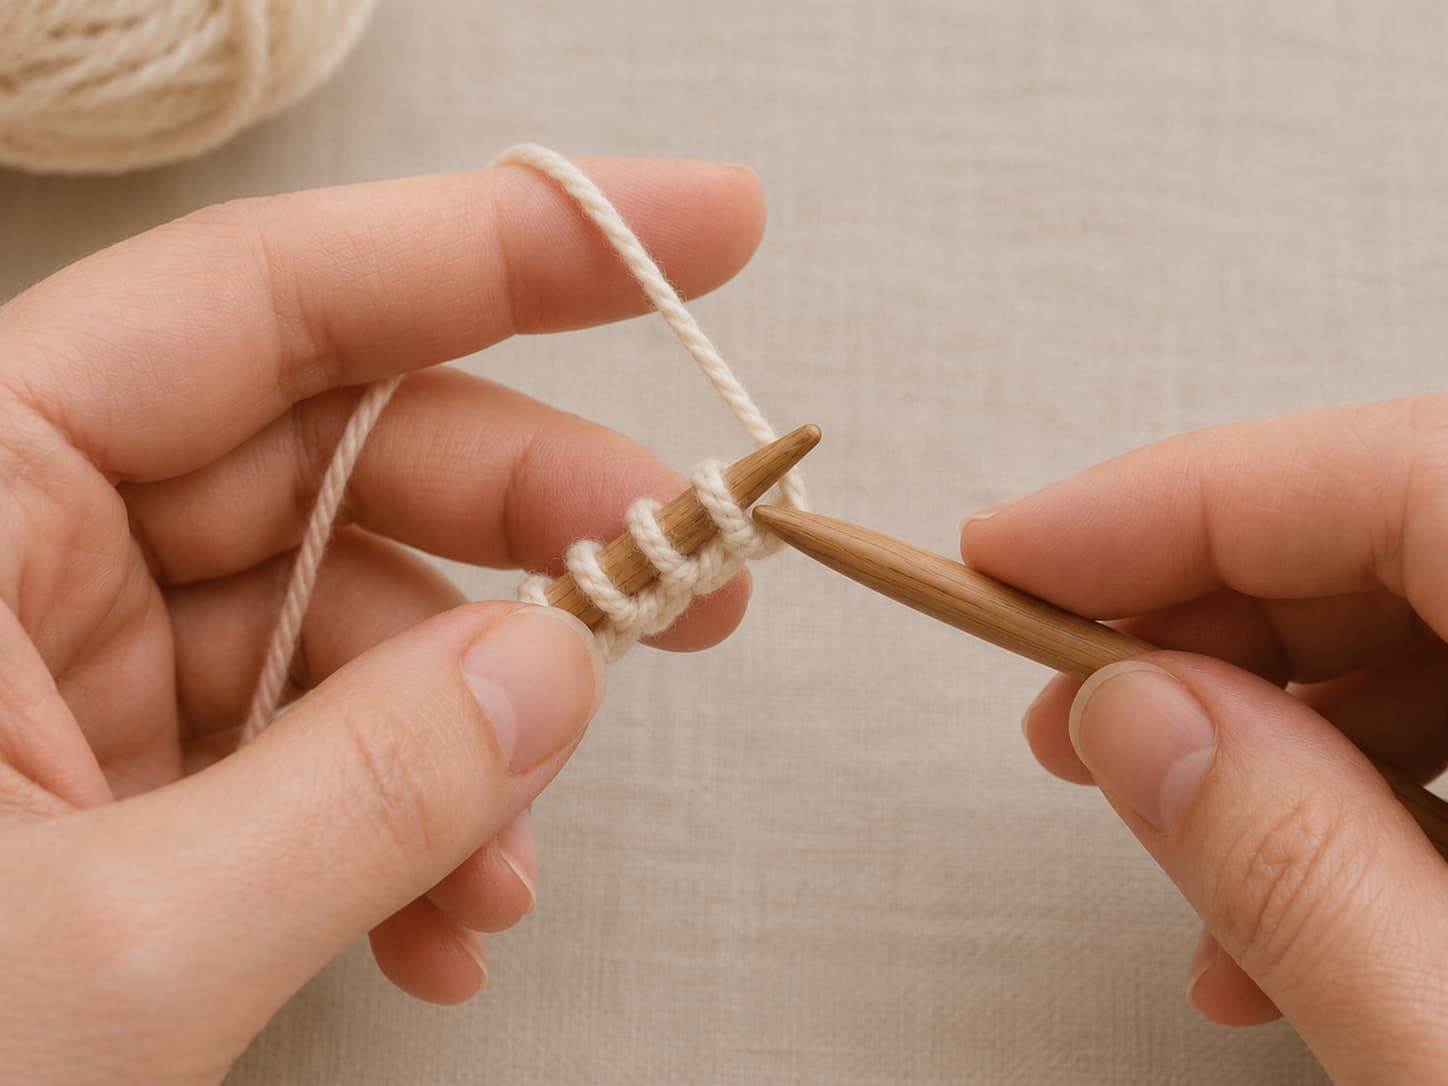
The knit stitch begins by inserting the right needle through the front
leg of the first stitch while keeping the working yarn behind both needles.
How to hold the needles
Hold the needle with the cast-on stitches in your left hand. Hold the
empty needle in your right hand. The working yarn should be coming from
the back of the work — it hangs behind the left needle. There are two
common ways to hold the yarn:
English style (throwing): Hold the working yarn in your
right hand. Let the yarn run over your right index finger and under your
middle and ring fingers — this creates enough tension to keep the yarn
feeding smoothly without pulling. You wrap the yarn around the right
needle with your right index finger for each stitch. This is the most
common method for beginners in English-speaking countries and the one
described in this guide.
Continental style (picking): Hold the working yarn in
your left hand. You pick up the yarn with the right needle by moving the
needle to the yarn. This method is often faster once mastered. If you
already crochet, Continental may feel more natural because you are used
to holding yarn in your left hand.
Try both. Use whichever feels more comfortable. The stitches are the same.
1
Insert the right needle. Hold the needle with the stitches in your left hand. Insert the tip of the right needle into the first stitch on the left needle, from front to back, going from left to right. The right needle goes under the left needle. The two needles form a small X, with the right needle behind the left.
2
Wrap the yarn. Bring the working yarn around the
right needle counterclockwise, keeping the strand close to the needle
tips so the new loop is neither stretched nor pulled tight.
3
Pull the yarn through. Use the tip of the right needle to pull the wrapped yarn through the stitch on the left needle, bringing it from the back of the work to the front. The right needle tip should emerge on the near side of the left needle, carrying a new loop of yarn with it.
4
Slide the old stitch off. Slide the old stitch off the left needle by gently pulling the right needle to the right. The new stitch is now on the right needle. You have completed one knit stitch. The old stitch is gone and a new stitch is on the right needle.
Repeat these four steps for every stitch on the left needle. When the left
needle is empty and all stitches have moved to the right needle, you have
finished one row. Swap the needles — put the needle with the stitches back
in your left hand and the empty needle in your right hand — and knit the
next row.
Step 5
The purl stitch: the reverse face of a knit stitch
Knit and purl are the two basic stitch orientations used to build most
knitting textures. A purl stitch places the horizontal bump on the side
facing you. Alternating one knit row with one purl row creates stockinette,
with smooth V-shaped stitches on one face and purl bumps on the other.
For a purl stitch, keep the working yarn in front and insert the right
needle into the first stitch from right to left.
1
Bring the yarn to the front. Move the working yarn
between the needle tips so it hangs in front of the work.
2
Insert the right needle. Enter the front of the first
stitch from right to left. The right needle crosses in front of the
left needle.
3
Wrap the working yarn. Wrap it counterclockwise around
the right needle, keeping the yarn close to the tips.
4
Draw the loop through and slide off. Push the new loop
through the old stitch toward the back of the work, then slide the old
stitch off the left needle.
Step 6
Binding off: how to finish your knitting
Binding off (also called casting off) secures the live stitches so the
fabric can leave the needles without unraveling. This guide uses a
basic knitwise bind off, which matches the garter-stitch
washcloth.
1
Knit two stitches. Knit the first two stitches of the row normally. You now have two stitches on your right needle.
2
Lift the first stitch over the second. Insert the tip of your left needle into the first stitch on the right needle (the one farther from the tip). Lift that stitch up and over the second stitch and completely off the right needle. One stitch remains on the right needle.
3
Knit one more stitch. Knit the next stitch from the left needle. You now have two stitches on the right needle again.
4
Repeat. Repeat steps 2 and 3 — lift the first stitch over the second, knit one more stitch — until only one stitch remains on the right needle and the left needle is empty.
5
Finish the last stitch. Cut the working yarn, leaving a tail of at least 6 inches. Pull the tail all the way through the last stitch and tighten gently. Thread the tail onto your tapestry needle and weave it back and forth through several stitches on the wrong side of the fabric. Trim the excess.
Step 7
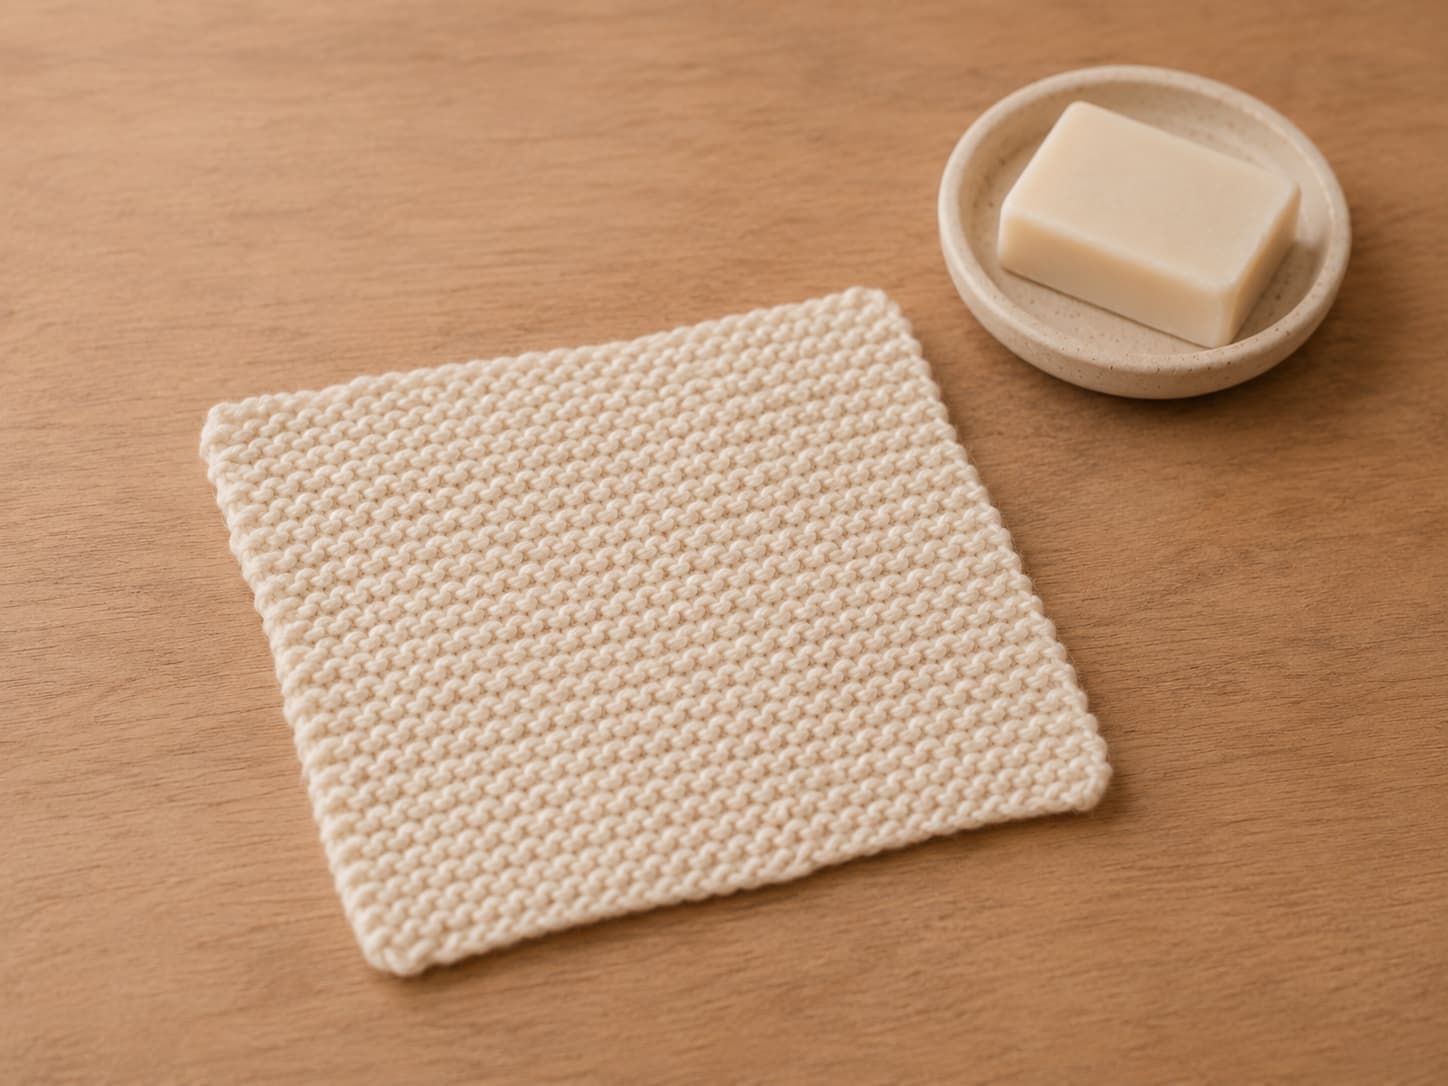
Your first project: a cotton garter-stitch washcloth
Garter stitch is made by knitting every row. The fabric is reversible,
textured, and naturally lies flat, making it suitable for a first square
project. Use measurement rather than a fixed row count because yarn,
needle material, and hand tension change row height.
A small cotton washcloth provides enough repetition to practise the knit
stitch without making the first project feel overwhelming.
Free beginner pattern
Simple Garter-Stitch Washcloth
Skill levelBasic / complete beginner
Yarn80–110 yd (73–100 m) #4 cotton
NeedlesU.S. 8 / 5 mm
Finished sizeApprox. 7–7½ in (18–19 cm) square
Gauge targetAbout 16–18 sts per 4 in in garter stitch
Beginner timeApprox. 4–8 hours
Abbreviations:
CO = cast on · k = knit · st(s) = stitch(es) · BO = bind off.
CO 30 sts using the long-tail cast on or another
comfortable, moderately stretchy cast on.
Row 1: Knit every stitch across. You should still
have 30 sts.
Repeat Row 1 until the piece measures approximately the same length
as its relaxed width. This is often around 50–60 rows,
but measurement is more reliable than row count.
BO knitwise and loosely. Cut the yarn, leaving a
tail of at least 15 cm, and pull it through the final loop.
Weave both tails through several purl bumps on the reverse face.
Trim only after the tails feel secure.
Wash according to the yarn label, reshape the cloth into a square,
and dry it flat.
Troubleshooting
Six common beginner knitting mistakes and the quickest checks
Count the stitches at the end of each row while learning. A changing count,
unusual hole, crossed stitch, or tight edge is easier to correct immediately
than several rows later.
The stitch count keeps increasing
At the beginning of a row, pulling the working yarn up and over the left
needle can make the first stitch look like two loops. Insert the needle
into the actual first stitch, not both visible strands. Accidental yarn
overs also create extra stitches and small holes.
The stitch count keeps decreasing
A stitch may have slipped off the needle or two stitches may have been
knitted together accidentally. Count after every row and inspect both
edges before continuing.
A stitch has dropped
Secure the loose loop with a locking marker so it cannot run farther.
Use a crochet hook to lift the loop through each horizontal ladder strand
until it returns to the current row.
The stitches are too tight
Keep the newly formed loop on the full diameter of the right needle
rather than tightening it around the tip. Relax your grip and allow the
needle size to control the loop size.
Some stitches look crossed
A twisted stitch usually has crossed legs instead of an open V. Check
how the stitch is mounted and knit through the leading leg rather than
forcing the needle into the wrong side.
The bind-off edge pulls inward
Work the bind off with a relaxed hand and keep each loop on the full
needle shaft. A needle one size larger can help if the edge remains tight.
Practice tips
Build control through short, repeatable practice
Use 20–30 minute sessions. Stop, stretch your fingers,
and return later before fatigue changes your tension. Persistent pain or
numbness is a reason to stop and rest rather than push through.
Keep the same yarn and needles for several sessions.
Repetition with one setup helps you notice how hand position changes the
fabric.
Count every row at first. The washcloth should remain at
30 stitches from cast on to bind off.
Keep the first swatch. Uneven rows are a useful record of
progress and do not prevent a washcloth from being functional.
Look at the fabric, not only the needle tips. Learn to
identify open knit V shapes, purl bumps, dropped loops, and accidental holes.
Expand your skills
Four practical skills to try after the first washcloth
Try the knitted cast on
The knitted cast on uses a motion similar to the knit stitch and does not
require estimating a long tail. Compare its edge with the long-tail cast on.
Use circular needles for flat work
Knit across, turn, and knit back exactly as with straight needles. The
connecting cable simply supports the stitches and project weight.
Add a garter border to stockinette
Knit several stitches at each side and several rows at the top and bottom
while working the center in stockinette. The balanced border helps reduce curl.
Practice ribbing or seed stitch
Alternating knit and purl stitches within the same row teaches you to move
the yarn correctly between the front and back without creating yarn overs.
Continue learning
Choose one next skill and keep the project manageable
After the washcloth, practise purling on a small swatch, learn the
abbreviations used in written patterns, or choose a short scarf or headband
that repeats only one or two stitch combinations.
Curious about the other craft? The
crochet beginner guide
explains how one hook and one active loop create a structurally different fabric.
Common questions
How to knit for beginners FAQ
1.Is knitting or crochet easier for a complete beginner?
Neither craft is universally easier. Crochet uses one hook and one active
loop, while knitting holds many live stitches on two needles. Some people
prefer crochet's single tool; others prefer the rhythm and fabric of
knitting. Choose the process and finished projects that interest you,
then allow several short sessions before deciding whether the movement
feels comfortable.
2.How long does it take to learn the basic knit stitch?
Many beginners can form recognisable knit stitches during the first
30–60 minute session, but consistent tension takes longer. A first cotton
washcloth commonly requires about 4–8 hours across several sessions.
Hand speed, correction time, yarn texture, and the number of breaks all
affect the total.
3.Should a beginner use straight or circular knitting needles?
Either can work. Straight needles are visually simple and suitable for a
small washcloth. Circular needles can also knit flat: work across, turn,
and work back. Their cable supports the project weight and may feel more
comfortable. Choose 5 mm needles with enough surface grip to keep the
stitches controlled.
4.Why does my knitting get wider at the edges?
The first stitch of a row can look like two loops when the working yarn
is pulled over the top of the needle. Working into both strands adds a
stitch. Accidental yarn overs also add loops and usually leave a small
hole. Count every row and keep the working yarn below the needle when
beginning a garter-stitch row.
5.What is the difference between garter stitch and stockinette?
Garter stitch is produced by knitting every row when working flat. It
looks textured on both sides and normally lies flat. Stockinette is made
by alternating a knit row with a purl row when working flat. One face
shows smooth V shapes and the other shows purl bumps. Unbordered
stockinette naturally curls.
6.How do I fix a dropped knitting stitch?
First secure the live loop with a locking marker. A crochet hook can pull
the loop through each horizontal ladder strand until it reaches the
current row. If the mistake affects several stitches or the structure is
unclear, carefully undo the work to a stable row and return the live
stitches to the needle before continuing.
7.Do I need to learn the purl stitch for the first washcloth?
No. The washcloth uses garter stitch, so every row is knitted. Learning
purl separately is still useful because knit and purl combinations create
stockinette, ribbing, seed stitch, and many other common fabrics.
You are ready
Cast on slowly and let repetition build the skill
Your first rows do not need to be fast or perfectly even. Keep the stitches
loose enough to move, count after every row, and correct mistakes while they
are still close to the needle.
Cast on 30 stitches, knit each row until the piece is square, bind off
loosely, and weave in the ends. The finished cloth is useful, but its greater
value is the repetition that teaches your hands how a knit stitch should feel.
Happy knitting, — Sophie
Editorial references
Standards checked for this guide
Needle sizing, yarn-weight guidance, project-level wording, and knitting
abbreviations were checked against the current Craft Yarn Council standards.
A yarn label and the instructions in a specific pattern always take priority.