Learn four practical ways to secure yarn tails without adding unnecessary bulk. This guide covers duplicate stitch, zigzag weaving, over-stitching, and a felted wool join, with clear examples for crochet and knitting.
Written by Sophie Lane•Published •About 11 minutes to read
To weave in ends means threading a yarn tail through nearby stitches so it stays hidden inside the finished fabric. The best path depends on the stitch structure, yarn fiber, color, and how often the project will be handled or washed.
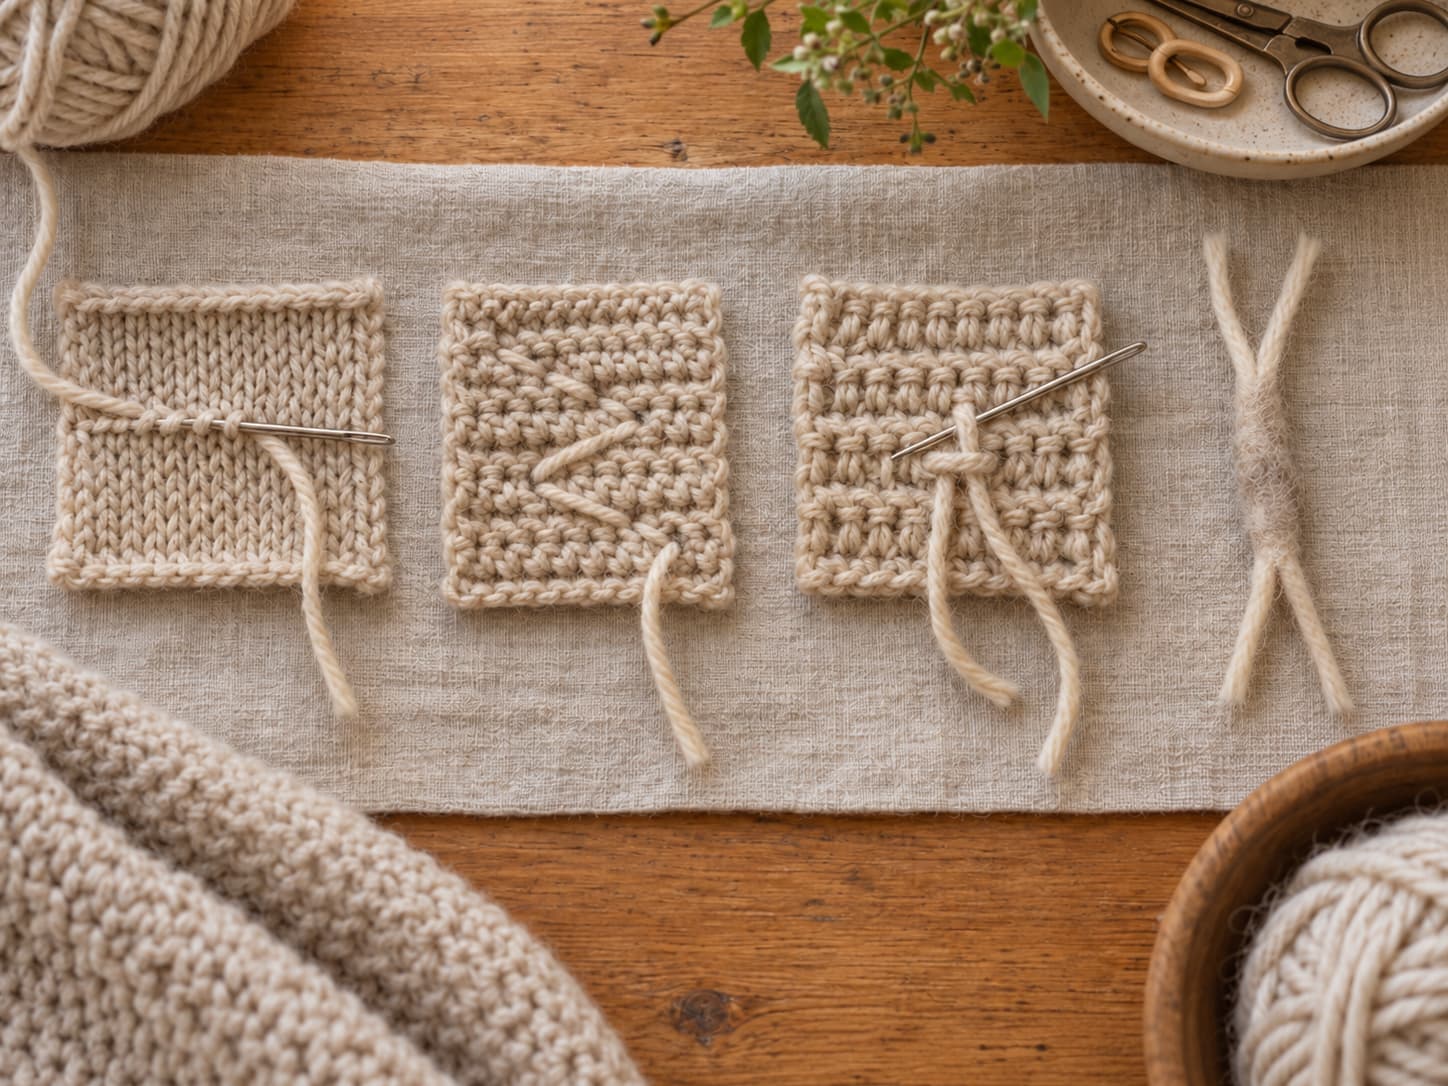
For example, duplicate stitch follows the shape of stockinette knitting. Zigzag weaving works well across many crochet and knitting fabrics. Over-stitching uses the posts of crochet stitches, while a felted wool splice can remove a mid-project tail before it is created.
The goal is not to pull the tail as tightly as possible. Instead, follow the fabric, change direction, keep the tension relaxed, and check the right side before trimming.
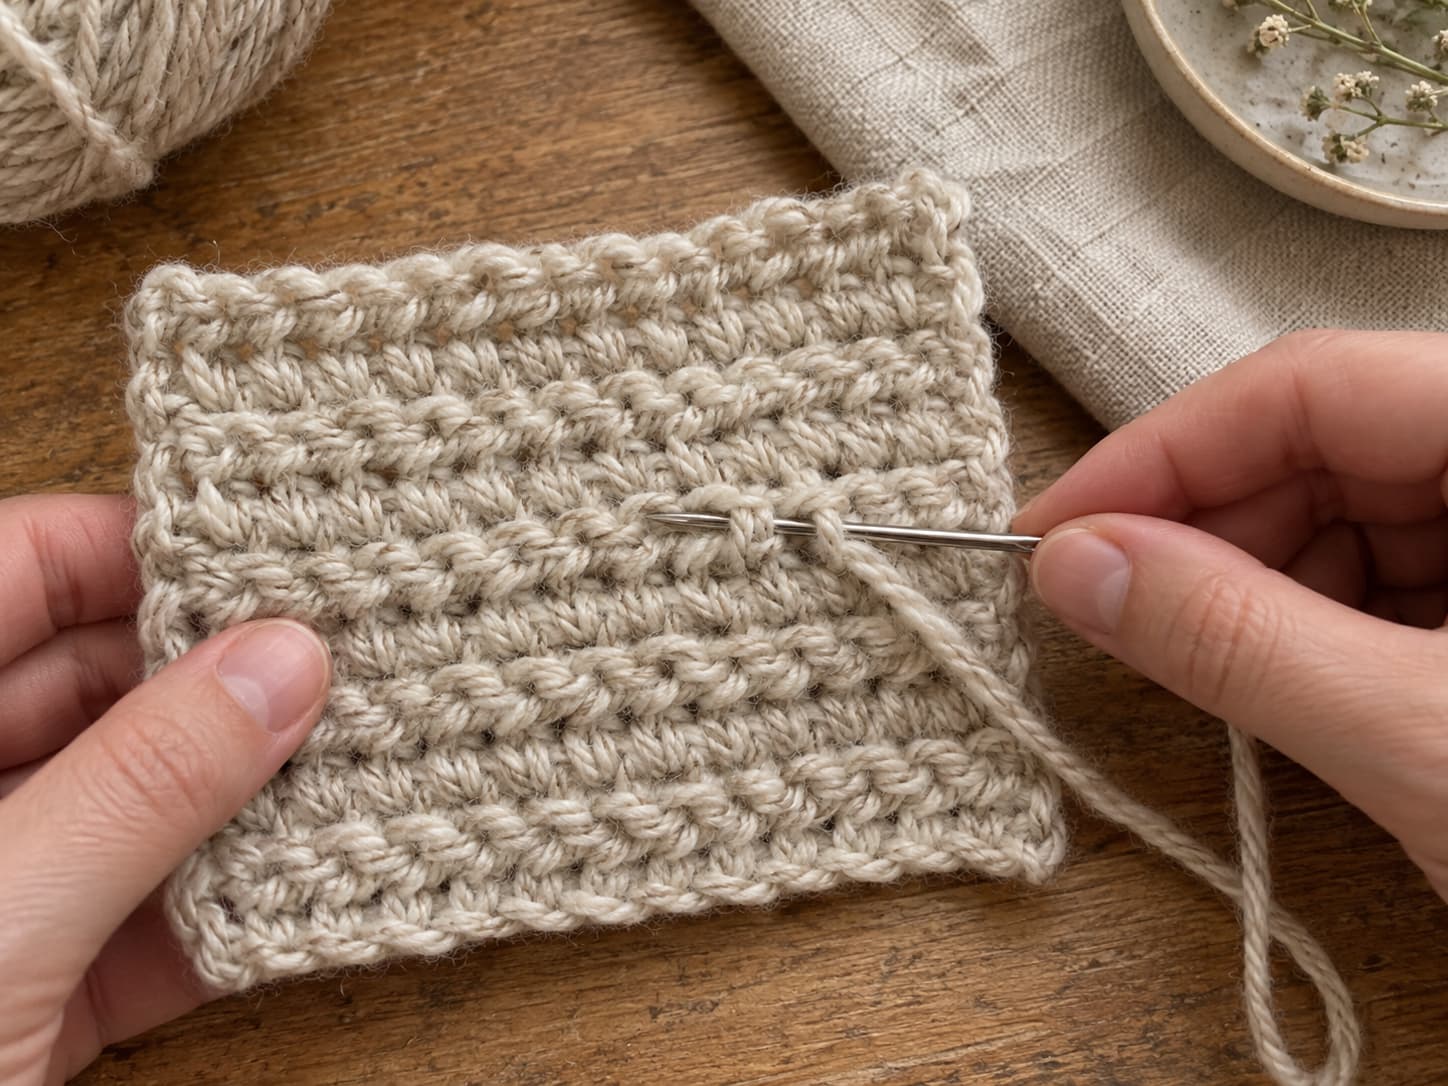
Work on the wrong side and follow nearby stitches so the tail stays hidden without pulling the fabric out of shape.
Key toolTapestry needle
A blunt tip and large eye help the needle travel between yarn strands.
Basic pathAbout 2 in / 5 cm
Then reverse direction so the tail is less likely to slide back out.
Methods4 practical options
Duplicate stitch, zigzag, over-stitch, and felted wool join.
CrochetZigzag or over-stitch
Choose based on whether horizontal bars or stitch posts are easiest to reach.
KnittingDuplicate stitch or zigzag
Stockinette has a clear stitch path; ribbing often hides a zigzag better.
Final checkStretch before trimming
Make sure the fabric still moves naturally and the tail does not show.
On this page
Why it matters
A secure tail should disappear into the fabric
Every cast-on, fasten-off, yarn join, or color change can leave a tail. If that tail is cut too short or left loose, it may work toward the surface as the fabric stretches, rubs, or goes through washing.
Good finishing balances security with flexibility. The tail needs enough friction to stay in place, but the woven section should not become stiff or puckered.
Security
Direction changes add friction, helping the tail stay inside the stitch structure during normal use.
Neatness
A careful path stays on the wrong side and avoids obvious loops, ridges, or contrasting strands on the front.
Flexibility
The woven section should still stretch and drape with the surrounding fabric instead of becoming a tight patch.
Washability
Frequently washed projects usually benefit from a longer weave and extra direction changes, especially with smooth fibers.
Before you start
Choose the right needle and leave enough tail
A blunt tapestry needle is the main tool for this guide. Match the eye size to the yarn so the tail threads easily without forcing the needle through the fabric. Scissors should be sharp enough to trim cleanly after the weave is tested.
Whenever possible, leave about 6 inches / 15 cm when you cast on, join a new yarn, or fasten off. A generous tail is easier to thread and gives you room to reverse direction.
Method 1 · Duplicate stitch
How to weave in ends with duplicate stitch
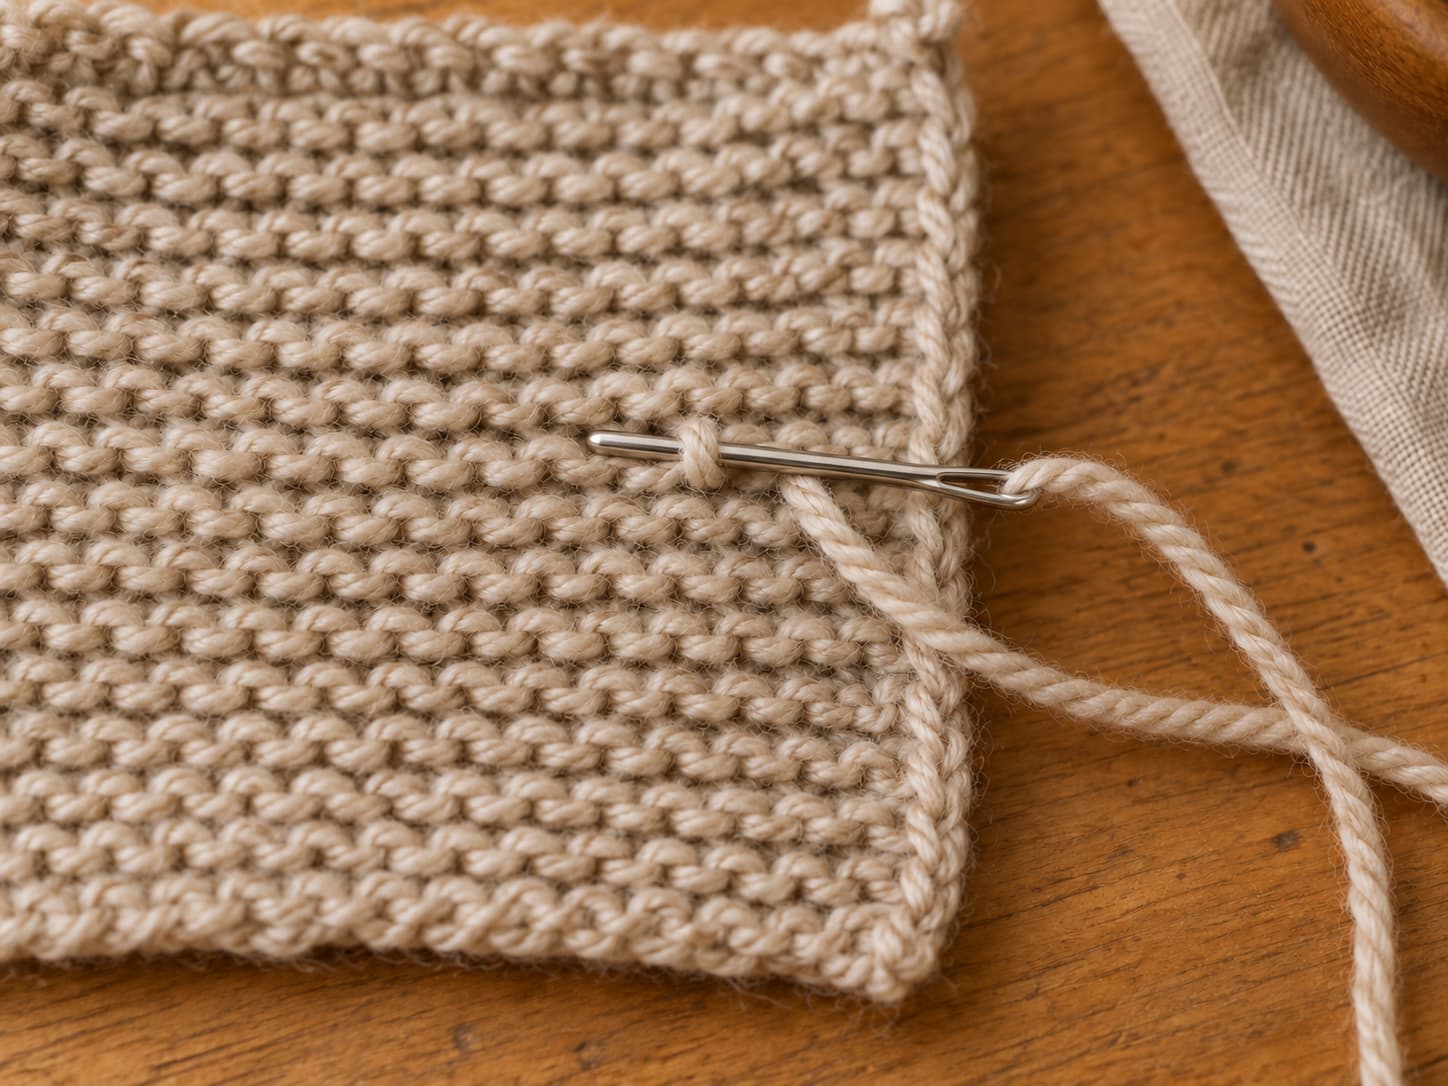
Duplicate stitch follows the route of existing knitting stitches on the wrong side. In stockinette, the purl bumps create a clear path. That makes this method useful when you want the tail to blend into smooth knitted fabric.
The needle follows the purl-bump path on the wrong side instead of crossing randomly through the fabric.
1
Thread the tail. Use a blunt tapestry needle and leave enough yarn outside the eye to prevent slipping.
2
Find a purl bump. Work on the wrong side and choose the first horizontal bump beside the tail.
3
Follow the stitch path. Pass the needle under the legs of the bump without splitting the working yarn.
4
Continue across. Follow neighboring bumps for roughly 2 inches / 5 cm while keeping the fabric relaxed.
5
Reverse direction. Turn back through nearby bumps so the tail does not follow one straight escape path.
6
Test and trim. Stretch the fabric gently. If the weave stays hidden and flexible, trim the remaining tail.
Best for
Stockinette knitting and color tails where the purl-bump path is easy to see.
Less useful for
Highly textured fabrics where the stitch path is difficult to follow consistently.
Method 2 · Zigzag / diagonal
Use a zigzag path for versatile everyday finishing
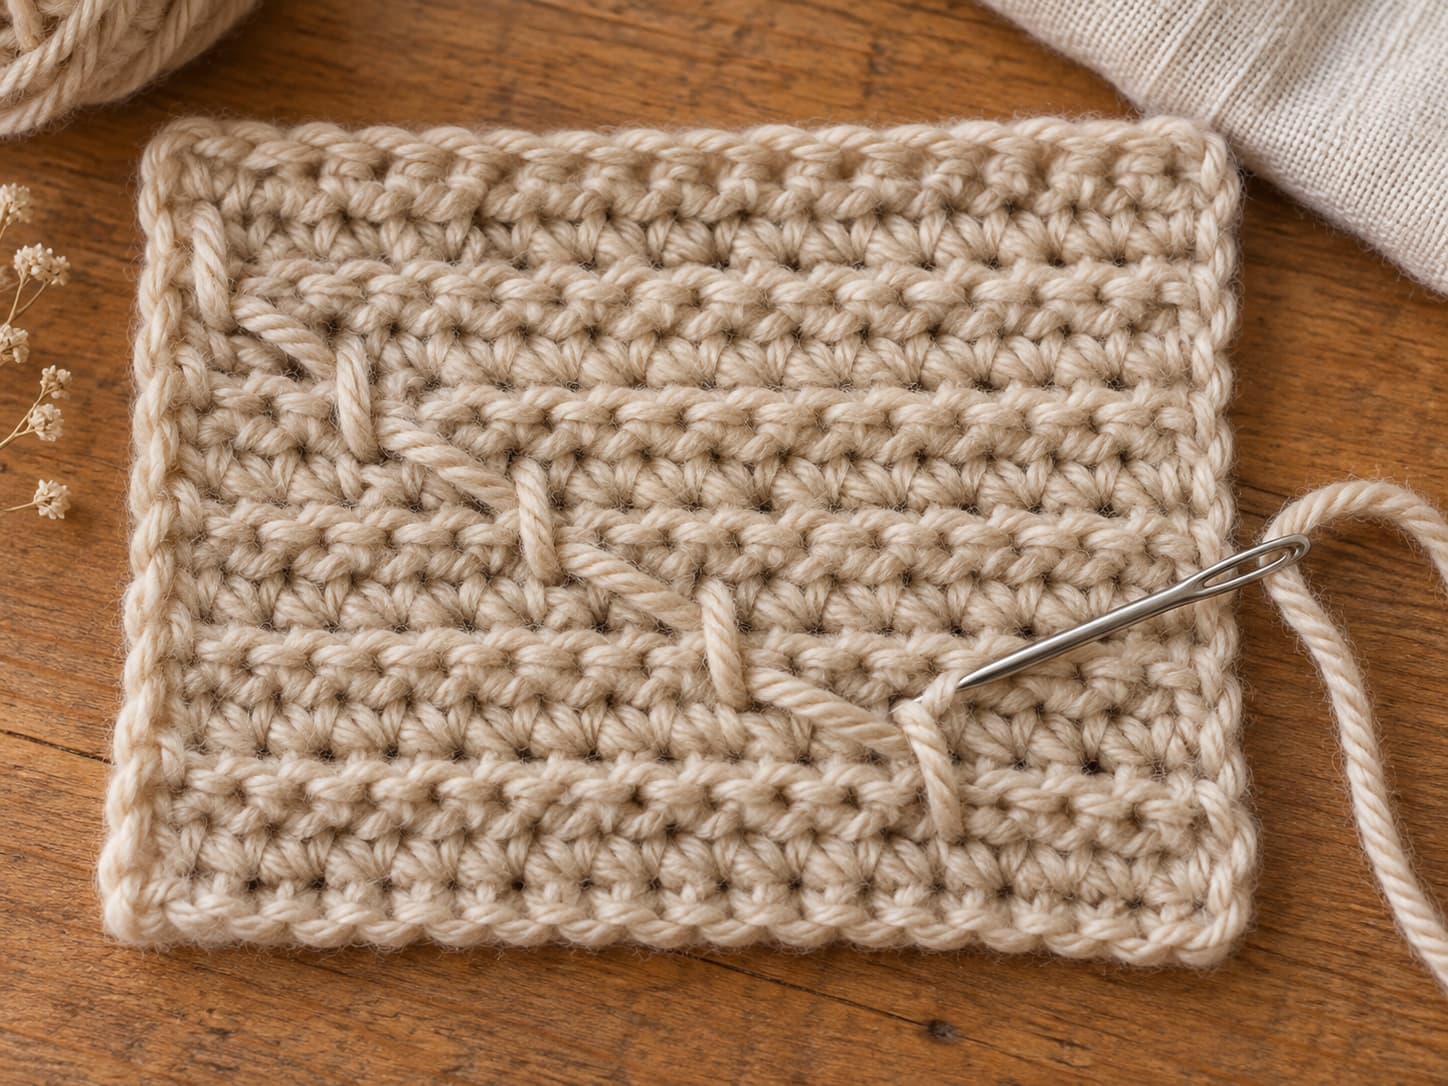
The zigzag method moves the tail diagonally through the backs of stitches. Then it reverses direction. Because the path crosses more than one stitch column, it works across many crochet and knitting textures.
The diagonal path crosses stitch columns, then reverses so the tail is held by friction in more than one direction.
1
Thread the tail. Bring the needle to the wrong side of the project.
2
Choose a nearby bar or loop. Start where the fabric gives you a secure path without crossing the front surface.
3
Move diagonally. Travel across nearby stitch columns instead of weaving in a straight horizontal line.
4
Change angle. After several passes, turn back through the fabric in the opposite direction.
5
Add security when needed. Smooth cotton or frequently washed items can use a longer third pass.
6
Trim after checking. Flex and stretch the fabric first, then cut the remaining tail close to the surface.
Method 3 · Over-stitch
Wrap around crochet posts when the structure is easy to reach
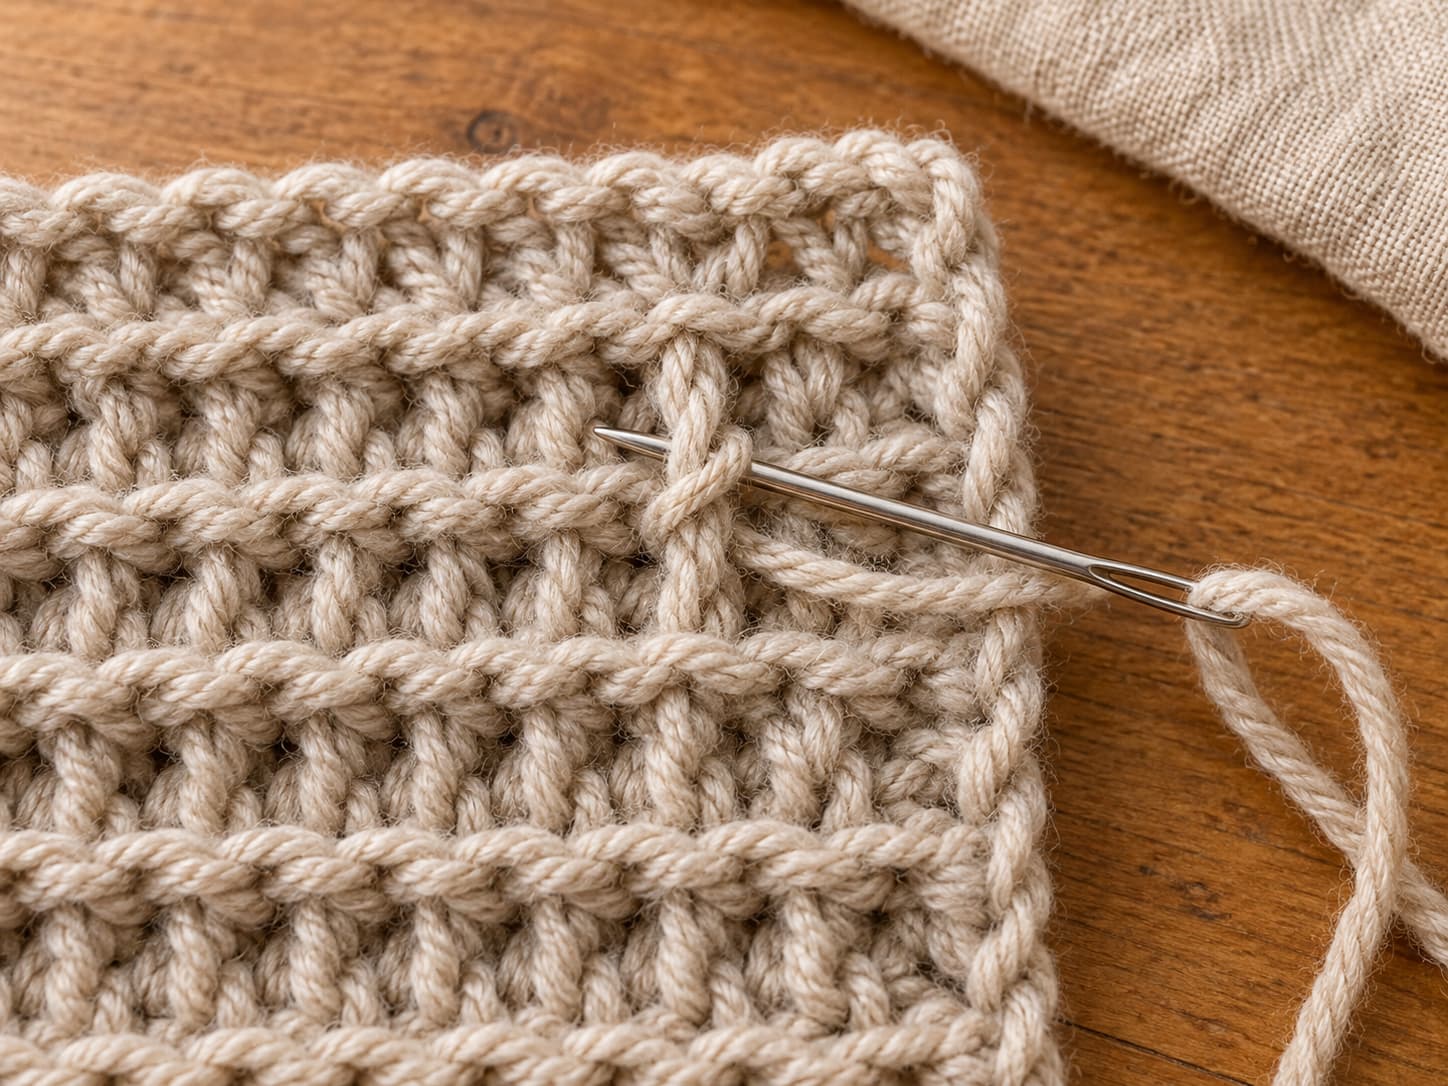
In crochet, the posts of taller stitches provide another place to hide a tail. The over-stitch method wraps the yarn around nearby posts on the wrong side instead of following horizontal bars.
Use the stitch posts on the wrong side as anchors, then reverse direction through nearby posts.
1
Thread the tail. Bring the needle to the wrong side.
2
Find a nearby post. Choose a vertical stitch shaft beside the tail.
3
Wrap around the post. Pass the needle around the post without pulling the wrap tight.
4
Continue across several posts. Keep the wraps neat and close to the wrong side.
5
Reverse direction. Work back through nearby posts to increase friction.
6
Check the front. Confirm that no wrap is visible before trimming.
Method 4 · Felted wool join
Join suitable wool yarn before a tail is created
A felted join—often called a spit-splice—uses moisture, friction, and feltable animal fibers to join an old yarn end to a new one. It is useful for some mid-project joins because the two ends become one working strand.
This method depends on fiber behavior. It is not a universal choice for every wool blend, and yarn labeled superwash is generally designed to resist felting. When in doubt, test a short sample first.
Taper and overlap the yarn ends, add a little moisture, then use friction to encourage suitable fibers to felt together.
1
Taper both ends. Untwist a short section and thin the tips so the overlap is not bulky.
2
Overlap the ends. Aim for an even transition instead of stacking two full-thickness strands.
3
Add moisture. Lightly dampen the overlap.
4
Add friction. Roll the overlap between your palms to encourage the fibers to interlock.
5
Test gently. If the join pulls apart, stop and use another joining method.
6
Continue working. Once the join feels stable, work past it and check the fabric again after blocking.
Which method when
Match the method to the stitch structure and fiber
No single method is best in every situation. Use the table as a starting point, then adjust the weave length and direction changes to the yarn in your hands.
Compare the path each method takes on the wrong side before choosing the least bulky option for your fabric.
Situation
Useful method
Why
Starting length
Stockinette knitting
Duplicate stitch
The purl-bump path is easy to follow on the wrong side.
About 2 in / 5 cm
Ribbing
Zigzag
A diagonal path can hide inside purl valleys without tracing every rib.
About 2 in / 5 cm
Single crochet
Zigzag
Dense fabric gives several bars and loops for direction changes.
2–3 in / 5–7.5 cm
Double crochet
Zigzag or over-stitch
Use either horizontal structure or accessible posts.
About 2 in / 5 cm
Granny square
Over-stitch
Motif posts and border stitches provide convenient hiding paths.
Several posts
Crochet color change
Zigzag or over-stitch
Choose the route that stays inside the same color area.
About 2 in / 5 cm
Knitting color change
Duplicate stitch
Follow same-color purl bumps to reduce show-through.
About 2 in / 5 cm
Cotton yarn
Longer zigzag
Smooth fibers often benefit from extra path length and direction changes.
About 3 in / 7.5 cm
Suitable feltable wool join
Felted join
Can remove the need for a mid-project tail when the fiber felts reliably.
Test first
Crochet specifics
How to weave in ends in crochet projects
Color-change tails
When you change color, keep each tail inside stitches of the same color whenever possible. You can crochet over part of a new tail for the first few stitches, then weave the remaining length afterward.
Granny-square joins
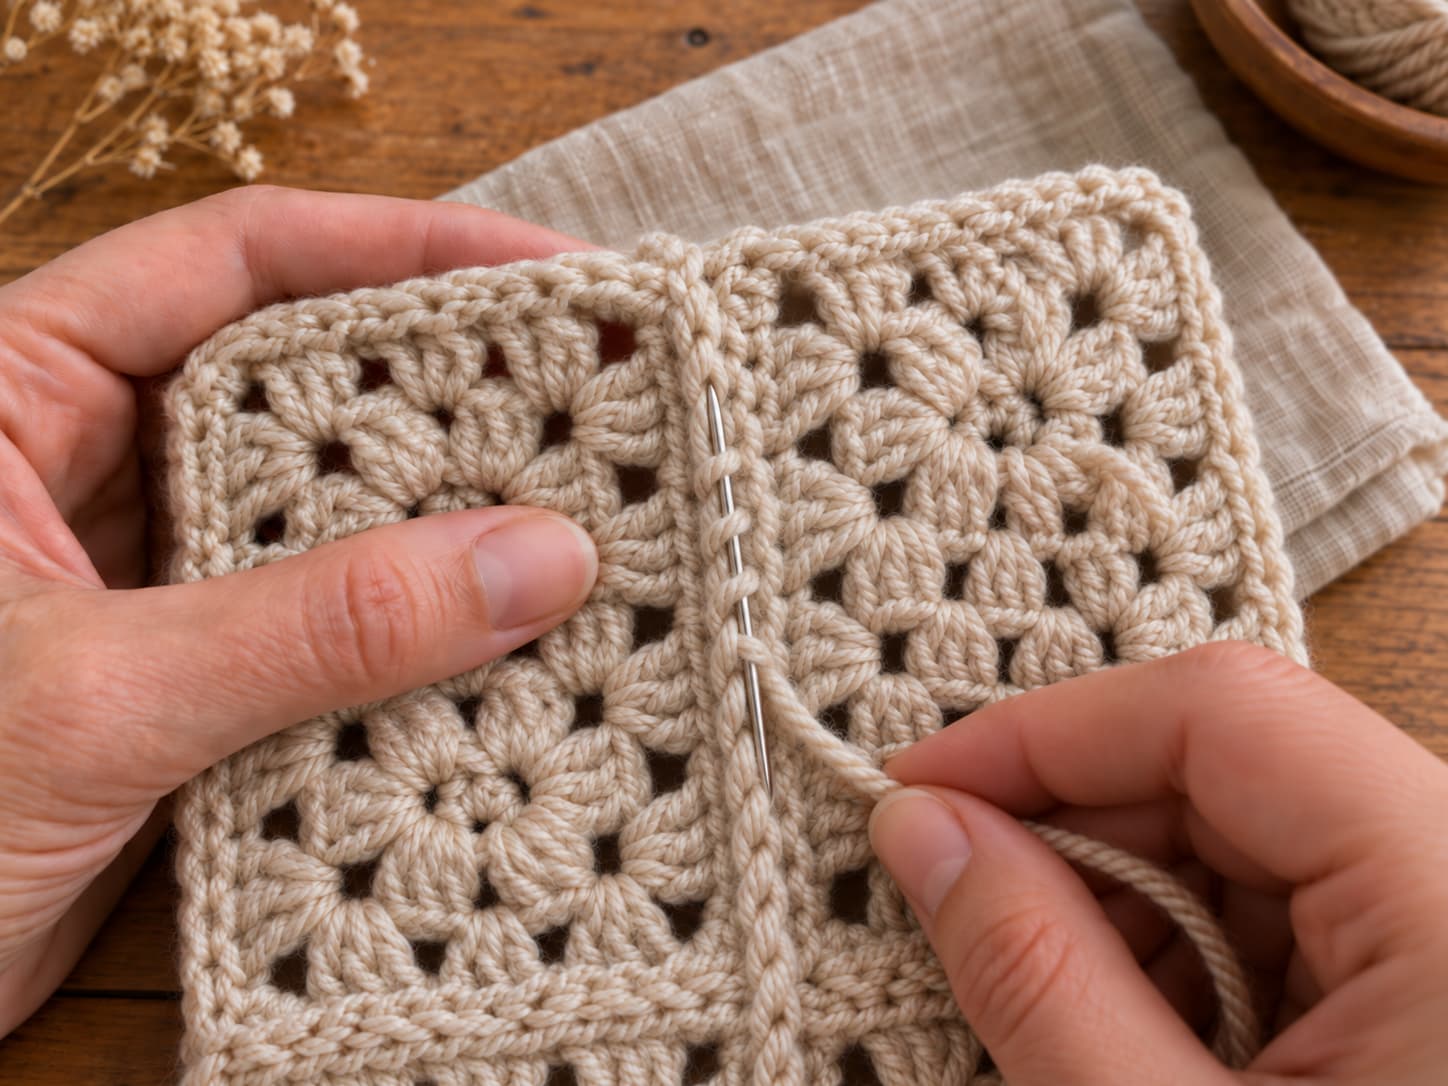
Motif joins often leave tails near chain spaces or slip-stitch seams. Use those existing structures as a hiding path instead of crossing an open hole where the yarn can show.
Use the join seam as the hiding path, then reverse direction before trimming the tail.
Stuffing can hide a tail from view, but it does not replace securing it. Weave through several nearby single-crochet stitches before trimming, then check that the tail cannot migrate back through the surface.
Knitting specifics
How to weave in ends in knitting projects
Stockinette
Stockinette gives you a repeating row of purl bumps on the wrong side. Follow those bumps with duplicate stitch and keep the tail in the same color area when possible.
Ribbing
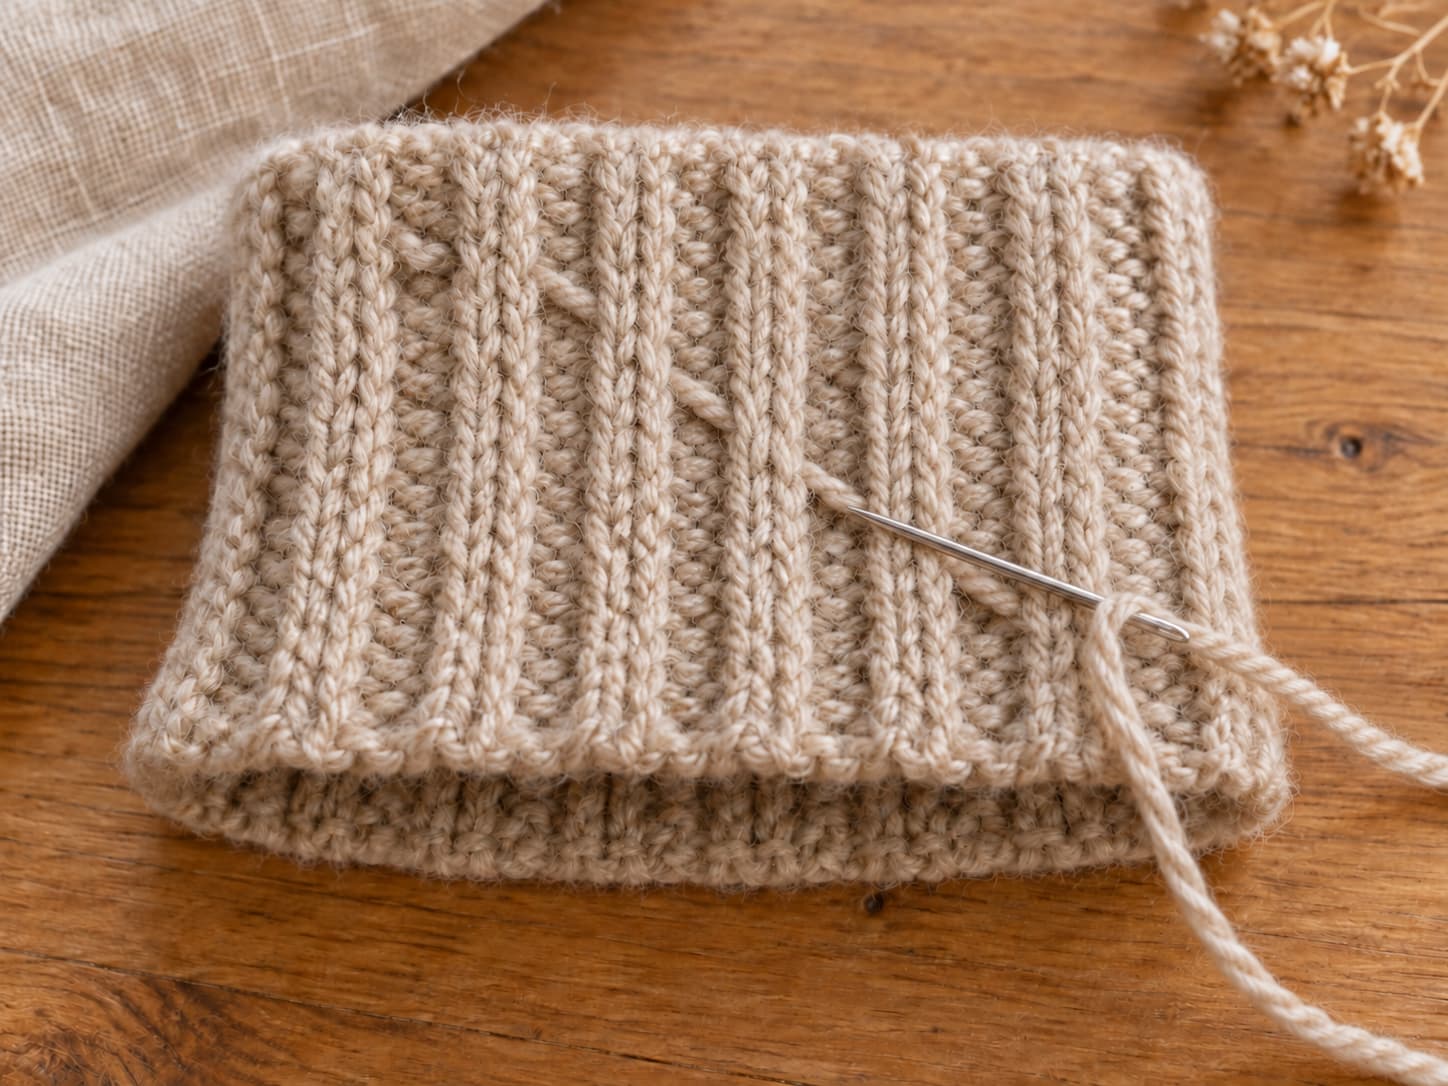
Ribbing needs to stretch, so avoid a tight horizontal bar across several ribs. Instead, weave a short zigzag path inside the purl valleys, where the tail stays less visible as the cuff opens.
The tail follows the purl valleys rather than crossing tightly over the raised ribs.
Use the tail inside stitches of the same color whenever possible. A dark yarn woven behind a light area can show through, especially in thinner fabrics.
Troubleshooting
Six mistakes that make woven tails more visible or less secure
The path is too short
A very short weave has little friction. Leave enough yarn to travel through several stitches and reverse direction.
Only one direction
A straight path can slide back toward its entry point. Turn the tail through the fabric before trimming.
Needle splits the yarn
A sharp or undersized needle can pierce plies instead of traveling between them. A blunt tapestry needle reduces that risk.
Fabric puckers
The tail is being pulled too tightly. Ease the woven yarn back until the fabric lies naturally.
Trimmed before testing
Stretch and flex the fabric first. If the tail appears, you still have enough yarn to correct the path.
Contrasting tail shows
Whenever possible, keep each tail inside stitches of the same color instead of carrying it behind a lighter area.
Practice tips
Build a finishing habit that works across projects
Practice on a swatch. Try the same tail with two methods and compare the wrong side, right side, stretch, and bulk.
Leave generous tails. About 6 inches / 15 cm gives you room to thread the needle and reverse direction.
Check the front often. A tail that looks tidy on the wrong side can still show through light-colored or open fabric.
Match the method to the fiber. Smooth yarns and slippery fabrics often need a longer, more directional path.
Block after the tails are secure. This lets the finished fabric relax after the weaving is complete.
Other joining ideas from the source guide
Other joining options include crocheting over a tail, the Russian join, magic knots, and felted joins. They can be useful in specific situations, but they are not interchangeable. Consider visibility, bulk, fiber behavior, and whether the join must stretch before choosing one.
1. Is weaving in ends different for crochet and knitting?
Yes. Crochet gives you stitch posts, horizontal bars, and chain spaces, while knitting gives you knit and purl paths. Zigzag weaving works across both crafts, but duplicate stitch is especially useful in stockinette and over-stitching is designed around crochet posts.
2. How long should I weave a yarn tail?
About 2 inches / 5 cm is a practical starting point for many yarns. Use a longer path for smooth cotton or heavily handled items, and adjust for yarn thickness and stitch density.
3. Can I knot the yarn instead of weaving the tail?
A knot can add a hard spot and may still leave tails that need hiding. For a flatter finish, weave the tail through the fabric. If a project specifically uses a knot, keep it on the wrong side and secure the remaining ends.
4. What if the tail is too short for a tapestry needle?
Use a crochet hook to pull a short tail through nearby stitches when there is not enough length to thread a tapestry needle. Work slowly so you do not distort the fabric or pull the tail to the right side.
5. Should I weave in ends before or after blocking?
This guide recommends securing the tails first and blocking afterward. Blocking can then relax any small tension changes created by the finishing process.
6. Why can I see the woven tail from the front?
Common reasons include weaving through an open area, pulling too tightly, or carrying a dark tail behind light stitches. Move the tail to the wrong side and follow solid stitches in a matching color area.
Conclusion
Choose the path that fits the fabric
Learning how to weave in ends is less about memorizing one universal trick and more about reading the fabric in front of you. Stockinette gives you a clear duplicate-stitch path. Crochet posts can support an over-stitch. Zigzag weaving adapts to many textures, while a felted join can simplify some wool yarn changes.
Leave enough tail, work on the wrong side, change direction, and keep the tension relaxed. Then stretch the fabric before you trim. Those habits make finishing cleaner across both crochet and knitting.
Happy making, — Sophie
Terminology reference
Standard crochet terms and abbreviations
For standard crochet terminology and abbreviations used throughout KnitSoul, refer to the Craft Yarn Council reference below.