Start here
A practical first project beyond scarves and hats
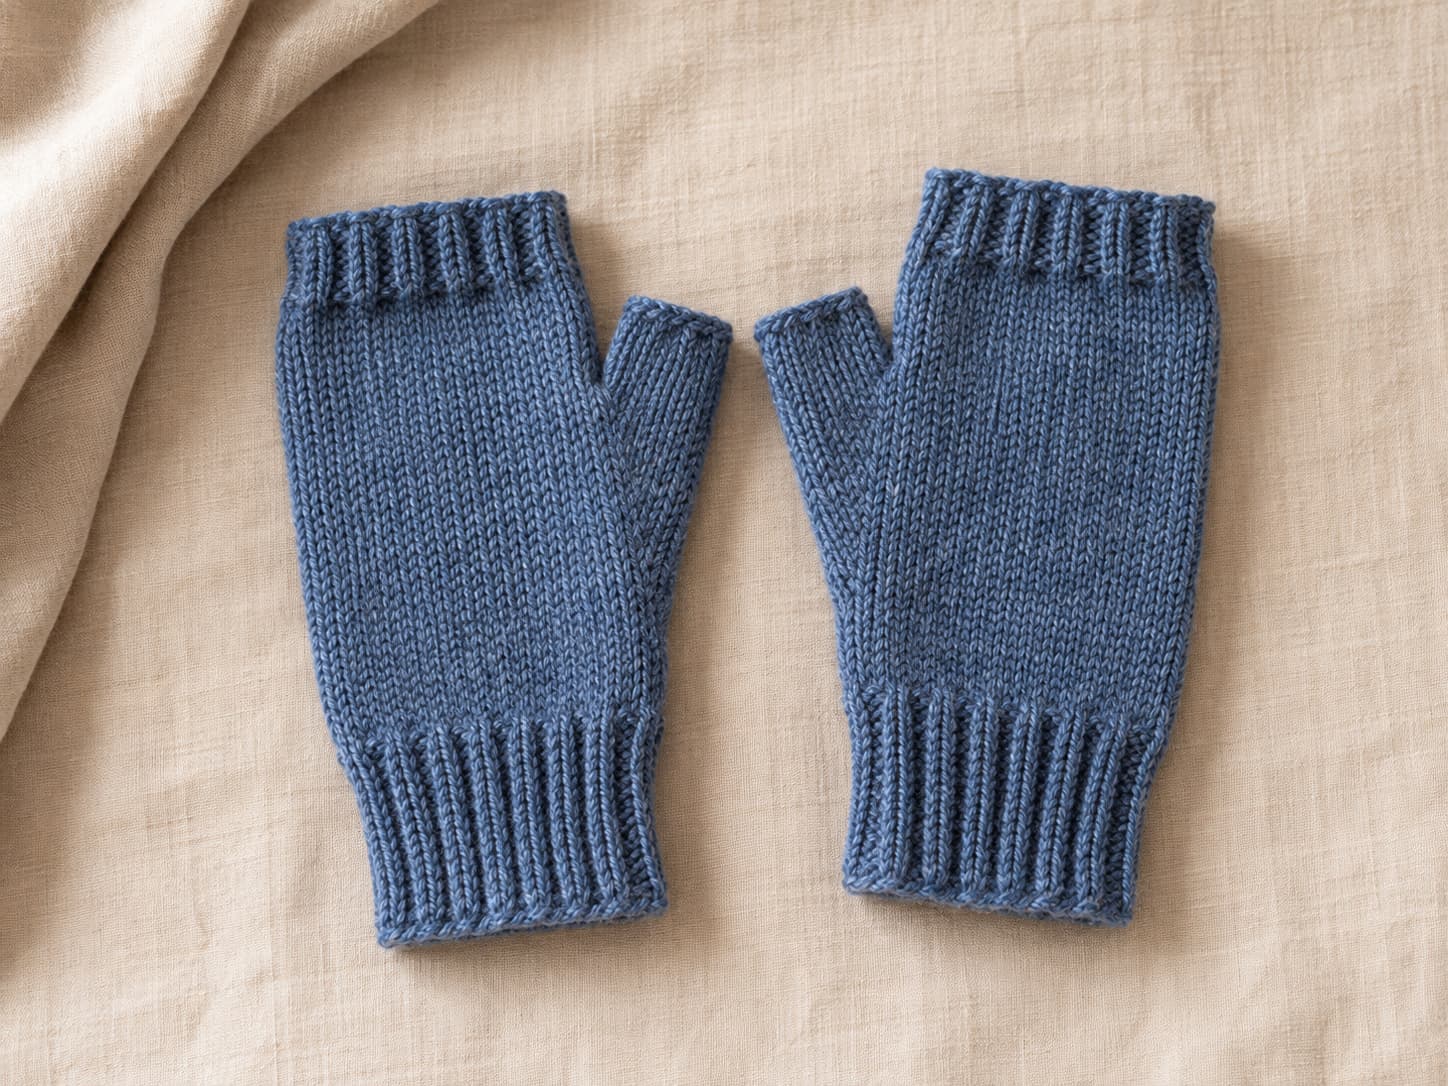
Fingerless mitts are a useful next step for a beginner who already knows the knit and purl stitches. They are small enough to finish in a weekend, but they introduce shaping skills that transfer to many later projects: ribbing, paired increases, holding stitches, picking up stitches, and mattress stitch.
This version is worked flat on straight needles. The thumb gusset is shaped in the center of the piece, the thumb stitches are placed on hold, and the mitt is finished with an invisible side seam. That keeps the knitting itself calm and familiar while still teaching the construction of a fitted hand accessory.
Knit, purl, M1 increases, held stitches, and basic seaming.
Use straight needles or a circular needle worked back and forth.
Adjust needle size as needed to achieve gauge.
Allow approximately 120–180 yards for one pair.
Designed for approximately 7–9.5 inch hand circumferences.
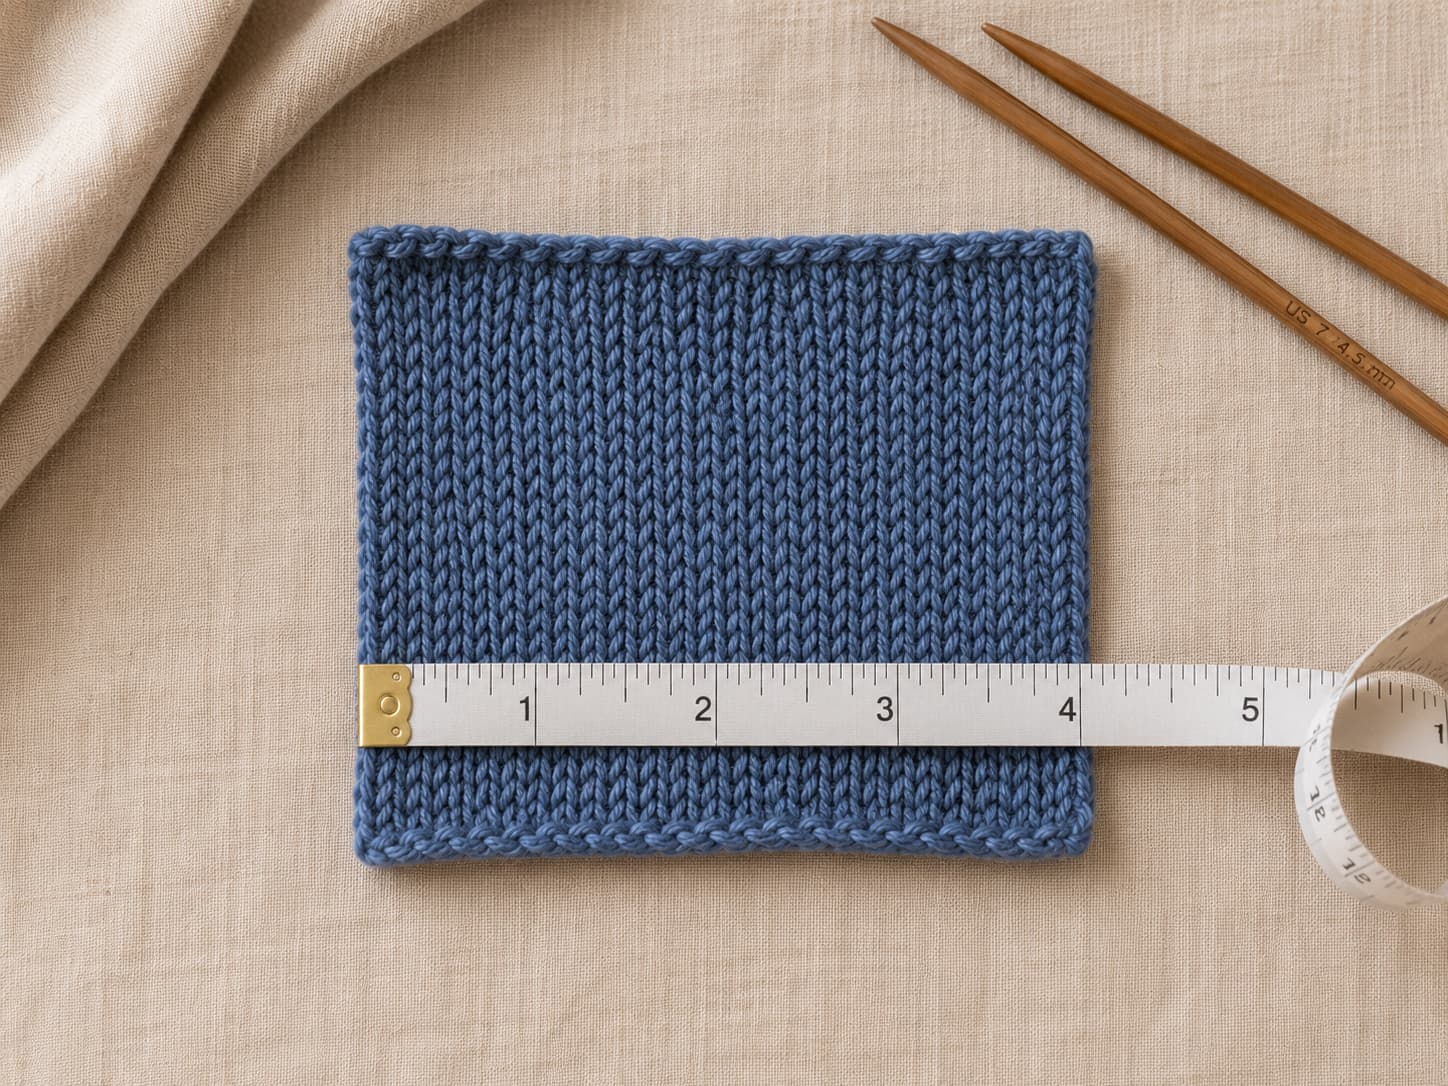
Equals 4 inches / 10 cm in stockinette after blocking.
In this article
1. Supplies and Yarn Suggestions
| Item | What you need | Notes |
|---|---|---|
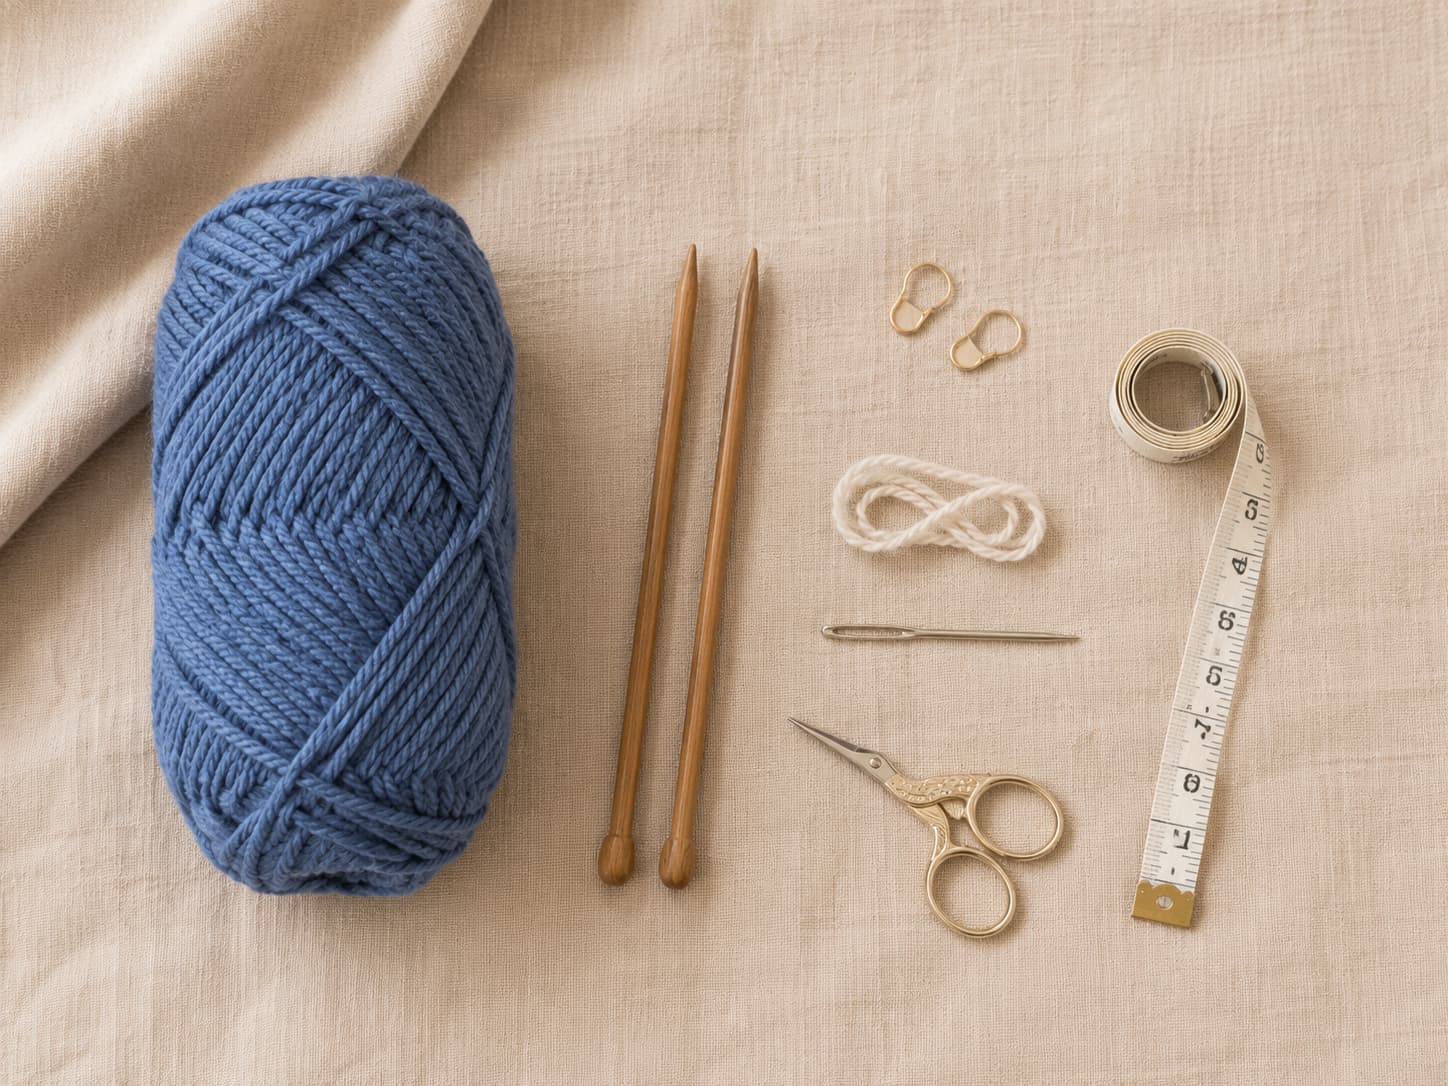
| Needles | US 7 (4.5 mm) straight needles | A circular needle can also be used while working back and forth. |
| Yarn | Worsted weight (#4), about 120–180 yd | Choose a smooth yarn with enough elasticity to recover after stretching. |
| Tapestry needle | Blunt tip, large eye | For mattress stitch and weaving in ends. |
| Stitch markers | 2 markers | Mark the two boundaries of the thumb gusset. |
| Waste yarn / holder | About 12 in of smooth scrap yarn | Holds the 13 thumb stitches while the hand is completed. |
| Other tools | Scissors + flexible measuring tape | Useful for checking gauge, hand circumference, and finished length. |
Three yarn options from the original pattern draft
Cascade 220 — 100% Peruvian Highland wool, approximately 220 yd / 100 g. Its elastic wool structure and clear stitch definition suit the ribbing and gusset well. One 220-yard skein covers the stated pattern yardage.
Malabrigo Rios — 100% superwash merino, approximately 210 yd / 100 g. It creates a softer, smoother mitt. A solid or semi-solid shade keeps the gusset shaping easier to see. One 210-yard skein covers the stated pattern yardage.
Knit Picks Swish Worsted — 100% superwash merino, approximately 110 yd / 50 g. Two balls provide about 220 yards, enough to cover the stated pattern yardage.
2. Sizing and Gauge
| Measurement | Adult S/M | Adult M/L |
|---|---|---|
| Hand circumference | 7–8 in | 8–9.5 in |
| Approx. finished circumference | 7.5 in | 9 in |
| Cuff length | Approx. 2.5 in | Approx. 2.5 in |
| Hand before thumb | Approx. 1.5 in | Approx. 1.75 in |
| Hand above thumb | Approx. 2.5 in | Approx. 2.75 in |
| Approx. total length | 8.5 in | 9.25 in |
Gauge: 20 stitches and 28 rows = 4 inches (10 cm) in stockinette stitch after blocking. If you have more than 20 stitches over 4 inches, try a larger needle. If you have fewer than 20 stitches, try a smaller needle.
Measure your hand: Wrap a flexible tape around the widest part of the palm, below the knuckles and excluding the thumb. Choose S/M for a 7–8 inch hand and M/L for an 8–9.5 inch hand. The finished mitt is intended to stretch slightly for a secure fit.
For a fitted accessory, gauge matters more than the needle number printed on the pattern. Swatch first, wash or block the swatch the way you plan to care for the finished mitts, and measure again before casting on.
3. Techniques You Will Use
The pattern is intentionally simple, but four techniques deserve a quick review before you begin.
M1L — Make One Left
With the left needle, lift the horizontal strand between the two needles from front to back. Knit into the back of the lifted strand. In this pattern, M1L is used at the left edge of the thumb gusset so the new stitch leans outward.
M1R — Make One Right
With the left needle, lift the horizontal strand between the two needles from back to front. Knit into the front of the lifted strand. In this pattern, M1R is used at the right edge of the thumb gusset. Work it deliberately; M1R often feels tighter than M1L.
2x2 ribbing worked flat
Because both sizes use stitch counts divisible by four, work *k2, p2; repeat from * on every ribbing row. After turning the work, the same sequence maintains the knit and purl columns correctly.
Picking up stitches
When you return to the thumb, knit the 13 held stitches, then pick up stitches around the gap. Insert the needle under a secure strand at the edge, wrap the yarn, and pull a new loop through. The pattern uses 3 stitches along one side, 1 from the bridge, and 3 along the other side.
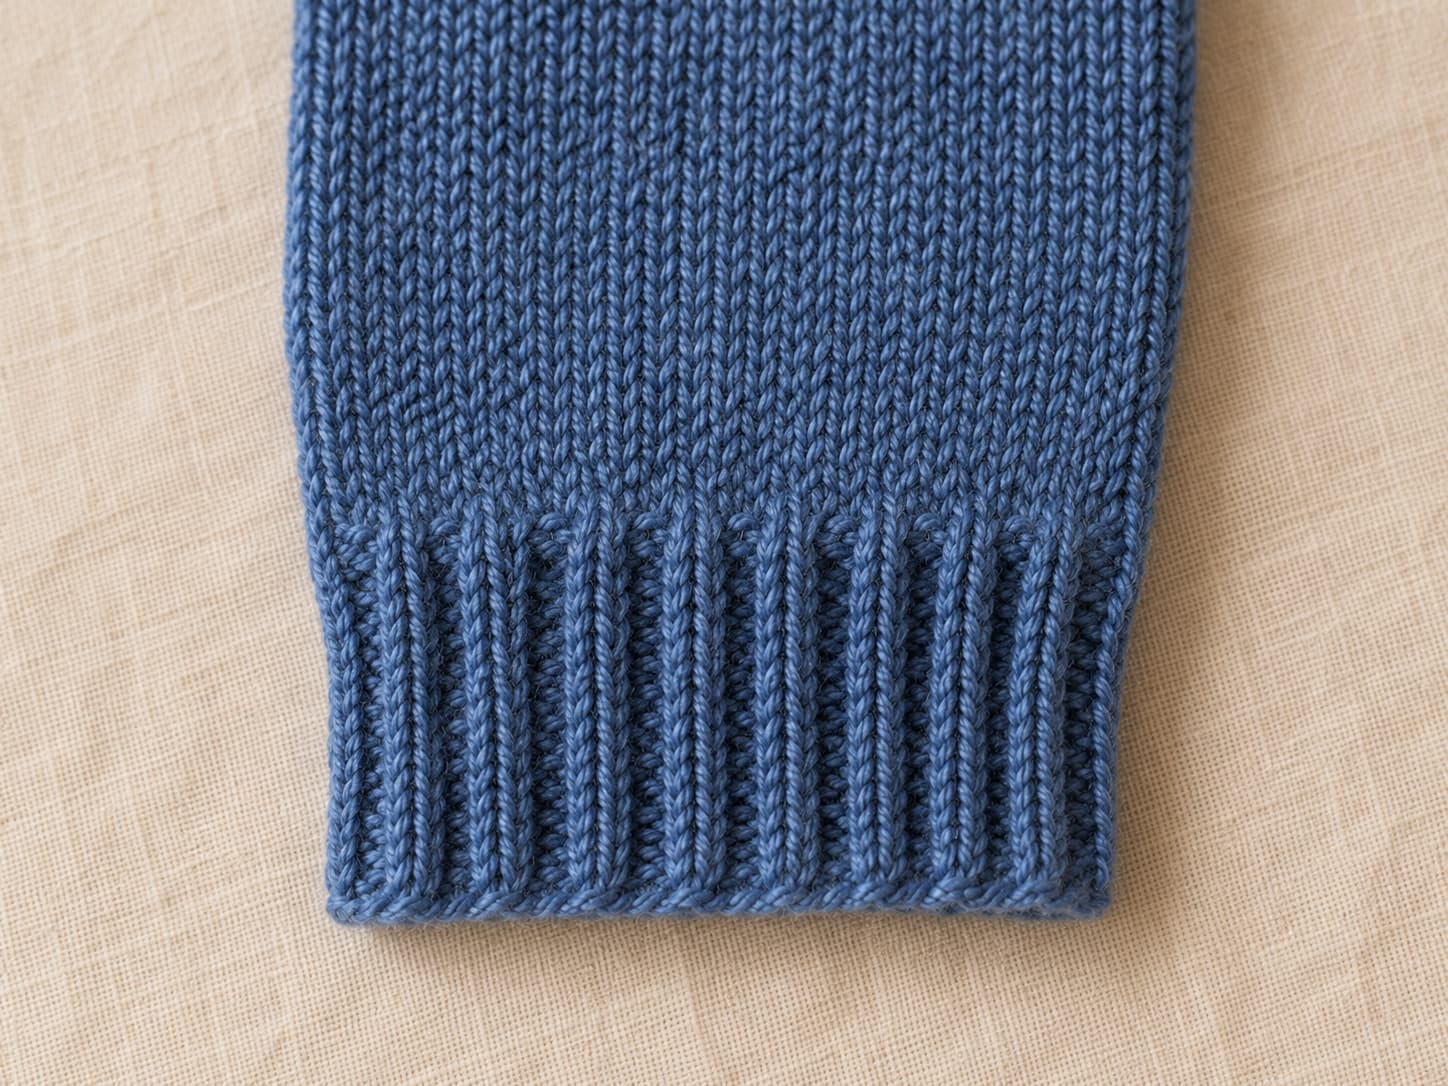
4. Easy Knit Fingerless Mitts Pattern
Pattern notes: Instructions are written for Adult S/M with M/L in parentheses. Work two identical flat pieces; the orientation is mirrored during finishing so the thumb sits on the outside of each hand. All stitch counts below were checked so the gusset returns to the original 40 (48) hand stitches after the 13 thumb stitches are placed on hold.
Easy Knit Fingerless Mitts
Sizes: Adult S/M (M/L) , Needles: US 7 / 4.5 mm , Yarn: Worsted #4, 120–180 yd , Gauge: 20 sts x 28 rows = 4 in
Cuff
Hand before the thumb
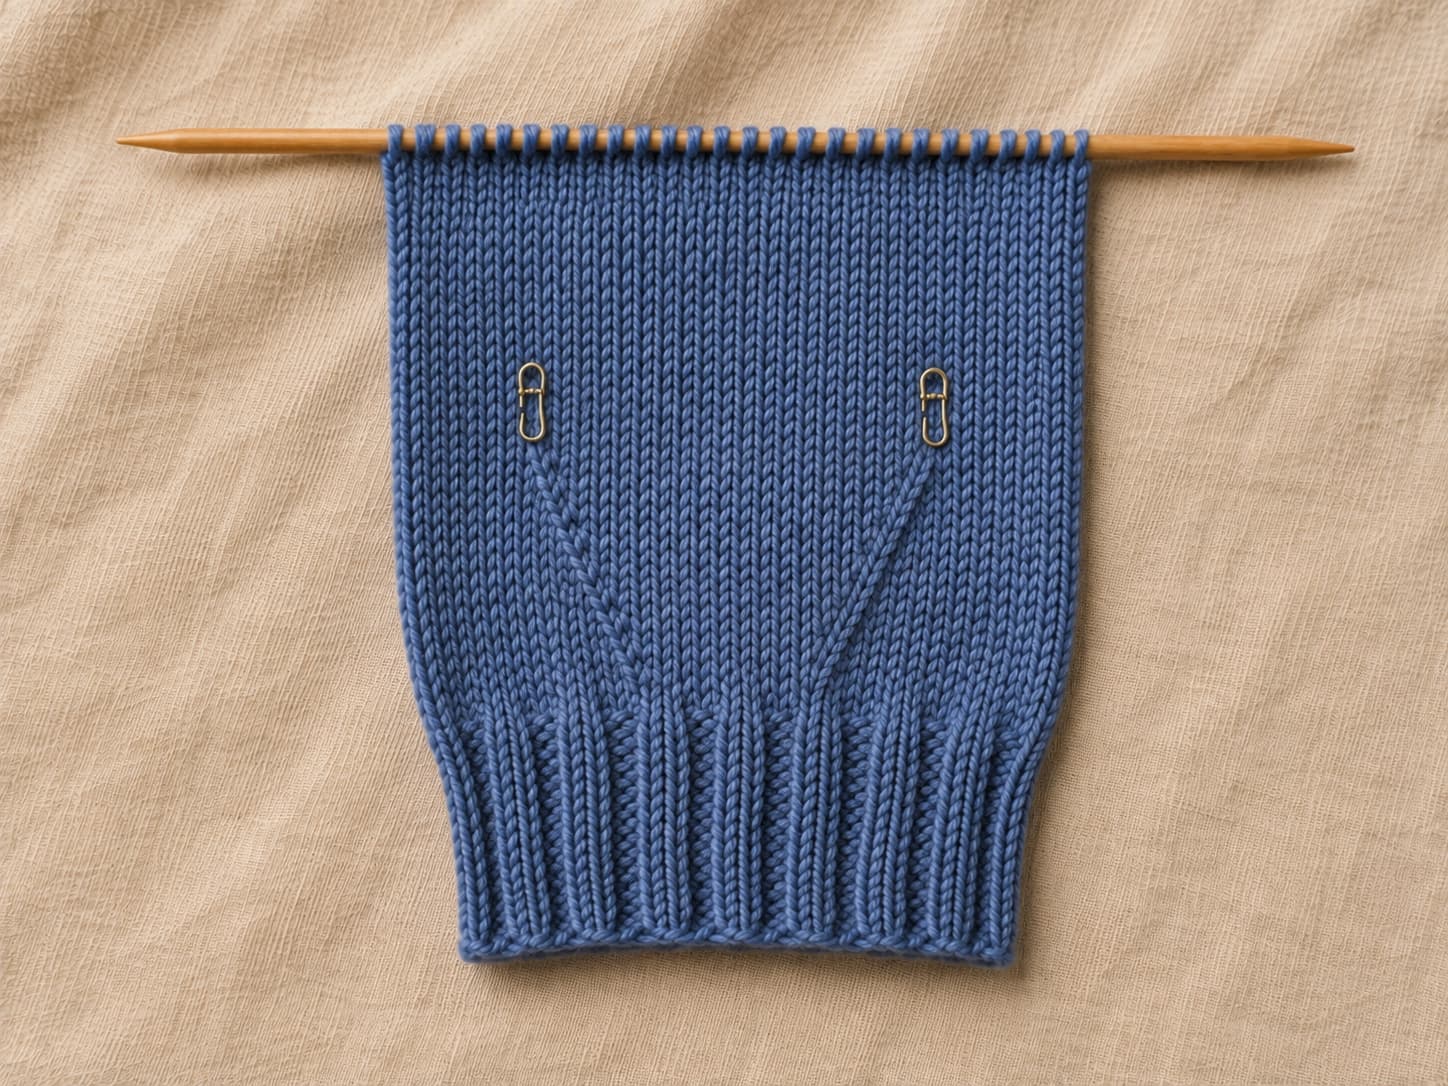
Thumb gusset
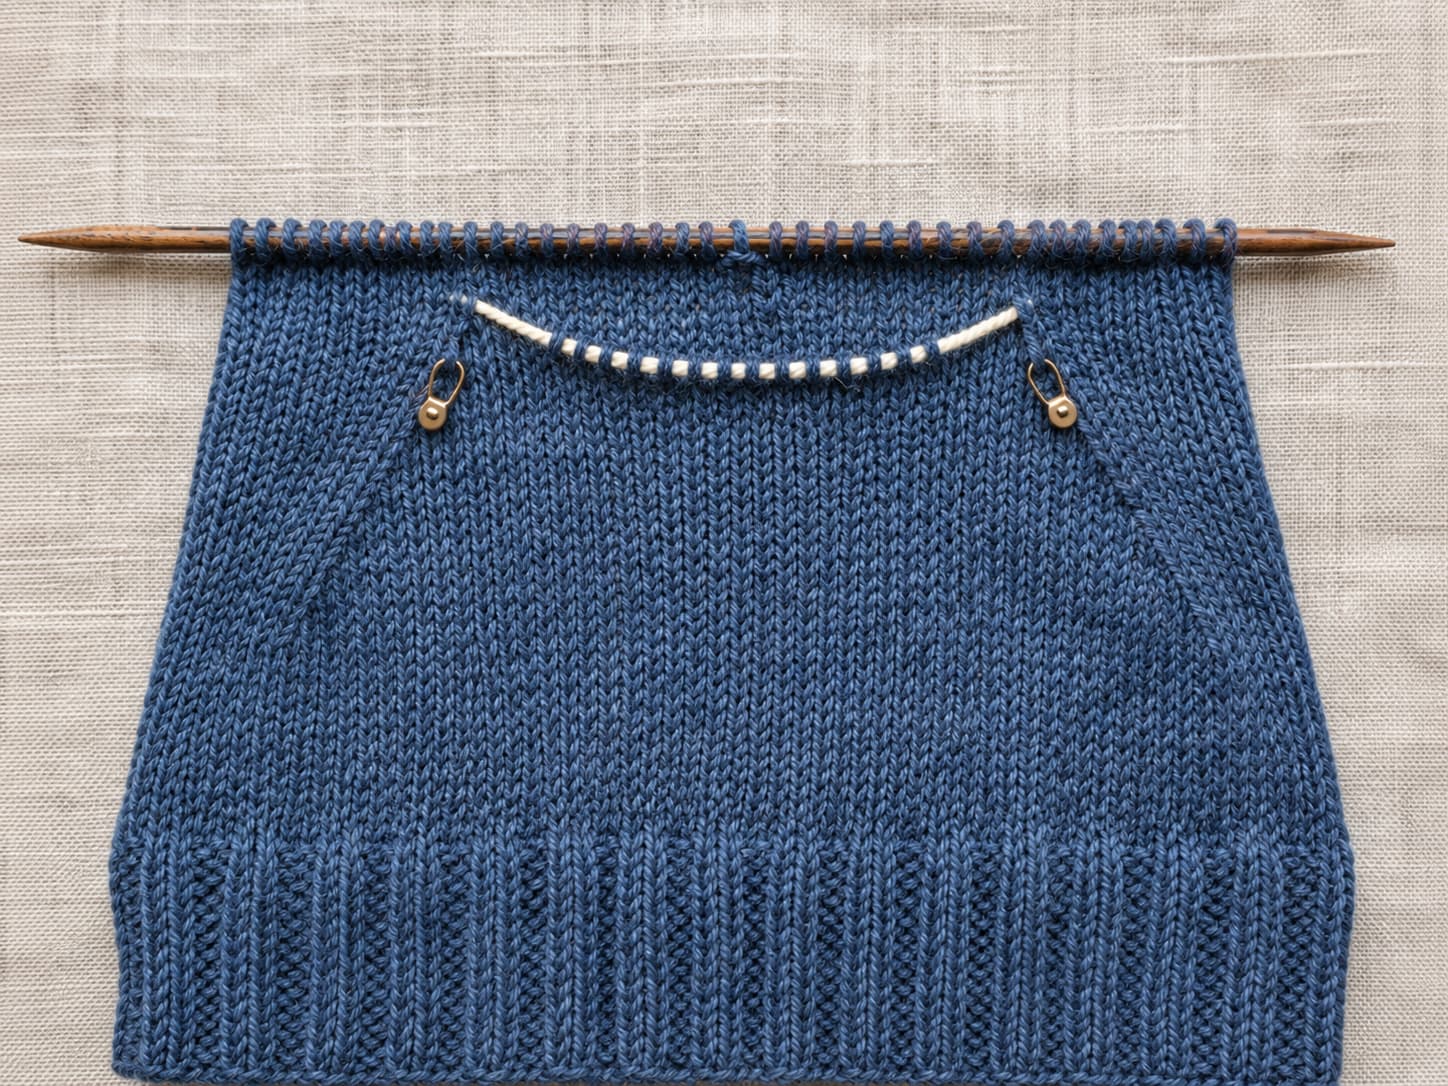
Hand above the thumb
Top ribbing
Thumb — work flat
5. Assembly and Finishing
Block first: Block each flat piece according to the yarn fiber and care label. Let it dry fully before seaming so the edges lie flat and the stitches settle.
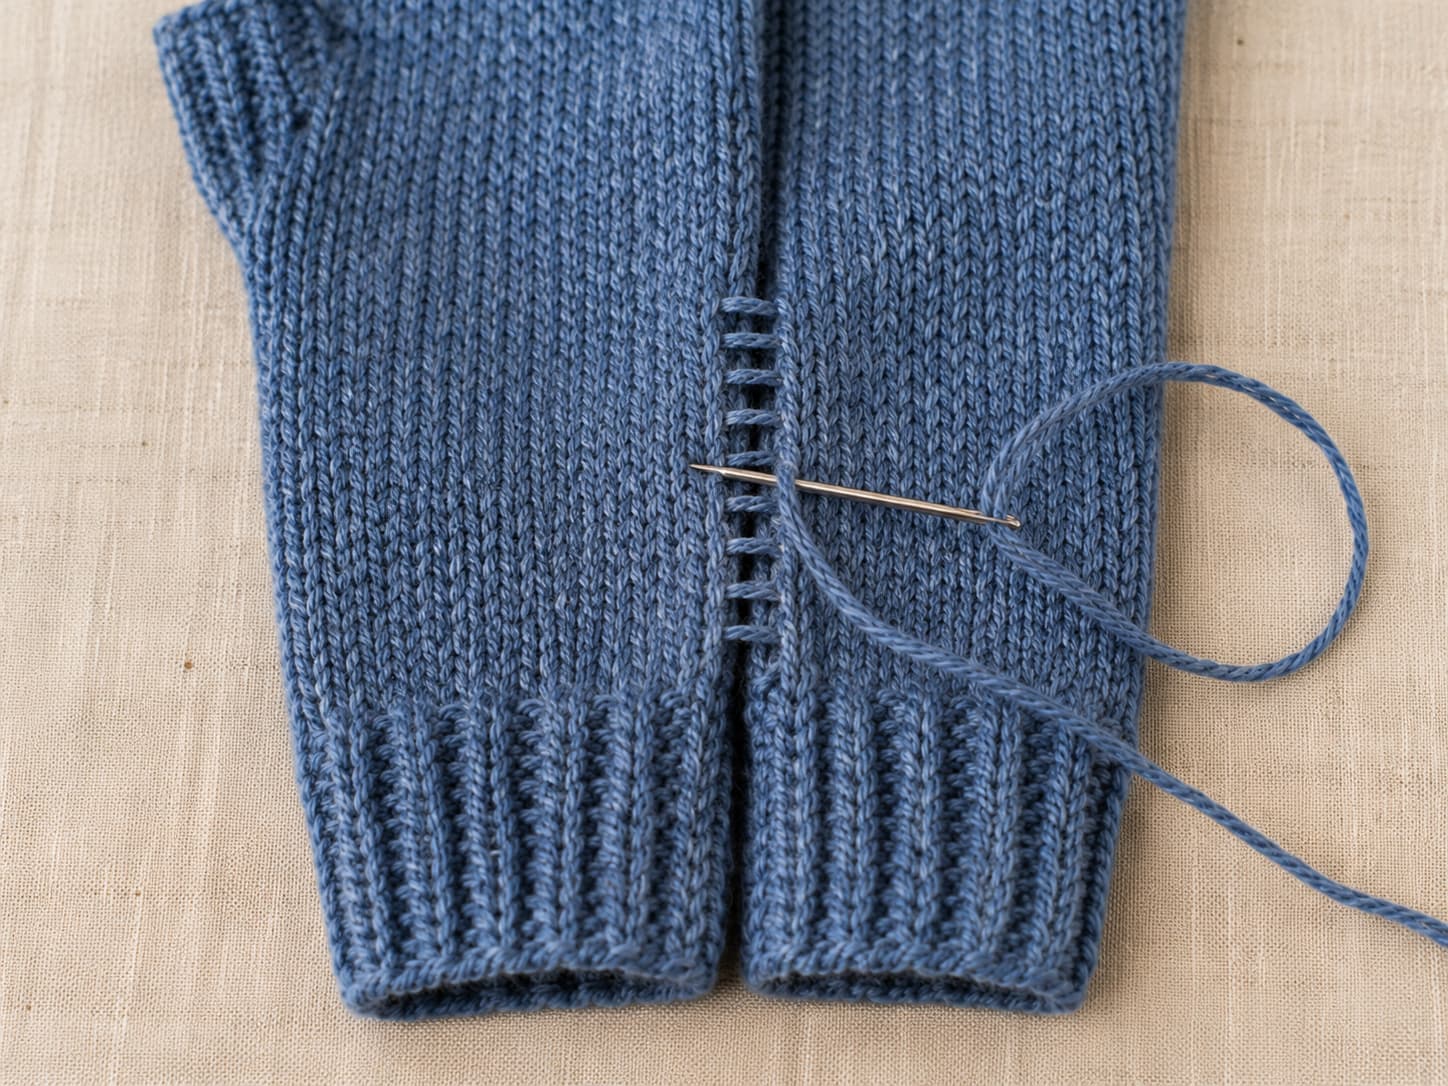
Seam the thumb: With the right side facing you, bring the two thumb edges together and use mattress stitch from the base of the thumb to the ribbed top. Keep the seam firm enough to close the gap but elastic enough to stretch comfortably.
Seam the hand: Fold the mitt so the thumb sits along one outside edge and the remaining long edges meet on the opposite side. With the right side facing, work mattress stitch through the bars between the first and second stitches of each edge. For the second mitt, mirror the fold so the thumb points to the opposite side.
Weave ends: Weave each tail through the wrong-side purl bumps in more than one direction before trimming. Fingerless mitts get frequent wear, so leave enough woven length for a secure finish.
6. Troubleshooting
- M1 increases are too tight. If the gusset puckers, deliberately relax the yarn after forming each M1. The increase should be firm enough to avoid a hole but not tighter than the surrounding stitches.
- You lose track of RS and WS. Stockinette has smooth V-shaped stitches on the RS and purl bumps on the WS. Clip a removable marker near the RS edge if you need a quick reminder.
- The gusset stitch count drifts. There are six increase rows in total, producing 13 stitches between the markers. Count the gusset after every RS increase row: 3, 5, 7, 9, 11, 13.
- Holes appear beside the thumb. Pick up from secure edge strands and twist a loose picked-up stitch through the back loop on the next row if a small corner gap remains.
- The seam is stiff. Mattress stitch should close the edge without drawing the fabric into a ridge. Stretch the seam gently every few inches while you work.
- Both mitts point the same way. The flat pieces are identical; the mirror image is created during finishing. Fold the second mitt in the opposite direction before seaming so the thumbs sit on opposite outer edges.
7. Practice Tips and Variations
- Make a mini gusset swatch first. Practice M1L and M1R on a small stockinette sample before using them in the mitt.
- Count the gusset after every increase row. The visible sequence 3 → 5 → 7 → 9 → 11 → 13 makes mistakes easy to catch early.
- Try the flat piece on before seaming. Use removable pins or locking markers to temporarily close the long seam and check thumb position and overall length.
- For a longer cuff, add ribbing rows in pairs. This changes wrist length without affecting the hand shaping.
- For shorter finger coverage, remove stockinette rows above the thumb. Keep the six top-ribbing rows so the edge remains stretchy and finished.
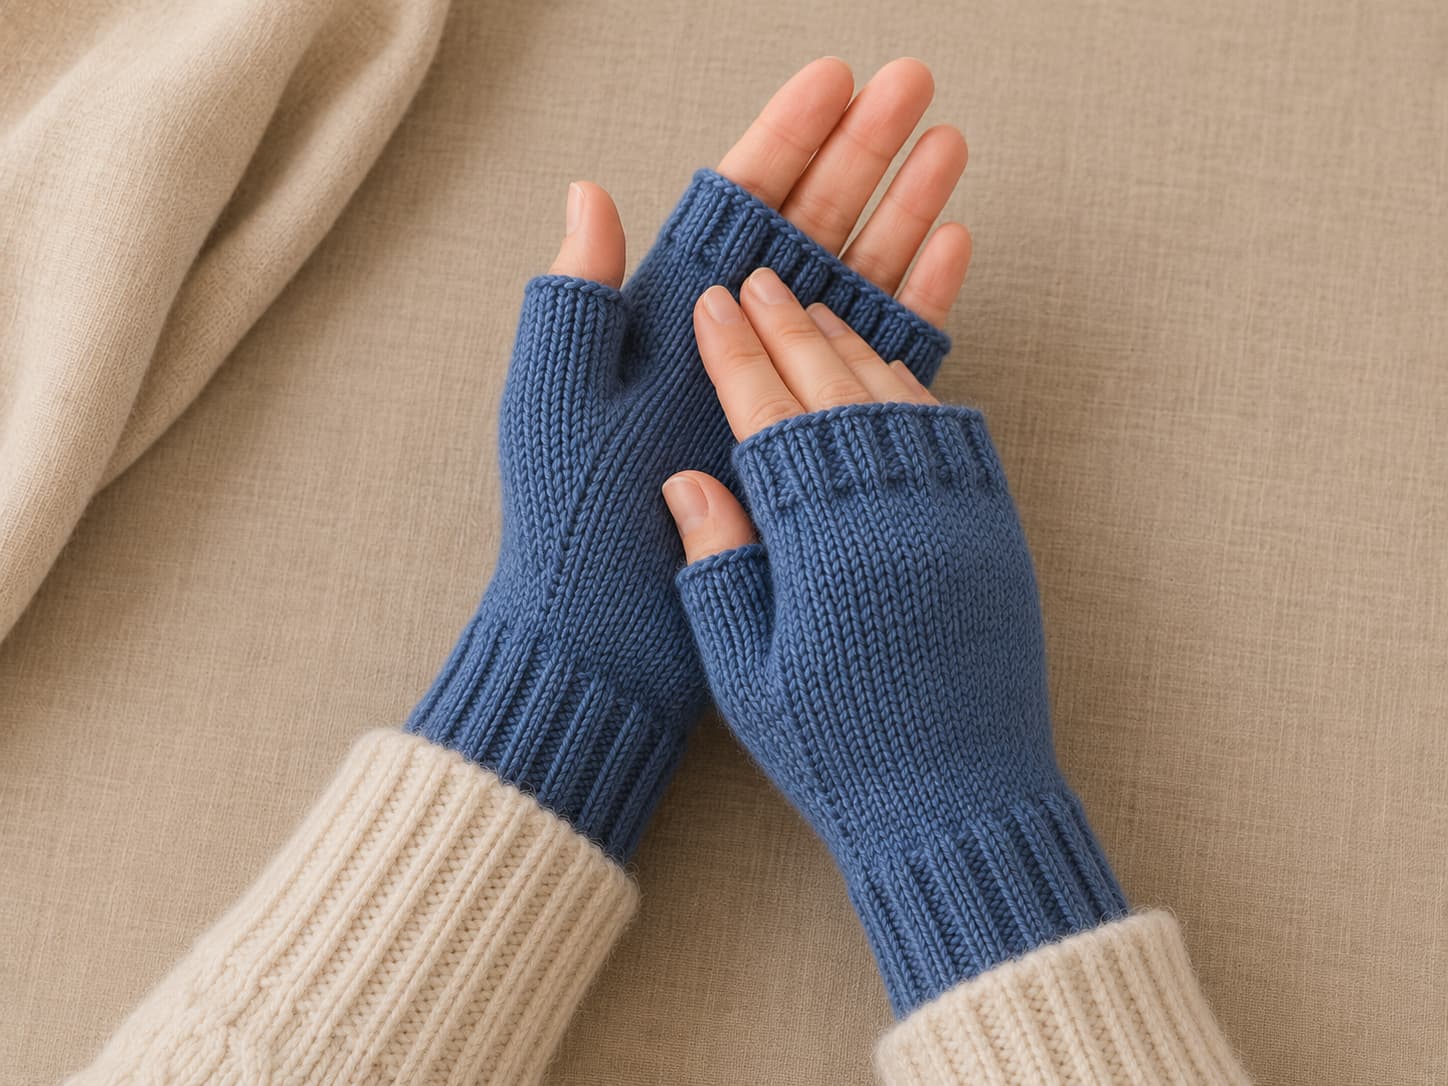
Color variation: A heathered denim blue gives clear stitch definition while staying soft and wearable. Warm oatmeal, muted rust, forest green, or soft charcoal also work well. For a first pair, avoid a yarn whose color changes hide the gusset lines.
8. Next Steps
- How to Knit for Beginners — review knit, purl, tension, and basic finishing.
- How to Read Knitting Patterns — understand abbreviations, gauge, and pattern structure.
- Easy Knit Hat Pattern — build on ribbing and shaping while learning to knit in the round.
- Yarn Weights Guide — compare yarn thickness and substitution choices.
- Crochet Hooks & Knitting Needles Guide — choose the right needle type and size.
9. Frequently Asked Questions
1. Can I knit these mitts in the round instead of flat?
Yes. Use the same cast-on count, join without twisting, and work the cuff in 2x2 ribbing. Work the hand in stockinette by knitting every round. Keep the same thumb-gusset increase logic, placing the increases every other round. Hold the 13 thumb stitches, cast on one bridge stitch, and continue the hand in the round. Work the thumb on double-pointed needles, a short circular, or magic loop.
2. What if I do not have US 7 (4.5 mm) needles?
Use the needle size that gives you the pattern gauge of 20 stitches and 28 rows over 4 inches in stockinette. A smaller needle may create a denser, smaller mitt; a larger needle may create a looser, larger mitt. Swatch first and change needle size rather than changing the cast-on count unless you are intentionally resizing the pattern.
3. How do I make the mitts longer or shorter?
Add or remove stockinette rows in the hand section above the thumb. At the stated row gauge, about seven rows change the length by roughly one inch. You can also add or remove cuff-ribbing rows. Keep the thumb-gusset stitch counts unchanged unless you are also changing the hand circumference.
4. Why does my M1R look tighter than my M1L?
M1R often feels tighter because the lifted strand is twisted in the opposite direction. Work the increase deliberately and avoid pulling the working yarn tight after forming it. A small tension difference usually evens out with blocking.
5. Can I use a different yarn weight?
Yes, but changing yarn weight changes gauge and therefore the finished size. The safest method is to choose a yarn that can produce a comfortable fabric at 20 stitches per 4 inches. For a different gauge, recalculate the cast-on from your hand circumference and keep the total stitch count compatible with the 2x2 ribbing.
6. What should I make after these fingerless mitts?
A simple knit hat is a natural next project because it builds on ribbing and shaping while introducing knitting in the round and decreases. You can also practice texture and edge finishing with a knitted dishcloth or return to a scarf for more stockinette and ribbing practice.
Put Your Mitts to Work
Your first pair of fingerless mitts is more than a small accessory. It is proof that you can shape knitted fabric, manage a thumb gusset, pick up stitches, and finish a fitted project neatly. Wear the pair for a few days, notice what you would change, and use those notes when you knit the next pair.
Get the free Fingerless Mitts Pattern PDF
A printable, ad-free copy with both sizes, the corrected stitch-count sequence, and a compact thumb-gusset checklist.
Free download. Unsubscribe anytime.