Easy Knit Scarf Pattern: Your First Wearable Project
Knit a soft two-color garter-stitch scarf with broad stripes, a tidy
slipped-stitch edge, optional fringe, and measurements that let you adjust
the width and length without complicated shaping.
Written by Sophie Lane•Published •About 15 minutes to read
Repeat one calm row until it becomes a scarf you can wear
This easy knit scarf pattern is worked flat in garter stitch,
using the knit stitch on every row. There is no shaping, increase,
decrease, or purling. The project adds only two techniques beyond the
beginner washcloth: a slipped-stitch selvedge for a cleaner side edge and
simple color changes for broad stripes.
A scarf is longer than a first washcloth, so the goal is not speed. The
value of the project is repetition: you practise turning the work, reading
the first and last stitch, maintaining 30 stitches, joining yarn, and
keeping a steady rhythm over many short sessions.
The sample uses two coordinating #4 yarns and U.S. 9 / 5.5 mm needles.
The finished dimensions are flexible, but the instructions target a scarf
approximately 7–7½ inches wide and 60 inches long before fringe.
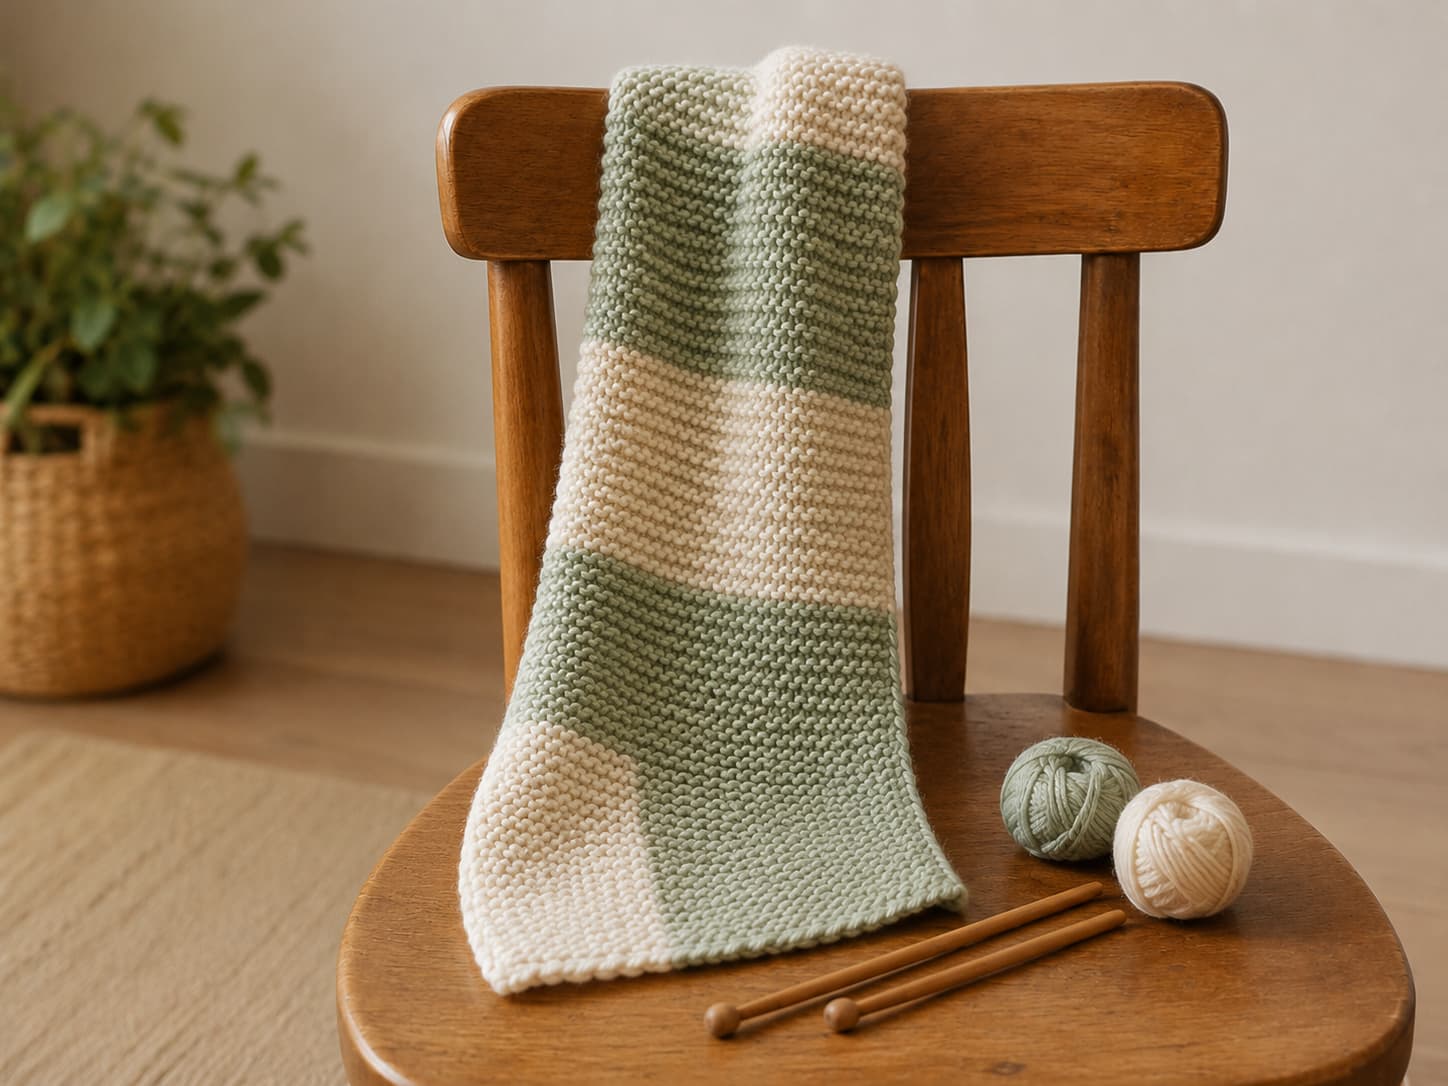
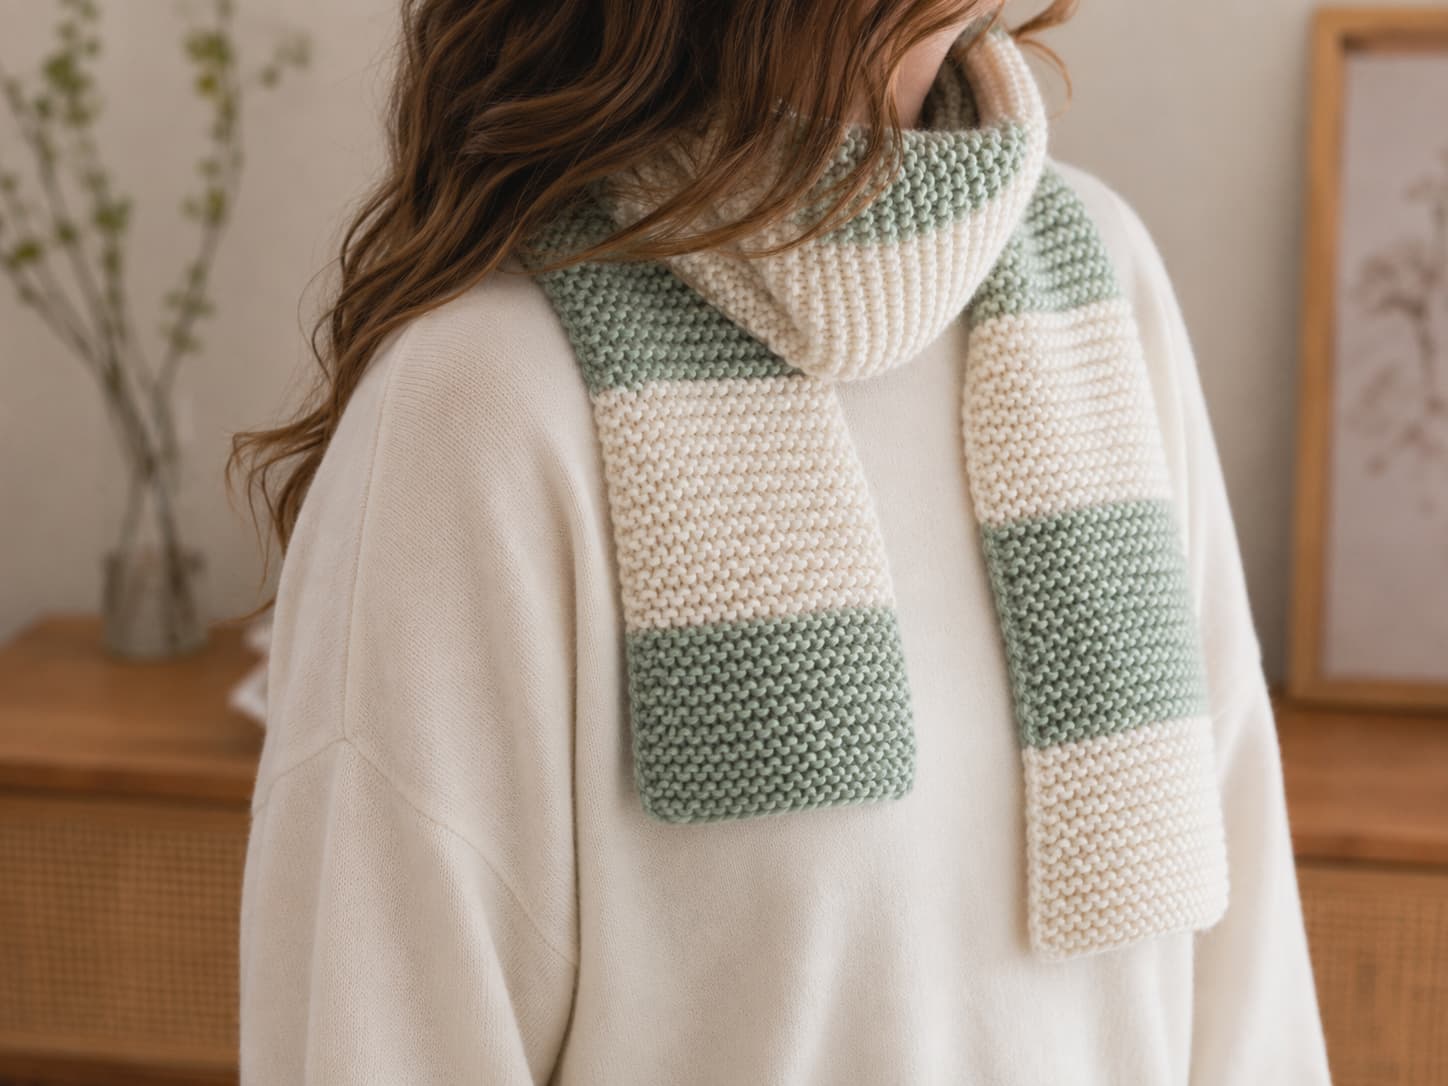
Broad cream-and-sage stripes and simple garter stitch turn one repeated
row into a wearable beginner knitting project.
Skill levelBasic / confident beginner
Requires cast on, knit stitch, turning rows, and bind off.
Main fabricGarter stitch
Knit every row for a reversible fabric that naturally lies flat.
Finished sizeApprox. 7–7½ × 60 in
About 18–19 × 152 cm before optional fringe.
Yarn450–550 yd total
Use two smooth #4 colors with compatible care instructions.
NeedlesU.S. 9 / 5.5 mm
Straight or circular needles can both be used for flat knitting.
Typical beginner time18–30 hours
Best divided into short, repeatable sessions.
On this page
Materials
Choose yarn that feels comfortable for hundreds of repeated rows
A scarf sits against the neck and takes many hours to knit. Choose a yarn
that feels pleasant against your skin, moves smoothly over the needles,
and can be cared for in a way that suits the intended wearer.
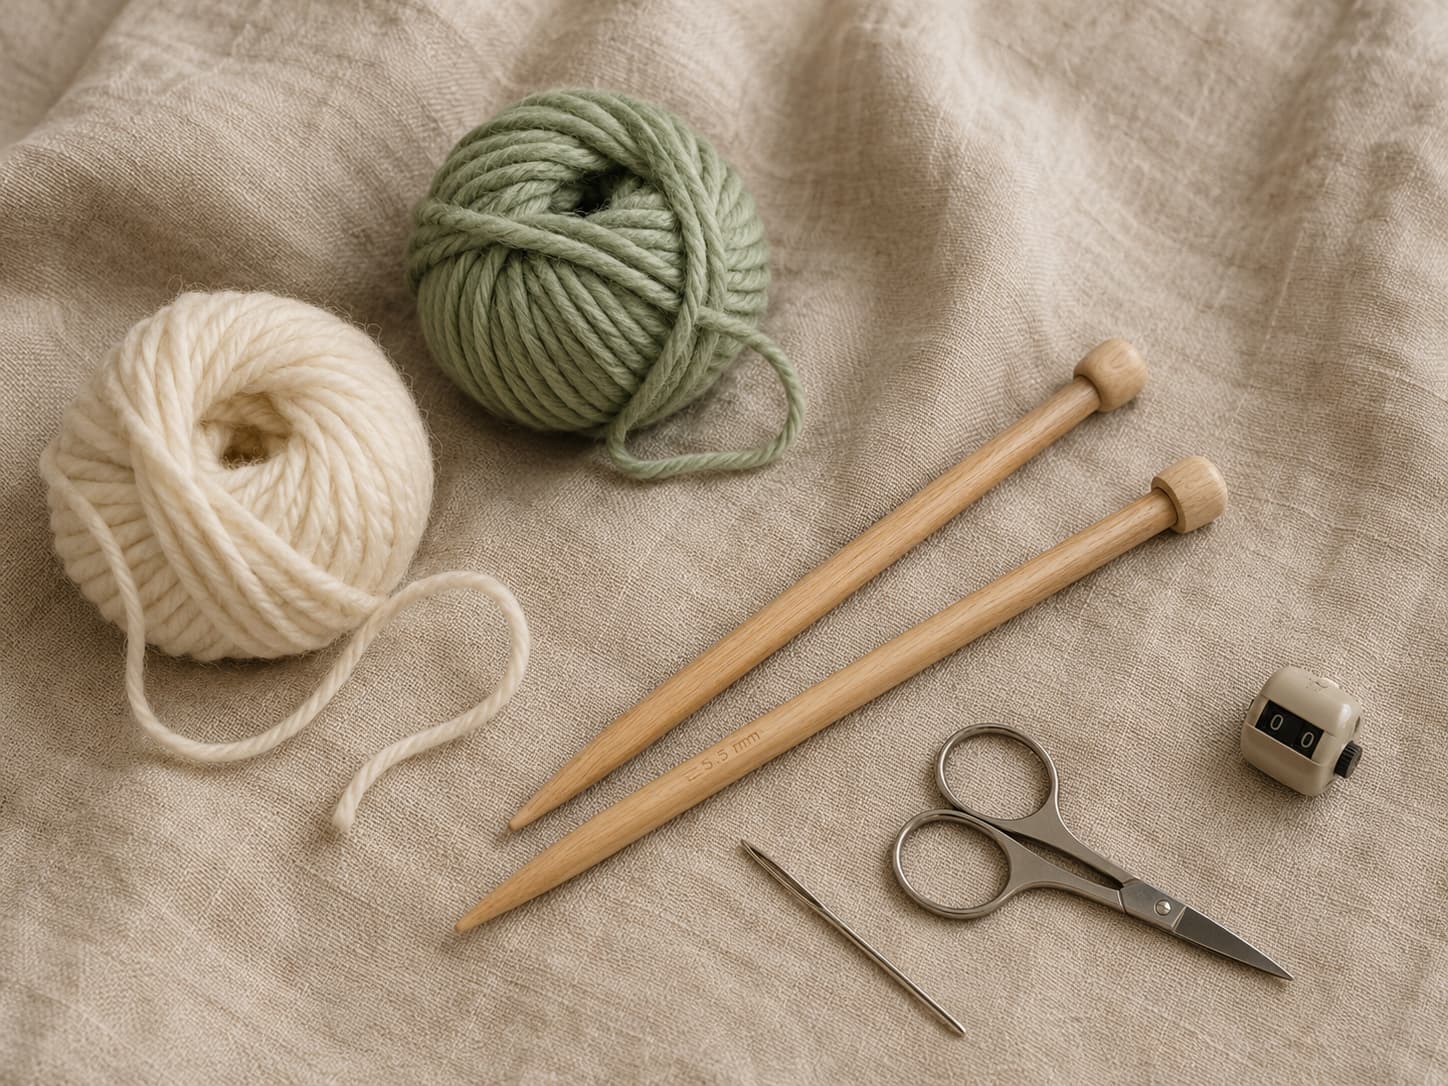
Smooth worsted yarn, comfortable 5.5 mm wooden needles, and a few essential
notions are all you need to knit and finish this beginner scarf.
Two colors of #4 yarn
Use approximately 225–275 yd (205–250 m) of each color, or
450–550 yd total. Smooth wool, washable wool blend, or soft acrylic
works well. Buy both colors with the same fiber content, weight,
meterage style, and care instructions when possible.
U.S. 9 / 5.5 mm needles
Straight or circular needles both work. A 60 cm circular needle is
still used flat: knit across, turn, and knit back. Wood provides more
grip; metal allows faster movement after your tension becomes steady.
Tapestry needle and scissors
Use a blunt yarn needle for weaving tails through garter ridges and
sharp craft scissors for trimming only after the ends are secure.
Row counter and tape measure
Count stripe rows with a clicker, app, or paper tally. Measure the
scarf relaxed on a flat surface rather than stretching it along the
tape.
Before casting on
Check the width before committing to a full-length scarf
Gauge is flexible for a scarf, but a small swatch prevents a surprise
width. Cast on 22 stitches and work at least 24 garter rows. Wash and dry
the swatch according to the yarn label when the finished scarf will also
be washed that way.
If the swatch is too narrow
Use a larger needle or cast on more stitches. At 4 stitches per inch,
adding 4 stitches adds about 1 inch of width.
If the swatch is too wide
Use a smaller needle or cast on fewer stitches. Keep the new stitch
count large enough to preserve a comfortable scarf width.
Complete pattern
The First Striped Scarf: full written instructions
Read the complete pattern once before casting on. Place a locking marker
on one face after the first few rows so you can consistently treat that
side as the right side, even though garter stitch is reversible.
Knitsoul free pattern
The First Striped Scarf
Skill levelBasic / confident beginner
Finished sizeApprox. 7–7½ × 60 in (18–19 × 152 cm)
Yarn450–550 yd (410–505 m) total #4 yarn
NeedlesU.S. 9 / 5.5 mm
Gauge target16–18 sts and 28–32 rows per 4 in
Beginner timeApprox. 18–30 hours
Abbreviations:
CO = cast on · k = knit · sl 1 wyif = slip one stitch purlwise
with yarn in front · st(s) = stitch(es) · BO = bind off.
See the
Knitsoul abbreviation reference
for additional terms.
With Color A, CO 30 sts using the long-tail cast on.
Setup Row: Knit every stitch across. Turn.
Regular Scarf Row: Sl 1 wyif, move yarn between
the needles to the back, k to end. Turn.
Continue the Regular Scarf Row until the Color A section contains
40 completed rows total, including the Setup Row.
Join Color B at the beginning of the next row,
leaving a tail of at least 6–8 in (15–20 cm).
Knit the first stitch instead of slipping it on this first
new-color row, then knit to the end.
Beginning with the following row, resume the Regular Scarf Row.
Work Color B until that block contains 40 rows.
Alternate 40-row blocks of Colors A and B. At the first row of every
new block, knit the first stitch with the new color; resume slipping
the first stitch on later rows.
Continue until the scarf measures approximately 59 in (150 cm),
then work with the current color until it reaches about 60 in
(152 cm) or the preferred finished length.
BO all sts knitwise and loosely. Cut the yarn, leaving a tail of at
least 6–8 in (15–20 cm), and pull it through the final loop.
Weave in every tail, block according to the yarn label, and add
optional fringe after the scarf is completely dry.
Technique 1
Create a quieter side edge by slipping the first stitch
Slipping the first stitch of most rows elongates the edge loop across two
rows and forms a chain-like selvedge. The technique does not correct an
inconsistent stitch count, but it reduces the bumpy appearance that can
develop when every edge stitch is knitted.
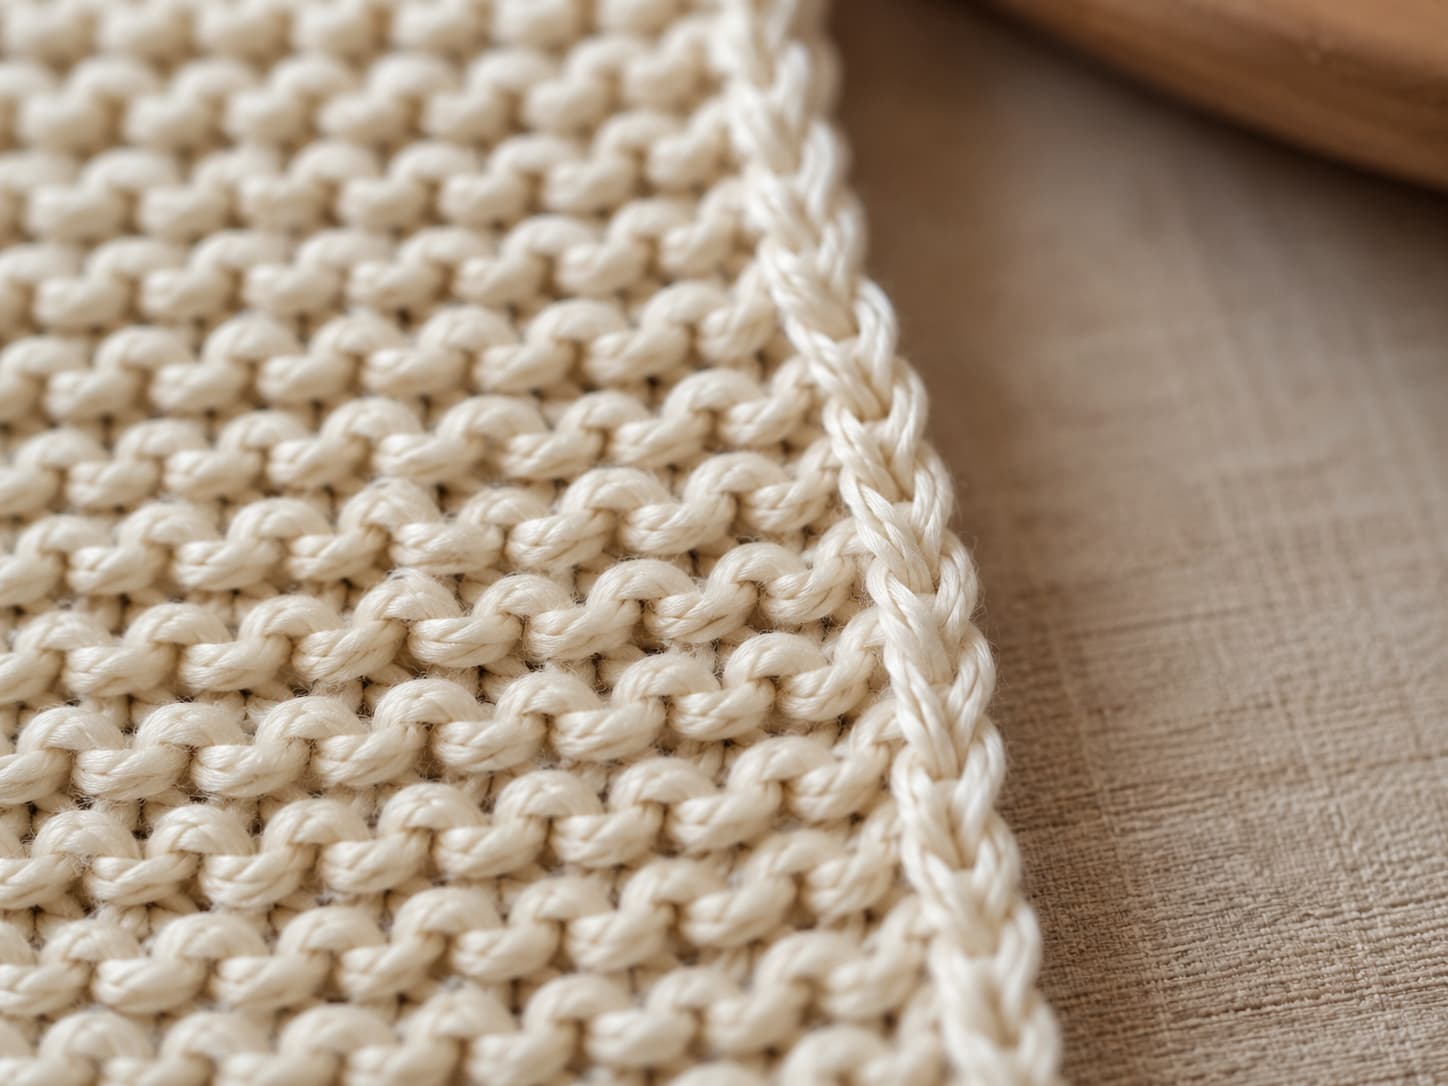
Slipping the first stitch purlwise creates a neat, chain-like selvedge
along the side of a garter-stitch scarf.
1
Keep the yarn in front. At the beginning of a
regular row, make sure the working yarn hangs in front of the needles.
2
Slip the first stitch purlwise. Insert the right
needle from right to left as if to purl, then move the stitch to the
right needle without wrapping yarn.
3
Move the yarn between the needles. Bring it to the
back without passing it over a needle, which would create a yarn over.
4
Knit across. Work every remaining stitch and avoid
pulling the second stitch tight against the slipped edge.
Technique 2
Join a new color without knots or a loose first loop
Broad 40-row blocks keep the number of color changes manageable. Cut the
previous color at each change rather than carrying an unused strand up a
long edge, which would create loose floats.
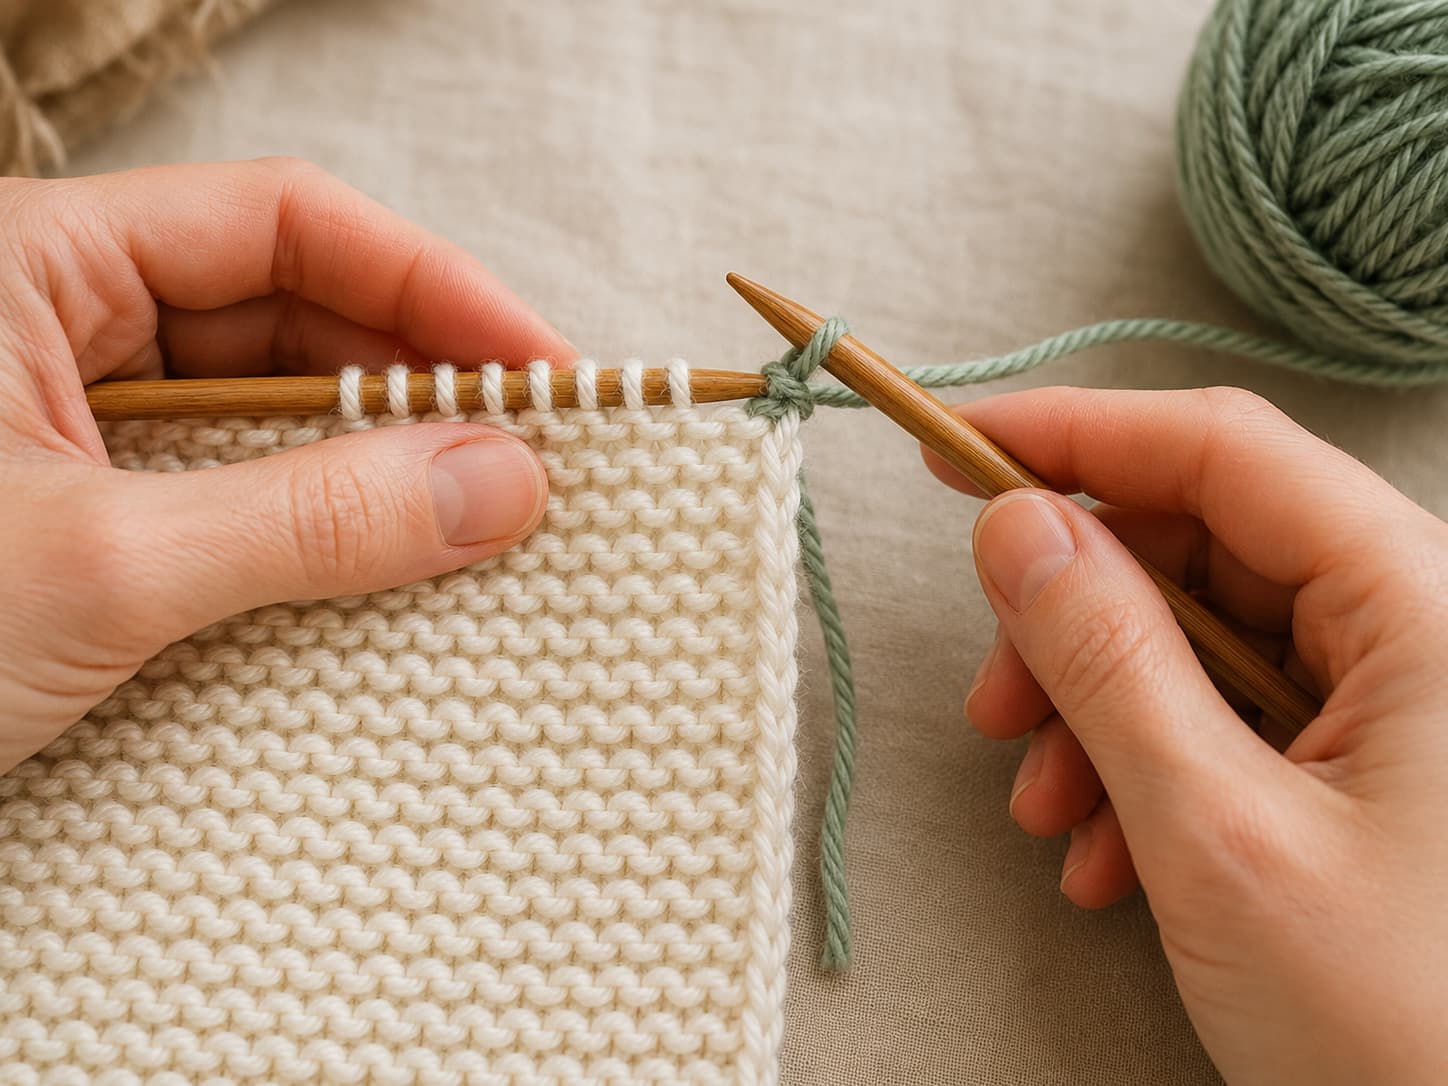
At the beginning of a new color block, knit the first stitch with the
sage yarn before returning to the slipped-stitch edge on later rows.
1
Finish the old-color row. Turn the work normally.
Cut the old yarn with a 6–8 in tail.
2
Leave a new-color tail. Hold a 6–8 in tail beside
the edge and use the strand connected to the ball as the working yarn.
3
Knit the first stitch. Do not slip the edge stitch
on this first new-color row. Knit it with the new yarn, then knit
every remaining stitch.
4
Secure without tightening. After several stitches,
gently adjust both tails so the edge closes without puckering.
Do not tie the colors together.
Finishing preparation
Weave each tail into the matching color block
Thread one tail onto a blunt tapestry needle. On the chosen wrong side,
follow the path of several garter bumps within the same color section.
Change direction once, pass through a few more loops, and trim only after
the tail remains secure when the fabric is gently stretched.
Finishing
Block the scarf according to the yarn label
Blocking relaxes the garter ridges, helps the width look consistent, and
prepares the ends for even fringe. The correct method depends on fiber
content, so the yarn label takes priority over a universal instruction.
1
Wash or wet as directed. For hand-wash wool or wool
blends, soak gently in cool or lukewarm water without agitation.
For washable fibers, follow the label's permitted method.
2
Remove water without wringing. Support the wet scarf,
roll it inside a clean towel, and press to remove excess moisture.
3
Shape it flat. Arrange the scarf at the intended
width and length without aggressively stretching the garter ridges.
Use rust-resistant pins only when needed.
4
Dry completely. Keep the scarf flat until no damp
areas remain, then remove pins and remeasure before adding fringe.
Optional finish
Add evenly spaced fringe after blocking
Fringe is optional. Add it after the scarf is dry so the final width is
stable and every tassel can be spaced evenly across both ends.
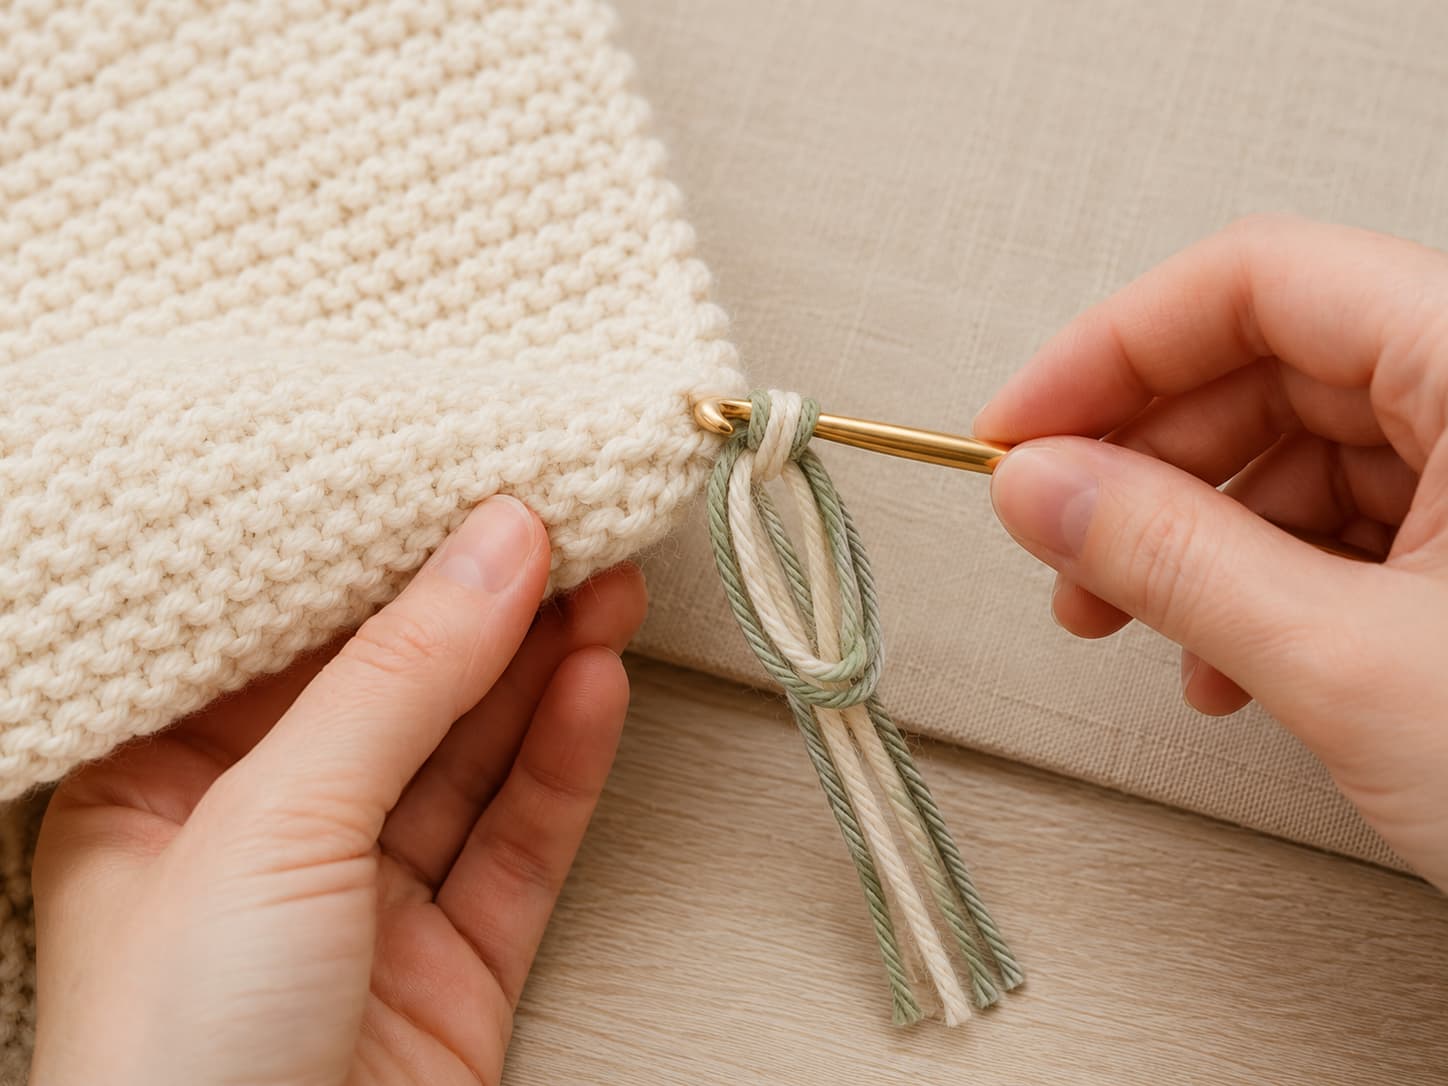
Add fringe after blocking so the strands stay even and are easier to trim.
1
Cut equal strands. For approximately 5 in fringe,
cut 11–12 in strands. Prepare about 30 strands per scarf end when
using two strands in each of 15 tassels.
2
Fold two strands together. Insert a crochet hook
through the scarf end and pull the folded center partway through.
3
Pull the four ends through. Tighten just enough to
seat the tassel without drawing the scarf edge inward.
4
Repeat and trim. Space 15 tassels across each end,
comb the strands with your fingers, and trim against a straight guide.
Customize it
Adjust the size or style without changing the core pattern
The finished scarf is long enough to wrap once around the neck while
leaving comfortable ends in front.
Solid-color scarf
Skip every color change and use approximately 450–550 yd of one yarn.
The slipped edge and finishing instructions remain unchanged.
Narrow scarf
At about 4 stitches per inch, cast on 24 stitches for approximately
6 inches. Confirm the actual width with your swatch.
Wider wrap-style scarf
Cast on 36–40 stitches for approximately 9–10 inches and increase the
yarn allowance proportionally.
Different block widths
Use 20-row blocks for smaller stripes or 60-row blocks for broad color
sections. Narrow stripes create more ends; wider blocks reduce finishing.
Color inspiration
Begin with two colors that have clear but gentle contrast
Cream and sage
Soft contrast with a natural, calm appearance.
Oatmeal and clay
Warm neutrals suited to autumn and handmade gifts.
Pale gray and charcoal
Higher contrast with an understated, versatile finish.
Troubleshooting
Six scarf problems to catch before they repeat for many rows
The stitch count changes
Count all 30 stitches at the end of every few rows and at each color
change. Extra stitches often come from accidental yarn overs or working
into both strands of a stretched first stitch.
The first stitch becomes very loose
Keep the second stitch relaxed but not distant from the edge. Do not
pull the first loop upward over the needle, which can distort it.
A color-change edge puckers
Loosen the new-color join and redistribute tension across the first
several stitches. The edge should remain as flexible as the center.
The two yarns feel different
Compare fiber, meterage, thickness, and washed swatches before combining
them. Similar label weights do not guarantee identical fabric.
The scarf is using yarn too quickly
Weigh the project and remaining yarn after one complete 40-row block.
That measurement gives a more useful estimate than an assumed number
of yards per row.
The bind-off edge is narrower
Bind off with the loops on the full needle shaft. When necessary, use
a needle one size larger for the final row and bind off.
Project pacing
Finish a long project through small visible milestones
Work in 20–30 minute sessions. Stop before hand fatigue
changes your tension. Persistent pain or numbness means it is time to rest.
Treat each color block as a milestone. Record the block
number and row count before putting the project away.
Keep yarn labels with the project. They preserve fiber,
color, dye-lot, meterage, and care information until the scarf is finished.
Weave ends during the project. Finish a previous block's
tails only after the new block is stable.
Measure every few blocks. Length is more reliable than
guessing from the number of stripes.
Continue learning
Add one new technique to the next small project
After this scarf, choose a project that introduces purling, ribbing,
seaming, or circular needles without adding all of them at once.
A realistic beginner estimate is approximately 18–30 hours. The scarf
contains many thousands of knit stitches, and time is also needed for
counting, correcting mistakes, changing colors, weaving ends, blocking,
and optional fringe. Short sessions over several weeks are usually more
comfortable than trying to finish it during one weekend.
2.How much yarn do I need for a 7-inch by 60-inch garter scarf?
Plan for roughly 450–550 yd (410–505 m) of #4 yarn in total. For two
balanced colors, allow approximately 225–275 yd of each. Actual use
changes with gauge, fiber, needle size, finished dimensions, and fringe,
so buy enough from the same dye lot when the yarn uses dye-lot labeling.
3.Can I knit the scarf in one color?
Yes. Use the same cast on, regular scarf row, length, bind off, and
finishing instructions without the color-change steps. A solid scarf
requires the full 450–550 yd in one color and produces fewer tails to
weave in.
4.Can I use circular needles even though the scarf is knitted flat?
Yes. Knit across the row, turn the work, and knit back just as you would
with straight needles. The cable supports the growing fabric and does
not require you to join the work in the round.
5.How many stitches should I cast on for a different scarf width?
Measure your washed swatch to find stitches per inch, then multiply that
number by the desired width. At 4 stitches per inch, 24 stitches makes
about 6 inches, 30 stitches makes about 7½ inches, and 36 stitches makes
about 9 inches. Confirm the result with your own gauge rather than
relying only on these examples.
6.Why is the first stitch knitted instead of slipped at a color change?
The new yarn needs to form and anchor a stitch. Slipping the first stitch
without working it can leave the new strand loose at the edge. Knit the
first stitch on the first row of a new color, then resume the slipped
selvedge on the following row.
7.How should I wash and store the finished scarf?
Follow the care instructions on the yarn label. Support the scarf when
wet, avoid wringing, and reshape it flat when required. Store it folded
rather than hanging for long periods, since the weight of a long scarf
can stretch the fabric.
You are ready
Let each stripe mark a little more confidence
A first scarf is not difficult because the row is complicated. It is
challenging because the same simple motion must stay steady over a much
longer project. Count the stitches, protect the edges, and allow the fabric
to grow one block at a time.
Cast on 30 stitches, knit the setup row, establish the slipped edge, and
finish the first 40-row block before thinking about the full 60 inches.
The completed scarf will show every practice session in a form you can wear.
Happy knitting, — Sophie
Editorial references
Standards checked for this pattern
Yarn-weight wording, needle sizing, project level, and abbreviations were
checked against the Craft Yarn Council reference pages. The final yarn
label and a tested physical sample remain the primary sources for care,
gauge, yardage, and finished dimensions.