Easy Crochet Throw Blanket Pattern: Garden Path for Beginners
Make a cozy throw with a simple four-row Garden Path repeat, straight edges, a soft sage border, and beginner-friendly finishing. The project is worked flat, so you can focus on stitch rhythm instead of shaping.
Written by Sophie Lane•Published •About 15 minutes to read
EasyU.S. crochet termsWorked flatBody target: about 48 × 60 in
Turn simple rows into an easy crochet throw blanket
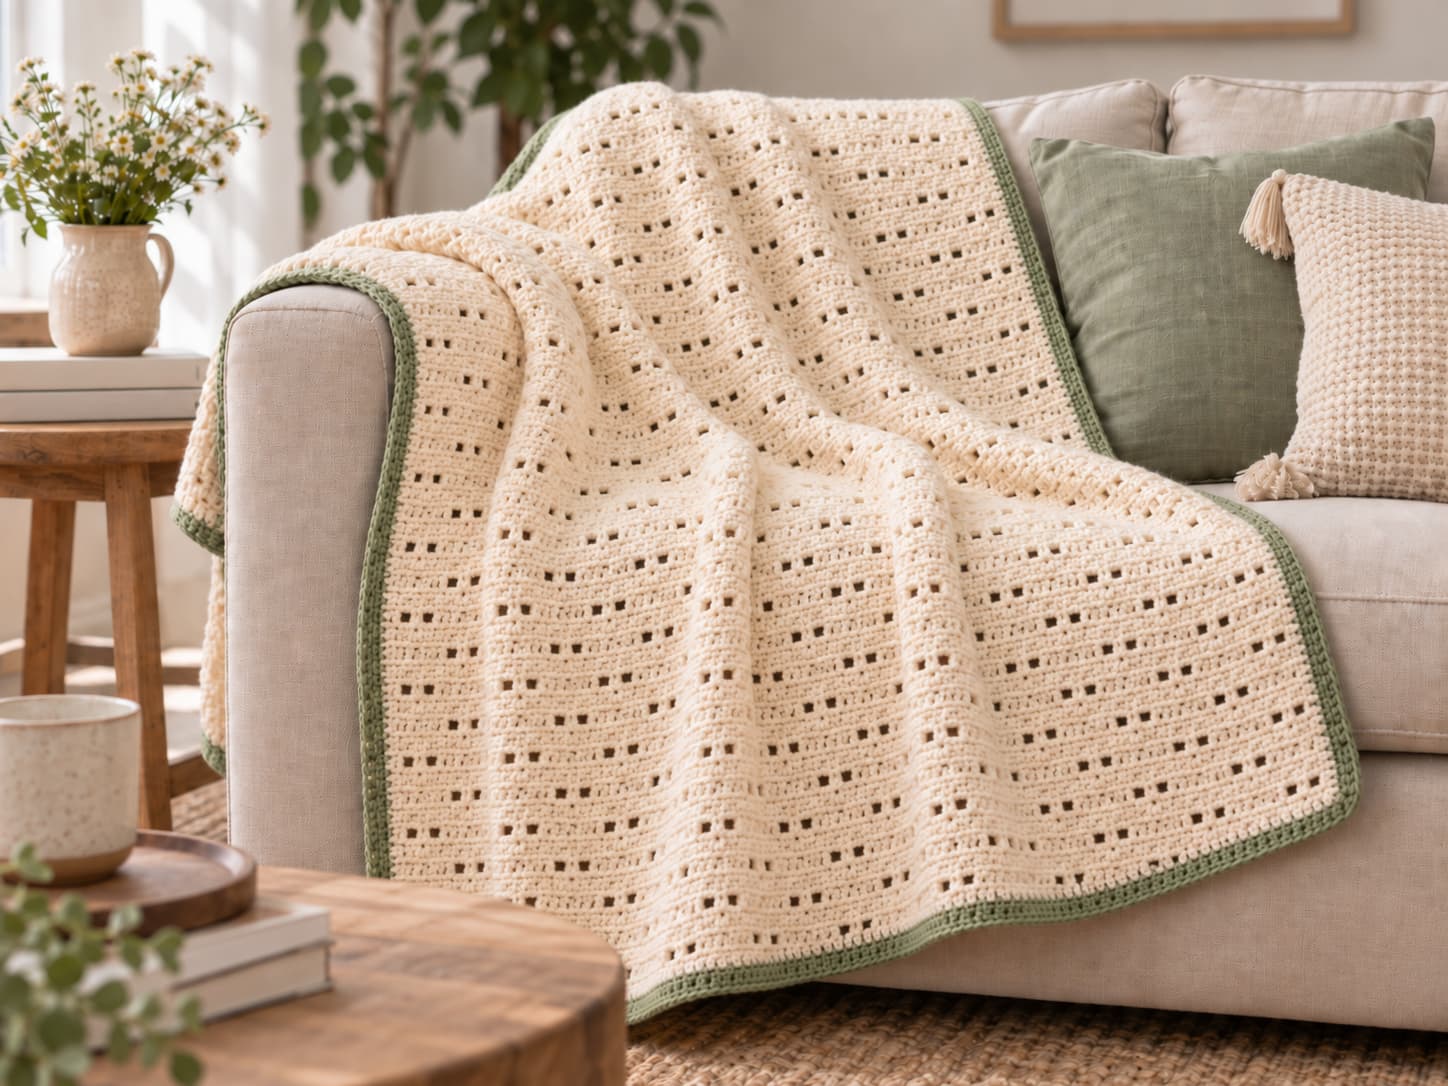
This easy crochet throw blanket is a flat rectangle built from single crochet and staggered chain-two spaces. Because there is no shaping, you can concentrate on even tension, straight edges, and the four-row Garden Path repeat. A single-crochet border in soft sage frames the warm cream body.
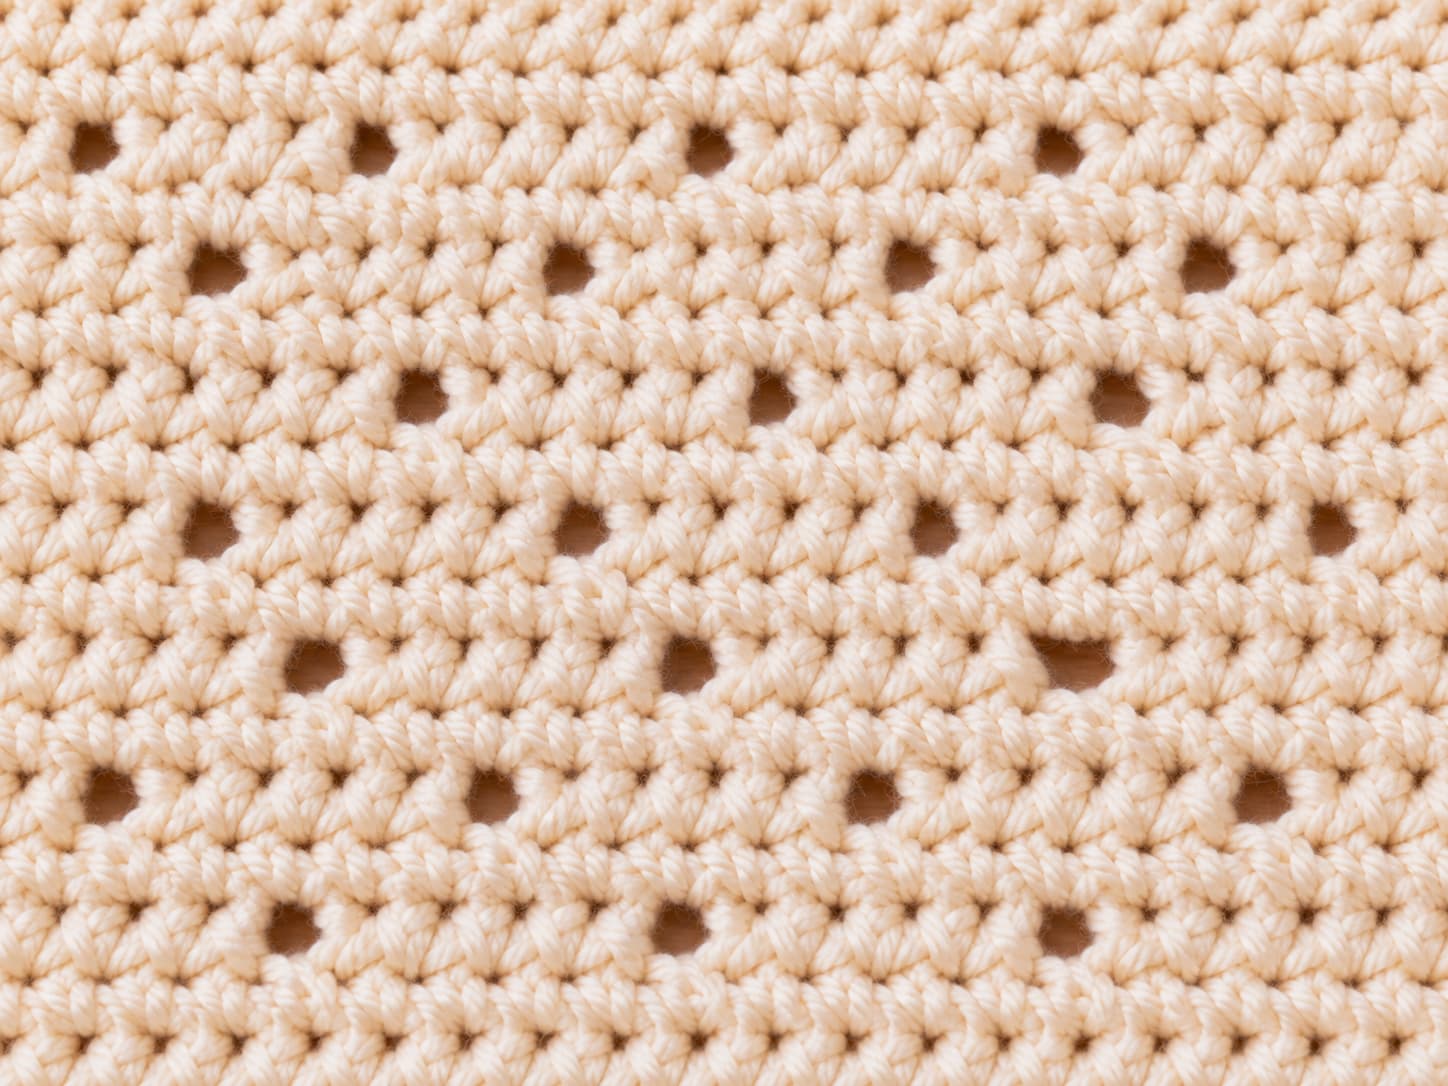
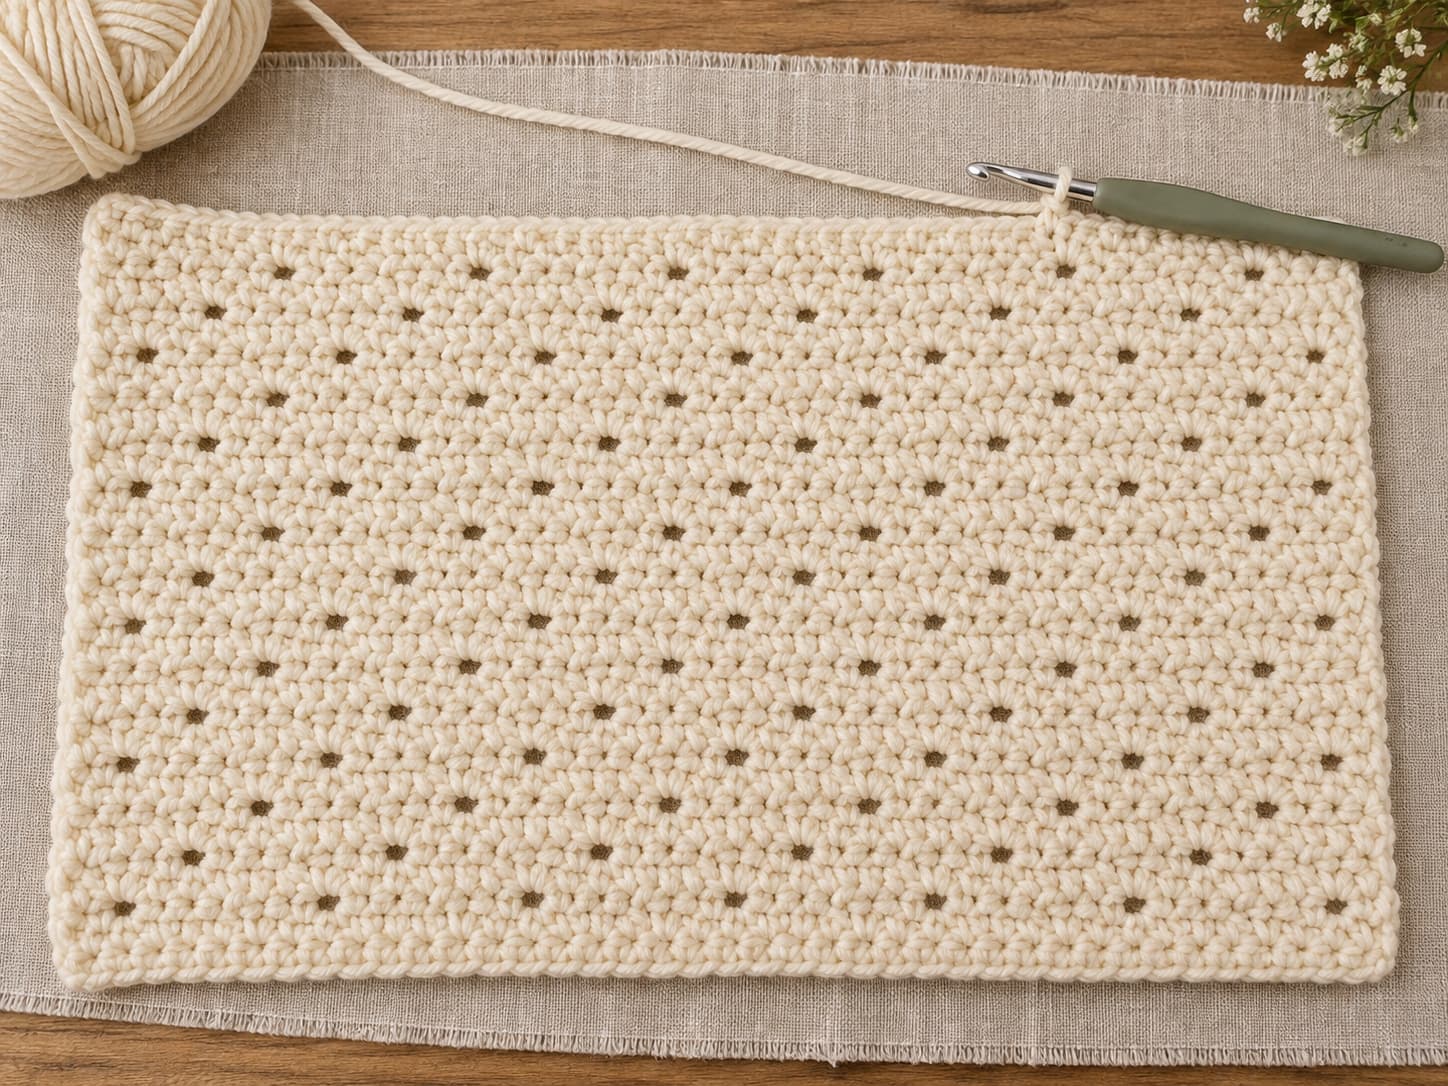
The Garden Path pattern alternates an openwork row with a solid single-crochet row. Then the next openwork row shifts the spaces sideways. As a result, the openings form a staggered path instead of vertical columns.
This easy crochet throw blanket uses warm cream for the body and soft sage for the border. Before you begin, check the yarn label, make a washed swatch, and confirm your gauge. That small step makes the finished size much easier to control.
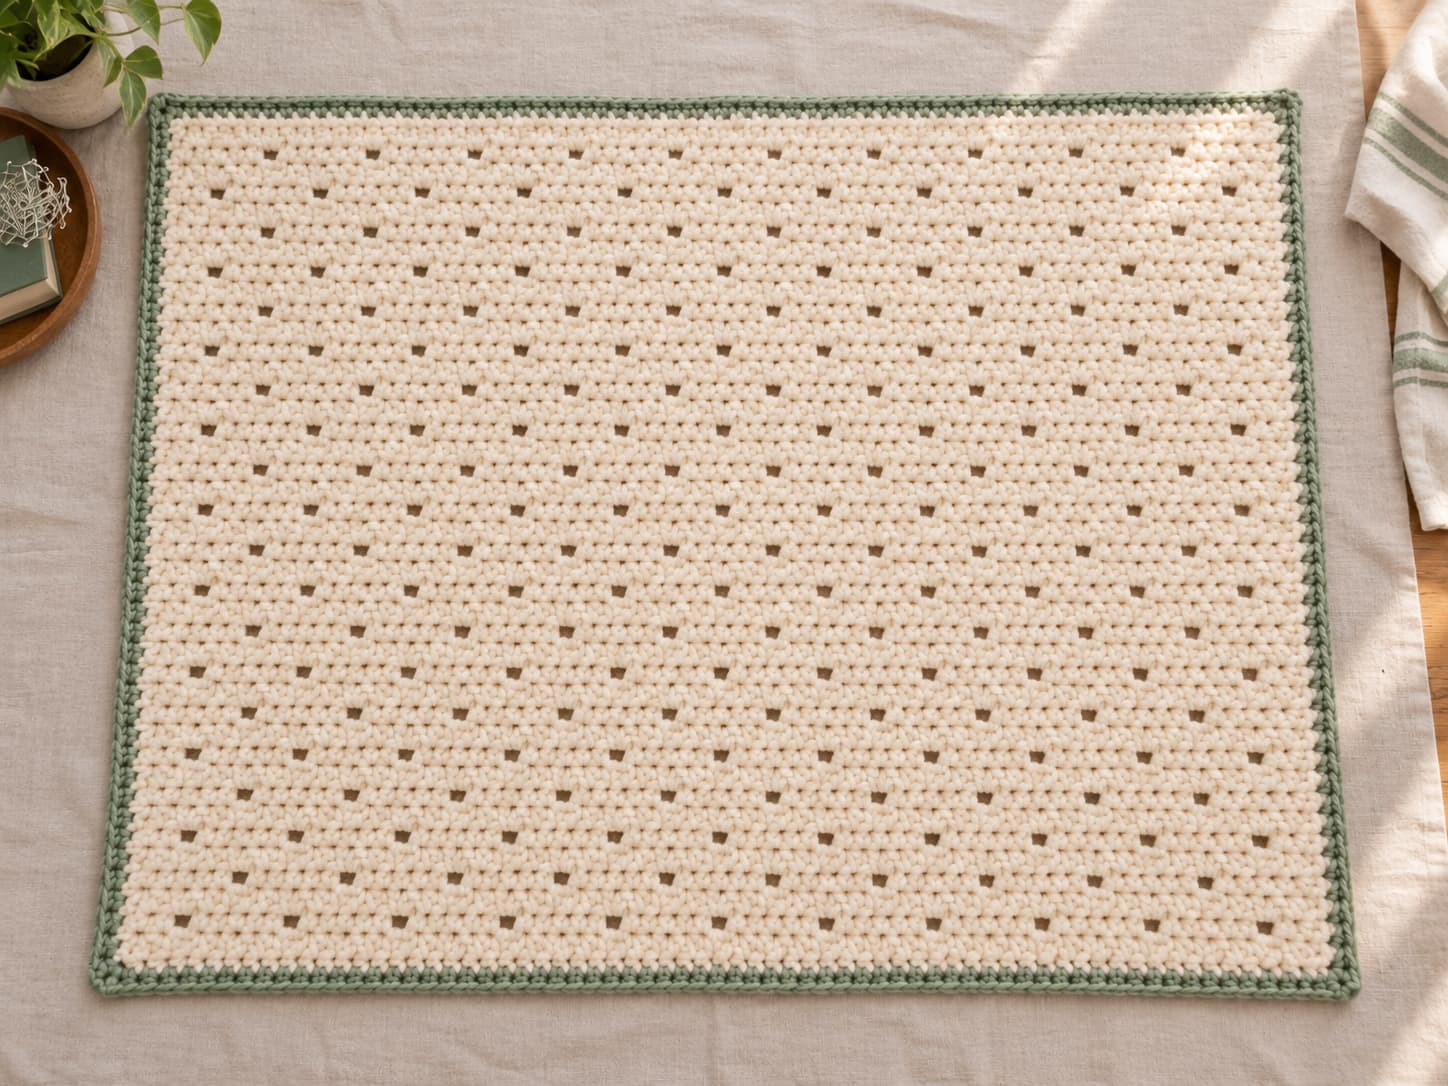
The finished Garden Path throw pairs a warm cream body with a soft sage single-crochet border.
Skill levelEasy
Chains, single crochet, and slip stitch.
YarnAbout 1200–1600 yd total
Worsted-weight cotton or cotton blend.
Hooks6.0 mm + 5.0 mm
Larger for the body, smaller for the border.
Gauge12 sts × 14 rows = 4 in
Measure the blocked Garden Path fabric.
Body targetAbout 48 × 60 in
122 × 152 cm before the border; finished size may be slightly larger.
Repeat4 rows
Two staggered openwork rows and two solid rows.
On this page
Construction map
Build the throw as one simple rectangle
1. Foundation
Chain 146 loosely. After the turning chain, you will have 145 working stitch positions for the Garden Path repeat.
2. Main fabric
Work the four-row repeat across the full width. Count 145 stitches on every solid row so you can catch errors early.
3. Sage border
After the easy crochet throw blanket reaches the target size, work one round of single crochet around all four edges. Place three single crochet in each corner.
4. Final blocking
Follow the yarn-care label, shape the blanket to finished dimensions, and let it dry flat before using it.
Materials and yarn
Choose smooth yarn so the Garden Path stays easy to read
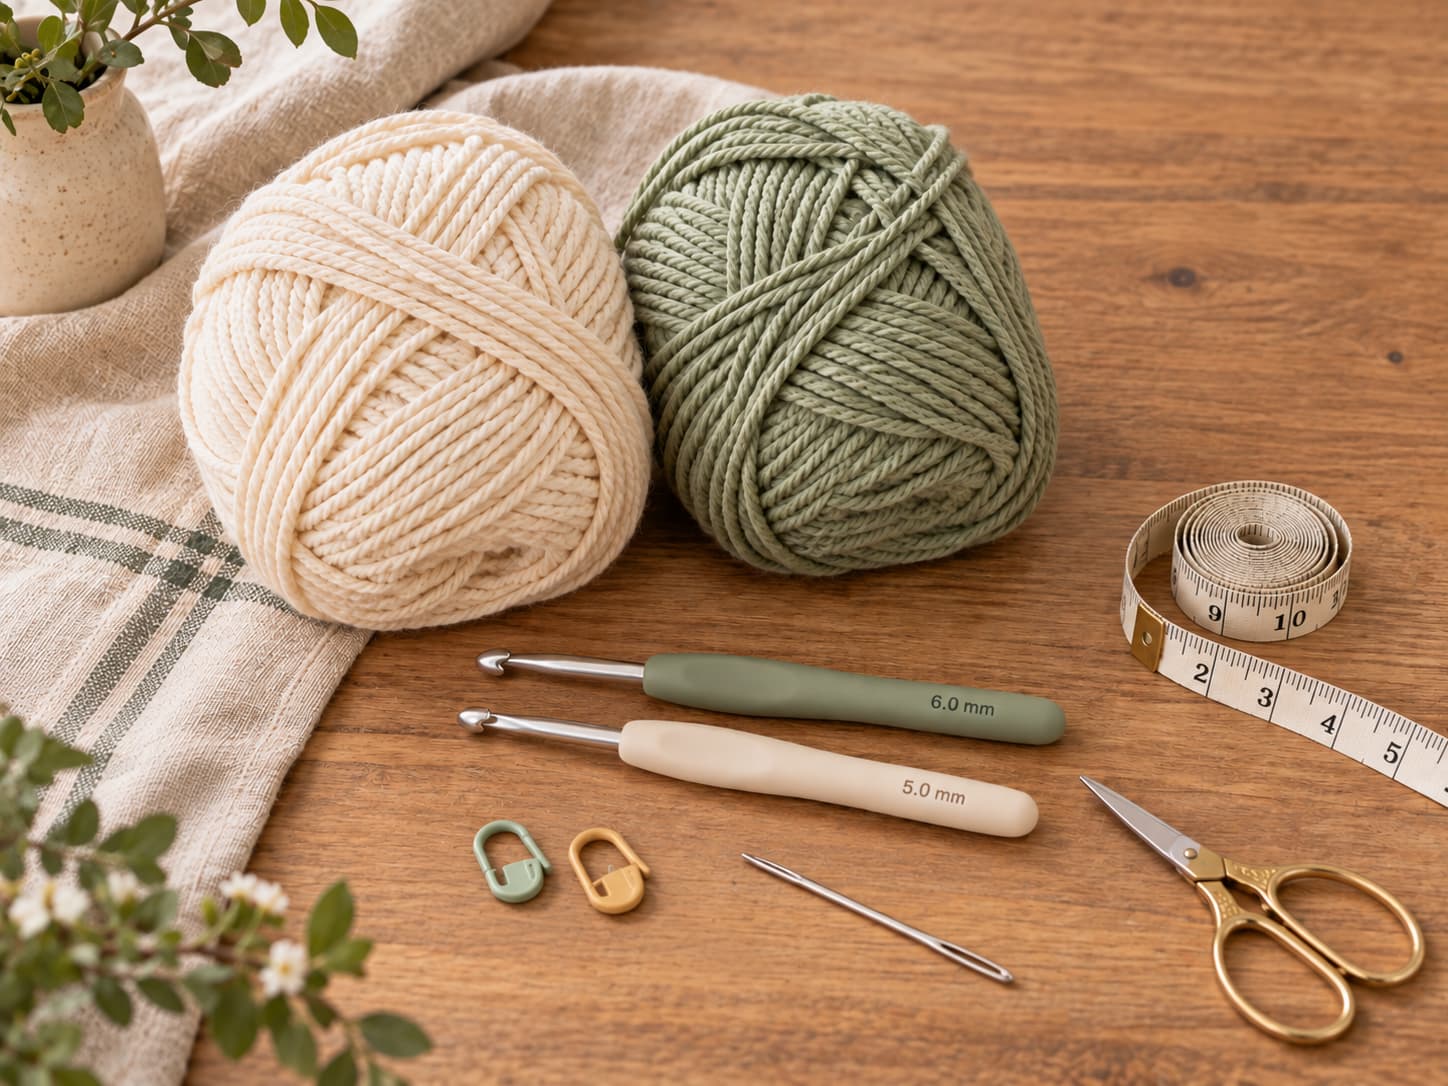
Prepare both yarn colors, two hook sizes, and the finishing tools before you swatch.
Item
Specification
Use
Body yarn
About 1000–1300 yd / 914–1189 m warm cream worsted
Choose a smooth CYC #4 worsted yarn that gives clear stitch definition. Cotton creates a substantial fabric, while a cotton-acrylic blend can add softness and easier care. However, fiber content changes drape and gauge, so always swatch the exact yarn you plan to use.
How much should you buy?
This easy crochet throw blanket uses an estimated 1000–1300 yards of the main color and 200–300 yards of the border color. In addition, buy enough from the same dye lot to cover your swatch and any optional tassels. Your actual usage can change with yarn, hook size, and tension.
Sizing and gauge
Swatch first, then size the blanket
Version
Target width
Target length
Foundation chain
Planning row count*
Lap blanket
36 in / 91 cm
48 in / 122 cm
110
About 168
Throw pattern
48 in / 122 cm
60 in / 152 cm
146
About 210
Twin-length throw
48 in / 122 cm
72 in / 183 cm
146
About 252
Wide throw
60 in / 152 cm
72 in / 183 cm
182
About 252
*Row counts are planning estimates based on the stated row gauge. Measure the actual blocked fabric before deciding when to stop.
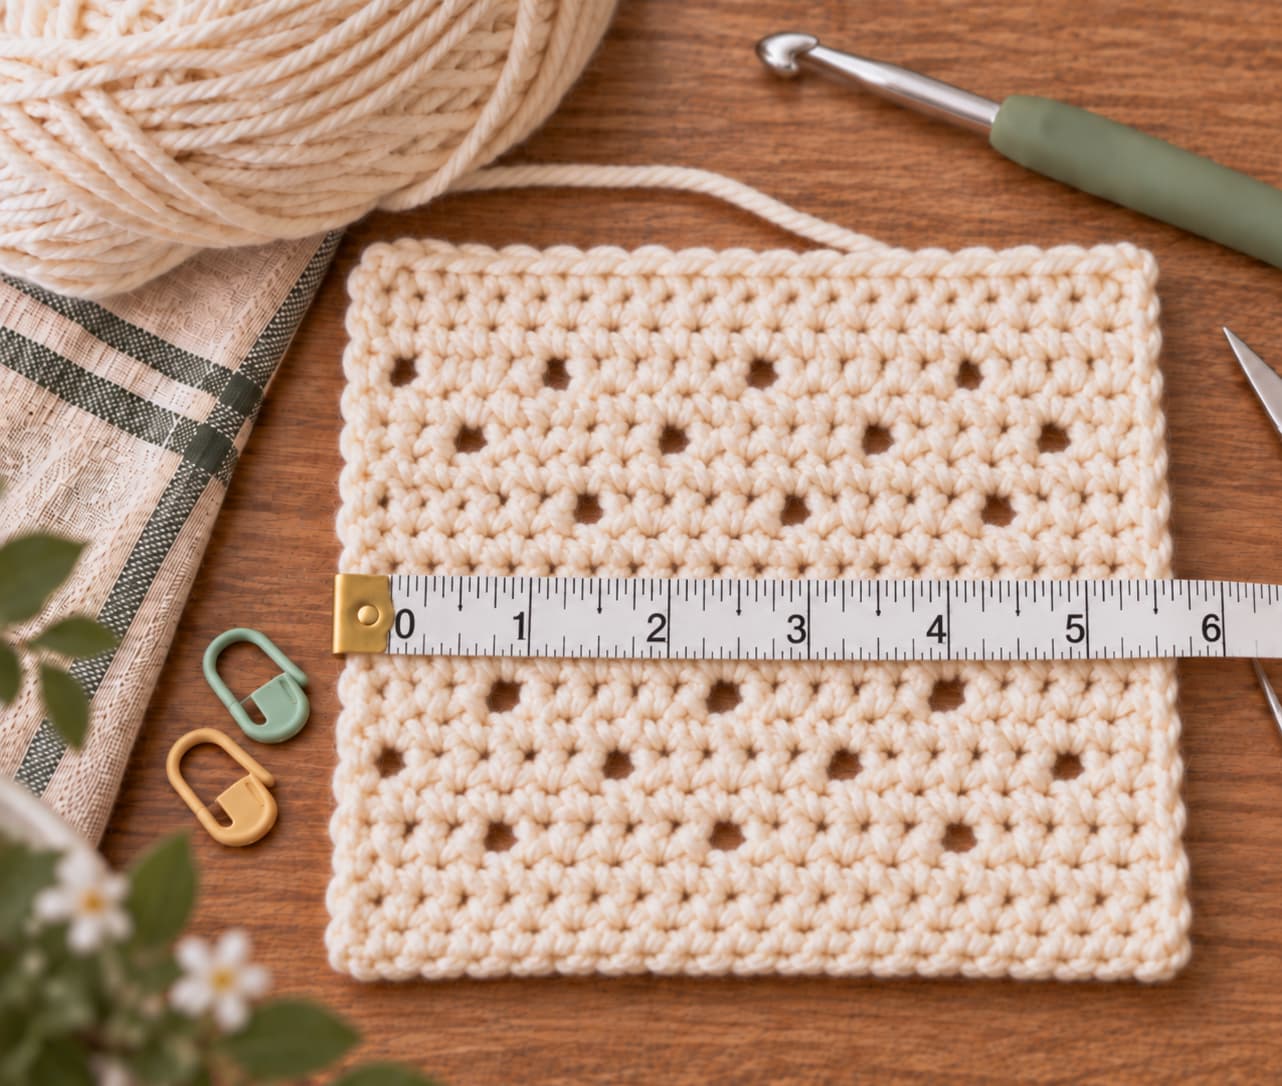
Gauge: 12 single crochet on a solid row and 14 rows = 4 inches / 10 cm in blocked Garden Path fabric with the 6.0 mm hook. If you have more stitches in 4 inches, try a larger hook. If you have fewer, try a smaller hook.
Make a swatch at least 6 inches square. First, crochet several complete Garden Path repeats. Then wash or wet the swatch as allowed by the yarn label, dry it flat, and measure across the center.
Measure across the center of a blocked swatch rather than along an edge.
Garden Path stitch
Use four rows to create staggered openwork
The Garden Path repeat uses two openwork rows and two solid rows. Row 1 places chain-two spaces across the fabric. Next, Row 2 fills those spaces and returns the fabric to 145 single crochet. Row 3 shifts the openings sideways, and Row 4 fills them again.
Because the openings alternate position, they form a scattered path instead of straight vertical channels. Meanwhile, the solid rows stabilize the fabric and make the repeat easier to count.
Two staggered openwork rows alternate with two dense single-crochet rows.
Garden Path repeat — 145 working stitches, multiple of 3 + 1:
Row 1: Ch 1, sc in first st. [Ch 2, skip next 2 sts, sc in next st] 48 times. Turn.
Row 2: Ch 1. Work 1 sc in every sc and 2 sc in every ch-2 space across. You should have 145 sc. Turn.
Row 3: Ch 1, sc in first 2 sts. [Ch 2, skip next 2 sts, sc in next st] 47 times. Sc in each of the last 2 sts. Turn.
Row 4: Ch 1. Work 1 sc in every sc and 2 sc in every ch-2 space across. You should have 145 sc. Turn.
Repeat Rows 1–4. The beginning chain does not count as a stitch.
Complete free pattern
Easy crochet throw blanket: Garden Path written pattern
The instructions below make a main blanket body measuring about 48 × 60 inches at pattern gauge before the border is added. The finished blanket may be slightly larger after the border and blocking. If you choose another size, use the foundation counts in the sizing table and confirm the final dimensions with your own blocked gauge.
KnitSoul free pattern
Garden Path Throw Blanket
TermsU.S. crochet terms
ConstructionBottom-up rectangle, worked flat
Abbreviationsch, sc, sl st, st(s), rnd, row
Turning chainDoes not count as a stitch
Pattern notes
Keep 145 working stitches on every solid row.
Work 2 sc into each ch-2 space on solid rows to restore the stitch count.
Measure the blanket regularly instead of relying on row count alone.
End the body after a solid row so the top edge is easy to border.
Foundation
With warm cream yarn and the 6.0 mm hook, chain 146 loosely.
Set-up row
Sc in second ch from hook and in each ch across. You should have 145 sc. Turn.
Garden Path Row 1
Ch 1, sc in first st. [Ch 2, skip next 2 sts, sc in next st] 48 times. Turn.
Garden Path Row 2
Ch 1. Work 1 sc in every sc and 2 sc in every ch-2 space across. Count 145 sc. Turn.
Garden Path Row 3
Ch 1, sc in first 2 sts. [Ch 2, skip next 2 sts, sc in next st] 47 times. Sc in each of the last 2 sts. Turn.
Garden Path Row 4
Ch 1. Work 1 sc in every sc and 2 sc in every ch-2 space across. Count 145 sc. Turn.
Continue the body
Repeat Garden Path Rows 1–4 until the blanket body is close to 60 inches long after accounting for blocking. At the stated row gauge, about 210 Garden Path rows is a planning estimate for roughly 60 inches of body length. Use the measured length—not the row count—as the final stopping point.
Finish after Row 2 or Row 4 so the final body row is solid. Then fasten off the cream yarn.
Count each solid row before starting the next openwork row.
Single-crochet border
Switch to soft sage yarn and the 5.0 mm hook. Join in a corner with a slip stitch, then ch 1.
Top and bottom: Work single crochet evenly across the stitch edges.
Sides: Place markers at the corners and halfway points, then distribute the single crochet evenly between them. As a starting point, work about 6 sc across every 7 row ends, adjusting slightly if needed so the edge lies flat without ruffling or pulling inward.
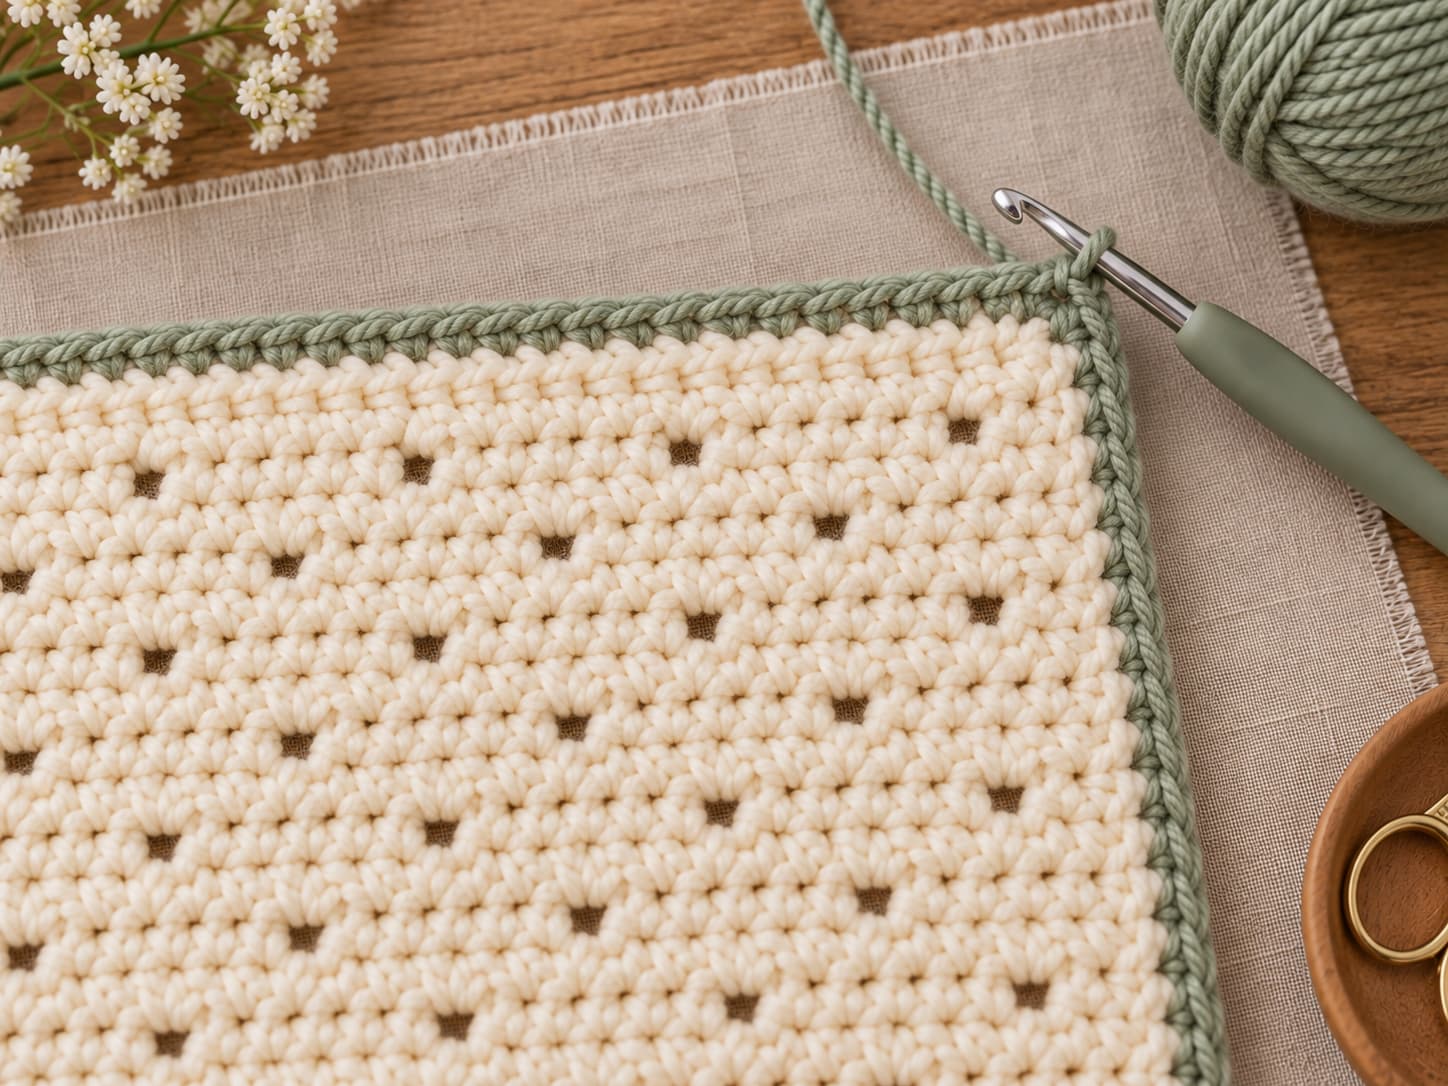
Corners: Work 3 sc in each corner to turn without puckering.
Join to the first sc with a slip stitch. Fasten off and weave in the tail.
Three single crochet in each corner help the sage border turn smoothly.
Optional tassels
Cut equal lengths of sage yarn, fold each group in half, and attach them through the border along the short ends. Then trim the tassels evenly. Because tassels change the yardage, make them only after the border is complete.
Finishing and blocking
Shape the easy crochet throw blanket so the edges lie flat
Block in this order
Weave in the ends. Secure each yarn tail through several nearby stitches before trimming.
Follow the yarn-care label. Wet or wash the blanket only in a way that is appropriate for the fiber.
Lay the blanket flat. Smooth it into a rectangle on blocking mats or clean towels.
Check the dimensions. Adjust the corners and long edges until the fabric is even and the border lies flat.
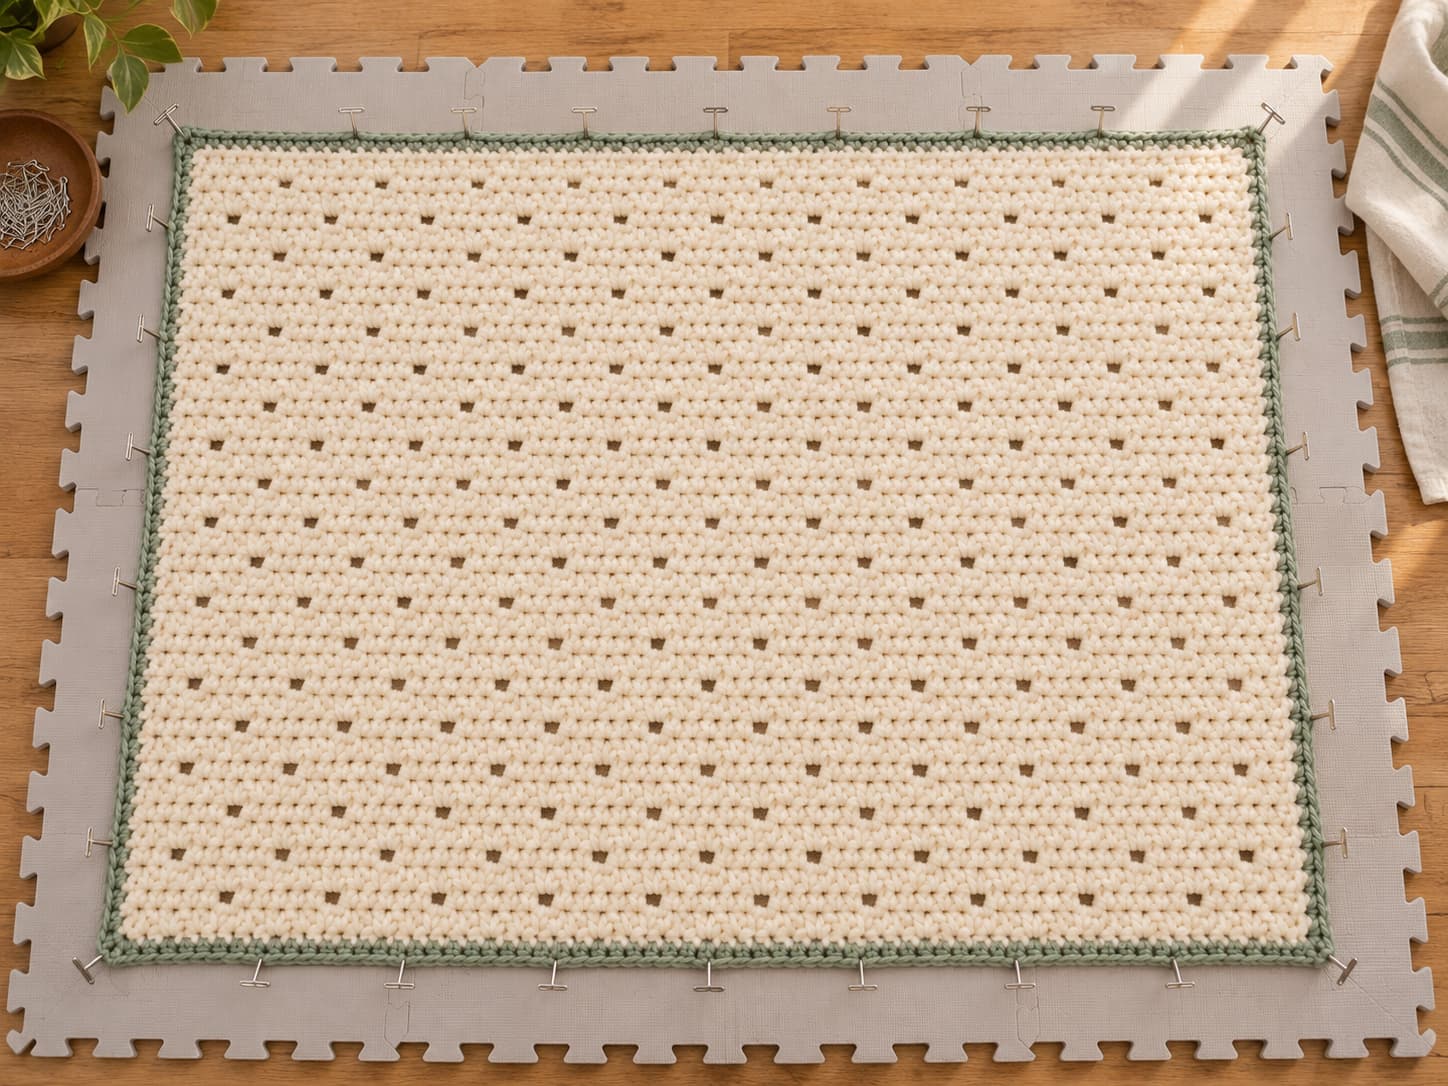
Let it dry completely. Do not remove pins until the fabric is fully dry.
Shape the throw to an even rectangle and let it dry completely before removing the pins.After blocking, the staggered Garden Path openings should look even and the sage border should rest flat.
Troubleshooting
Fix the six mistakes that most often change the blanket
Gauge is off
Swatch in Garden Path, block the swatch, and measure again. Then change hook size before starting the full throw.
Stitch count drifts
On Rows 2 and 4, work 2 sc in every ch-2 space. Count 145 sc before the next openwork row.
Openwork feels tight
Relax the chain-two spaces instead of pulling them close to the hook. Consistent chains create more even openings.
Border ruffles
Use fewer stitches along the affected edge. Then lay the border flat and check it again before continuing.
Openings form columns
Check Row 3. Its open spaces must be offset from Row 1 to create the staggered Garden Path effect.
Foundation edge pulls
Make the starting chain more loosely, or use a slightly larger hook for the foundation chain only.
Practice tips and variations
Change the finish without rewriting the whole pattern
Make it smaller
Use the lap-blanket foundation count and stop at the shorter target length. Then add the same sage border.
Make it longer
Continue complete Garden Path repeats until you reach the desired length. Finish on a solid row before adding the border.
Use a wider border
Add another single-crochet round if you prefer a stronger frame. However, check the corners after each round so they stay flat.
Keep it minimal
Skip tassels and use one clean sage border round. This keeps the staggered cream openwork as the main visual feature.
Count every solid row. Rows 2 and 4 are your checkpoints.
Use a row counter. Long projects are easier when you record each completed repeat.
Check the offset. After Row 3, confirm that its spaces sit between the spaces from Row 1.
Measure as you work. Row count is useful, but finished length matters more.
Take regular breaks. Long rows can change your tension when your hands get tired.
Continue learning
Build on your easy crochet throw blanket with your next crochet project
Yes. This easy crochet throw blanket uses chains, single crochet, and slip stitch, and it has no garment shaping. First, practice the four-row repeat on a swatch. Then start the full width once your stitch count stays consistent.
2. Why does the throw start with chain 146?
The Garden Path fabric uses 145 working stitch positions, which fits the multiple-of-3-plus-1 repeat. The extra foundation chain creates the turning height and is not counted as a stitch.
3. How much yarn do I need?
Plan on about 1000–1300 yards of the main color and 200–300 yards of the border color. Yarn usage changes with gauge, fiber, hook size, and optional tassels, so keep extra yarn available.
4. How do I keep the Garden Path openings staggered?
Work Row 1 with its standard spacing, then shift the openings on Row 3 by starting with two single crochet. After Row 3, the new spaces should sit between the spaces created on Row 1.
5. What if my border ruffles?
On an easy crochet throw blanket, ruffling usually means the edge has more border stitches than it can hold flat. Remove the affected section and space the single crochet more evenly. If the edge pulls inward instead, give it slightly more room.
6. How should I wash the finished blanket?
Follow the care instructions for the yarn you actually used. After washing, reshape the throw gently and dry it in the way recommended on the yarn label. Avoid hanging a heavy wet blanket because the weight can stretch the fabric.
Your first big project
Finish an easy crochet throw blanket you can use every day
This easy crochet throw blanket turns a small group of beginner skills into a substantial home project. Start with an accurate swatch, count every solid row, and check the staggered openings as you work. Finally, add the sage border and block the blanket so the rectangle settles evenly.
If you lose your place, return to the last solid row. Because Rows 2 and 4 restore the full stitch count, they give you a reliable checkpoint throughout the project.