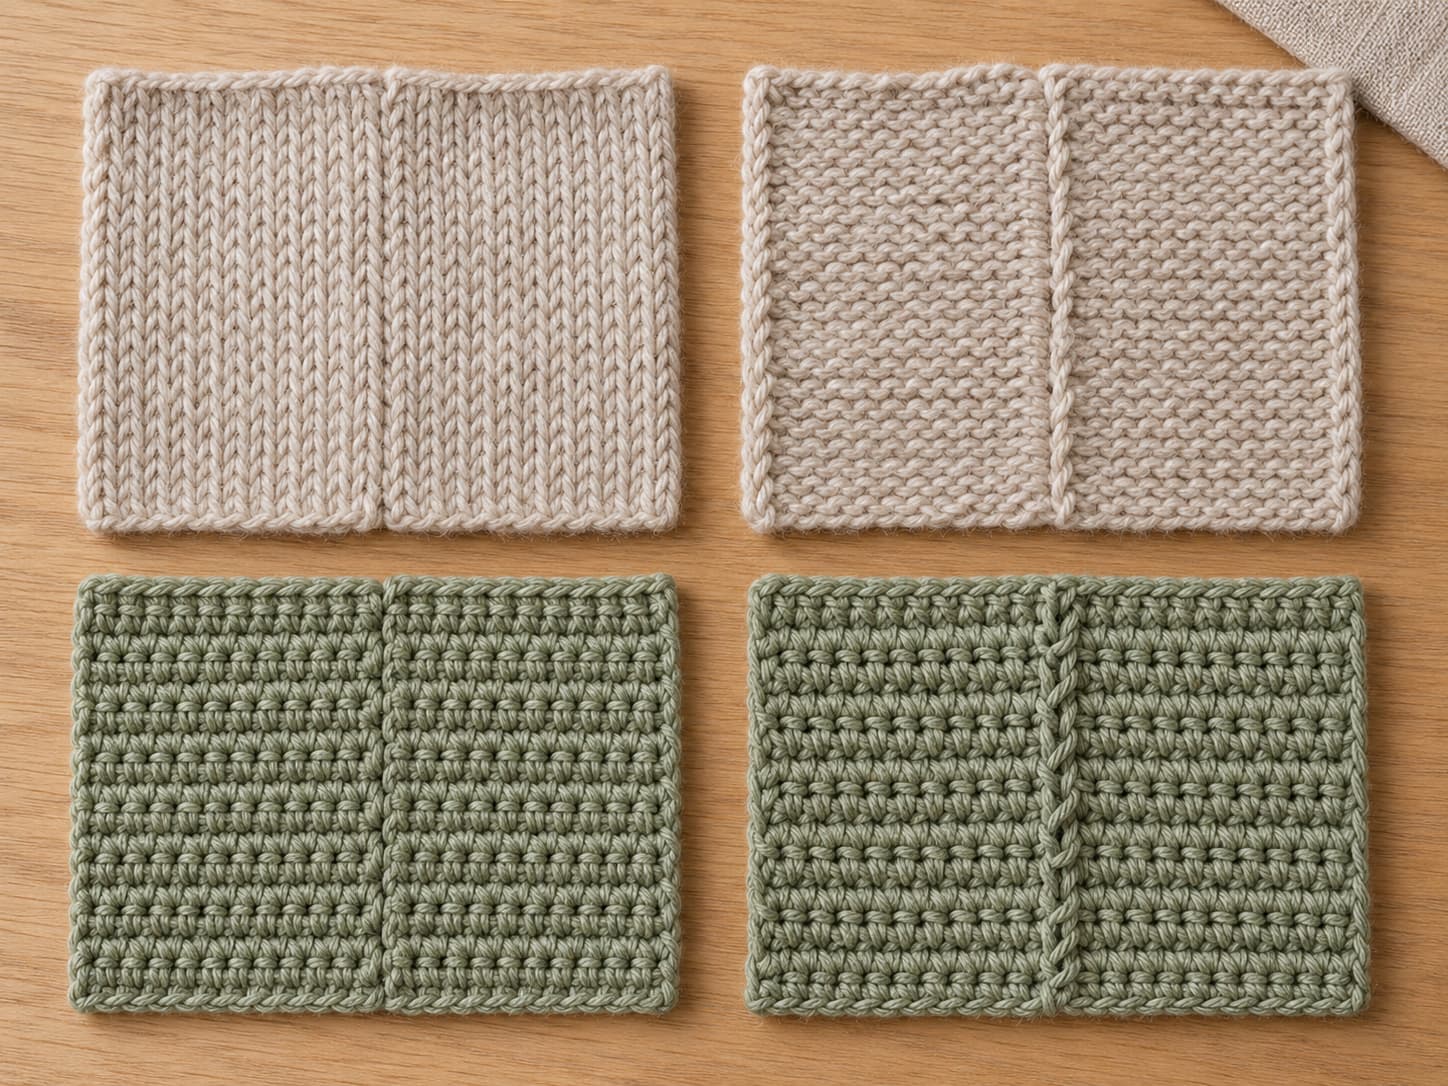
How to Seam Knitting and Crochet: Mattress Stitch & Whip Stitch
Join flat panels, motifs, shoulders, and mixed-direction edges with clean hand-sewn seams. This guide shows where the needle goes, how firmly to pull, and which method fits each edge.
Written by Sophie Lane•Published •About 16 minutes to read
Learning how to seam knitting and crochet begins with two decisions: identify the edges, then choose whether the join should disappear or remain visible. Mattress stitch is the usual choice for low-profile side seams. In contrast, whip stitch makes a firm join that can stay decorative or sit inside a project.
First, finish the pieces and compare their lengths without stretching either one. Next, align important points with locking markers. Then sew through consistent bars or loops while keeping the joining yarn relaxed.
A clean seam should support the fabric without changing its shape. Therefore, pause often, open the pieces, and compare the seam tension with the surrounding fabric before continuing.
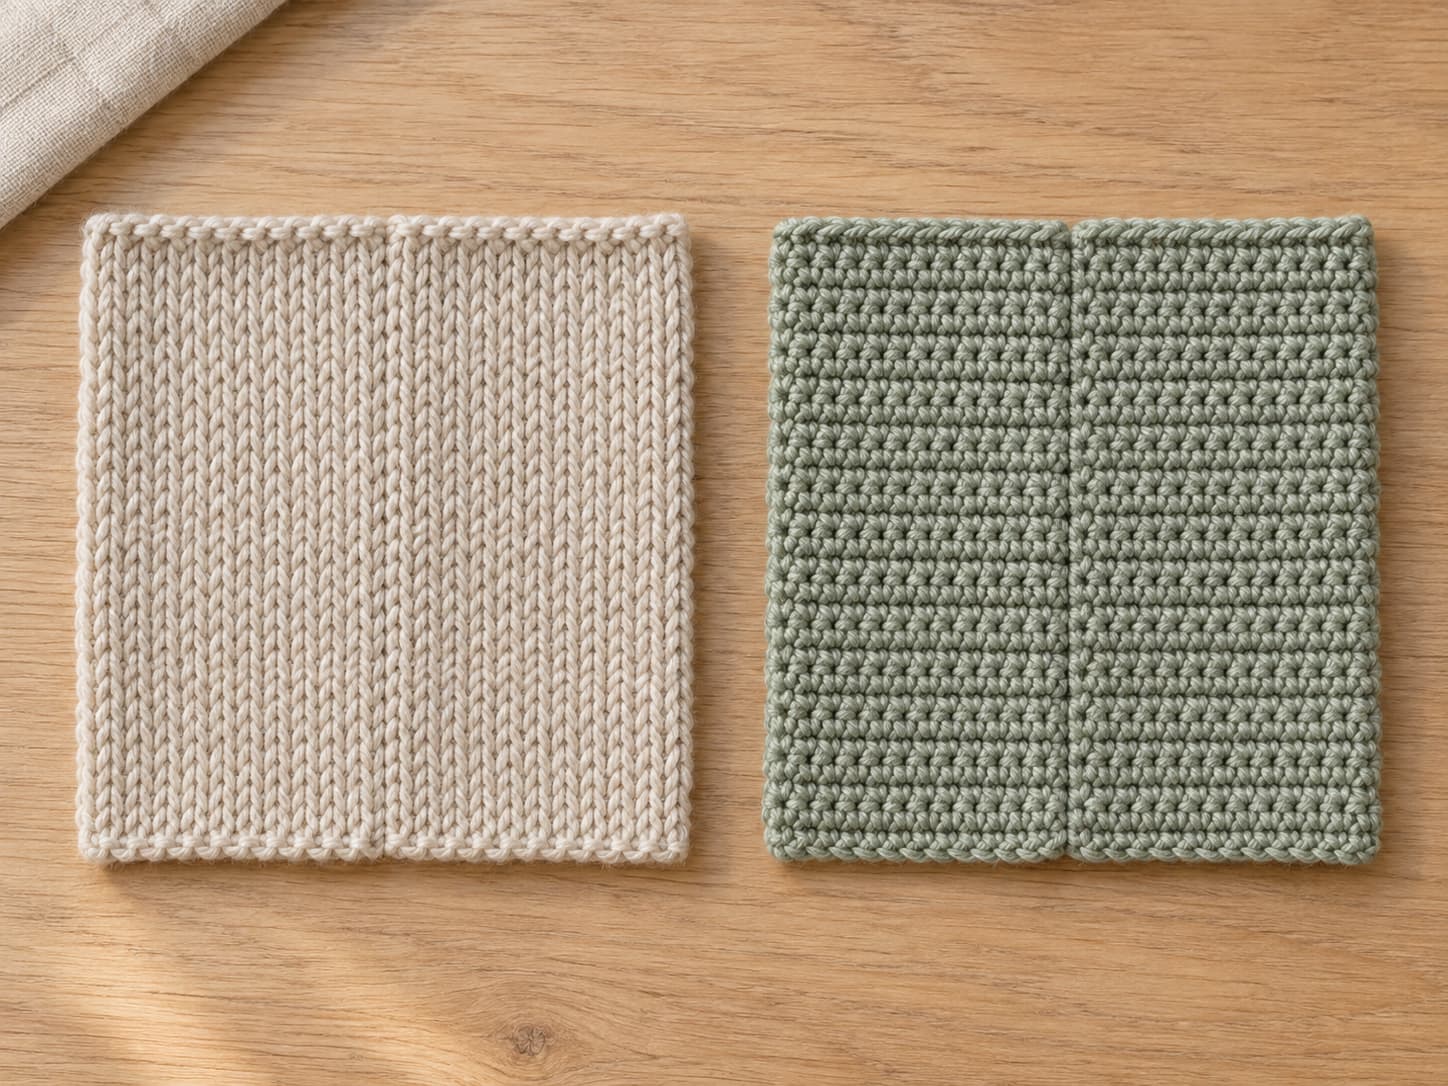
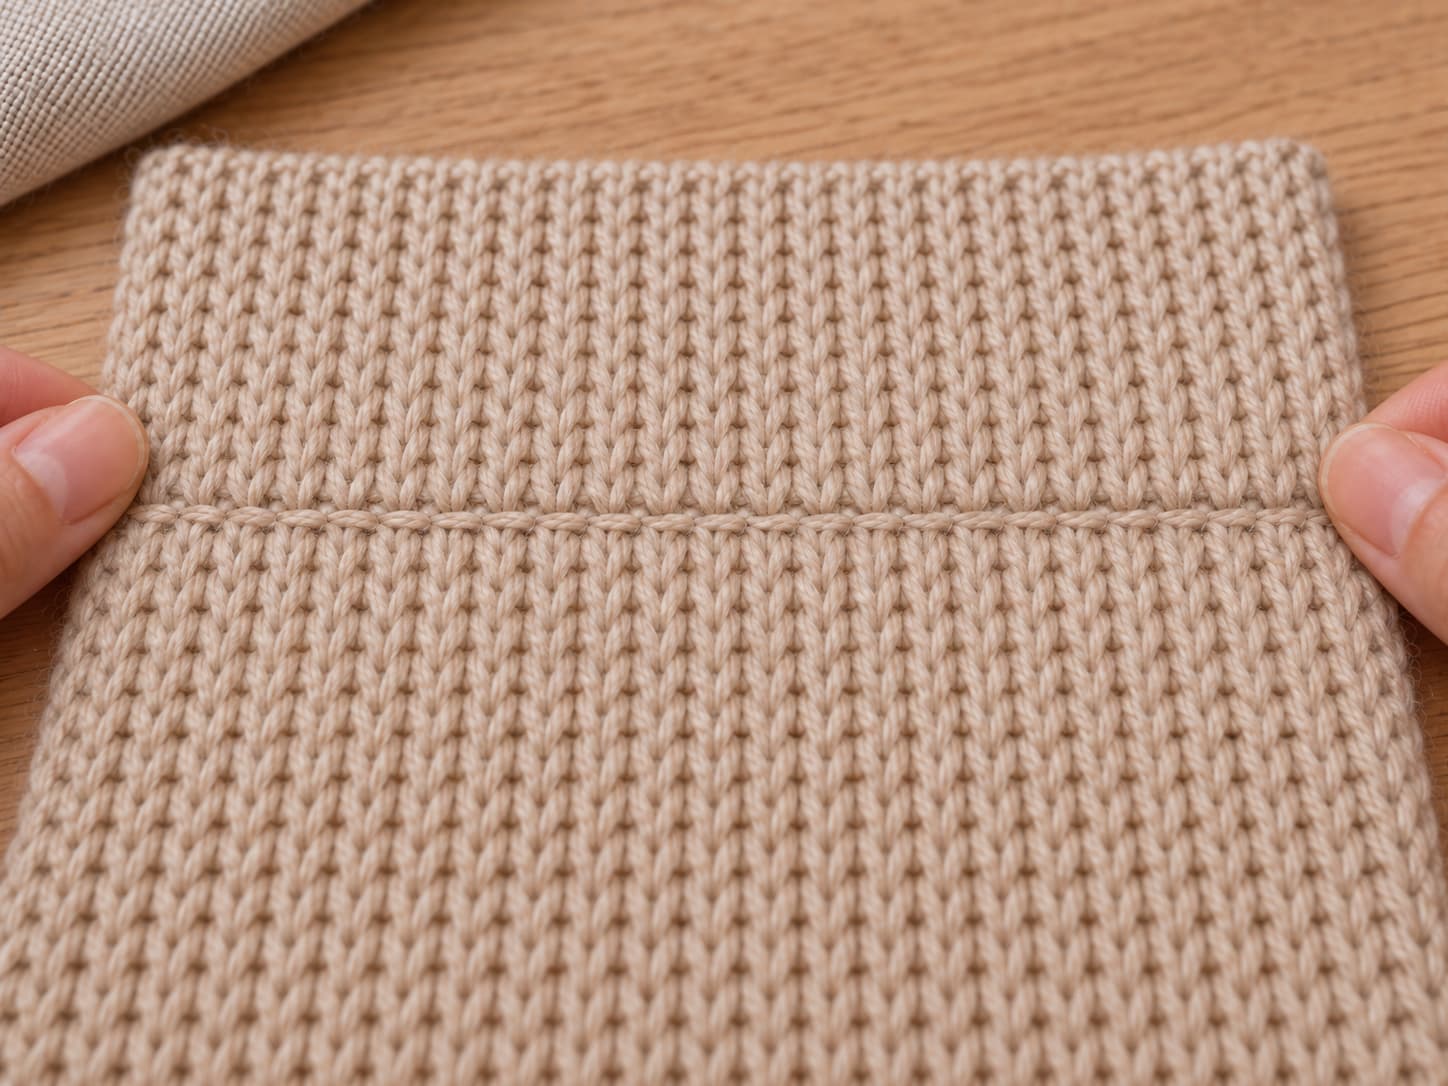
Image 01 · Finished seam resultsSuggested file: knitsoul-how-to-seam-knitting-crochet-finished-samples.jpgReplace only the img src value above with the full HTTPS WordPress Media URL.
A balanced seam follows the fabric edge, lies flat when opened, and does not shorten the joined panels.
Skill levelBeginner and up
Practice on two small swatches before seaming a garment.
Best invisible joinMattress stitch
Ideal for many matching vertical panel edges.
Simplest joinWhip stitch
Easy to see, repeat, and adjust as you sew.
Main toolBlunt tapestry needle
Choose an eye that accepts the project yarn without fraying it.
Key habitMark first
Match corners, centers, shaping points, and stripe changes.
Tension ruleSnug, never rigid
The seam should flex with the surrounding fabric.
On this page
Tools and yarn
Gather a small kit for controlled seaming
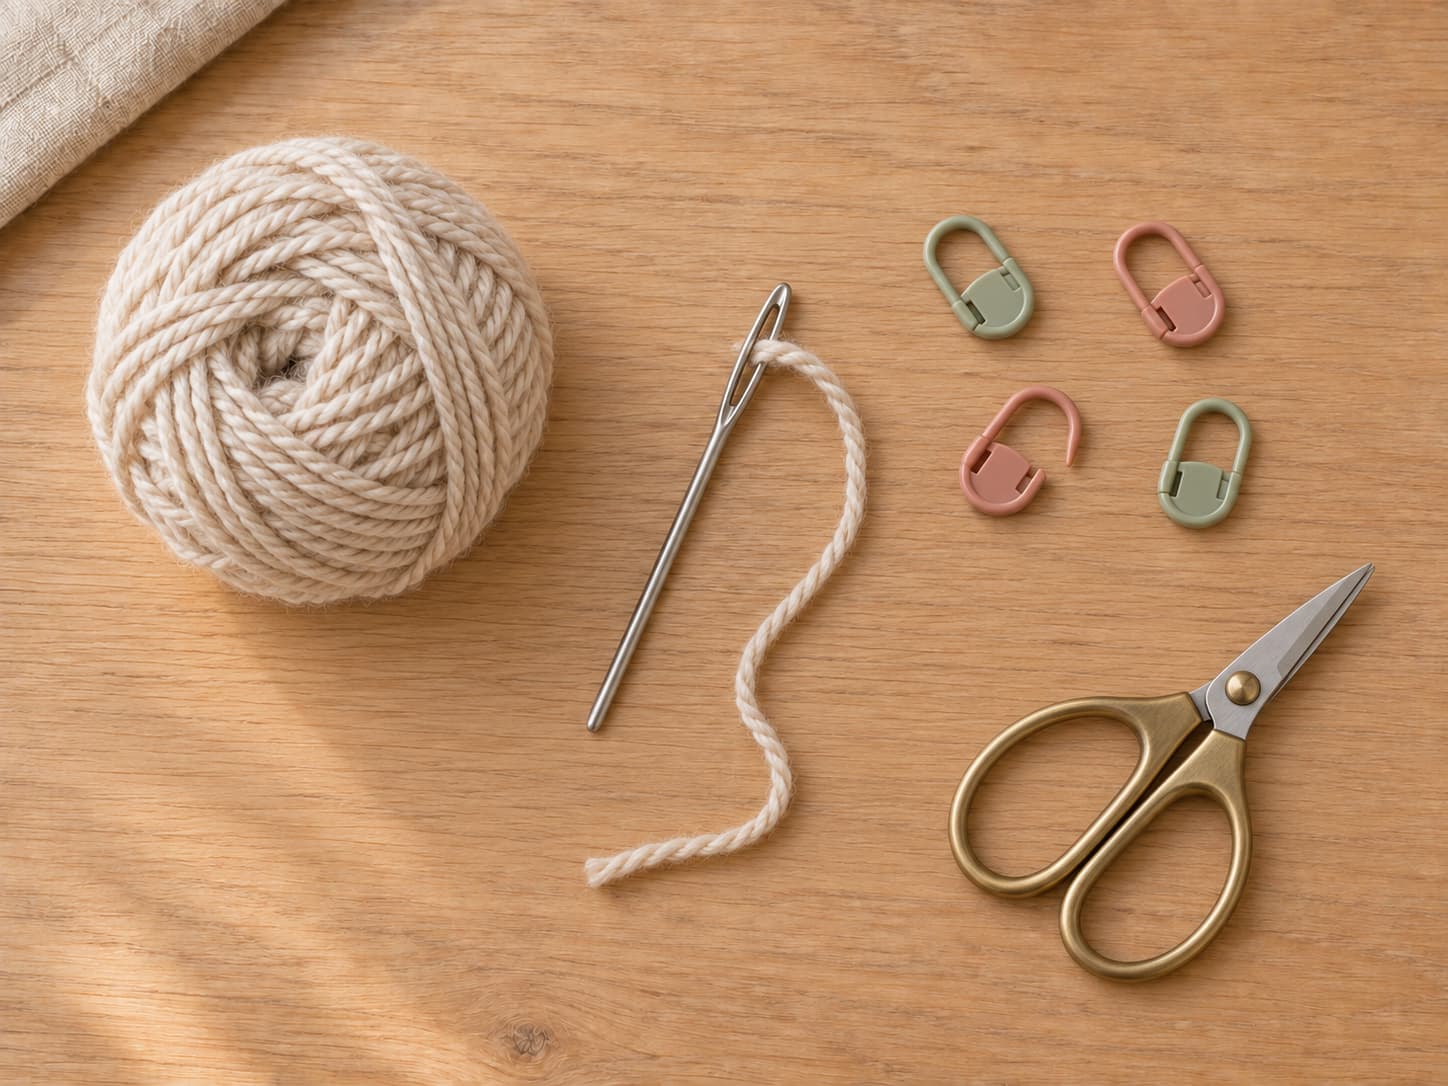
You need a blunt tapestry needle, project yarn, locking stitch markers, and scissors. In addition, a flat surface lets both edges rest at their natural length while you align them.
Image 02 · Essential seaming toolsSuggested file: knitsoul-seaming-tools-tapestry-needle-yarn-markers.jpgReplace only the img src value above with the full HTTPS WordPress Media URL.
A short list of well-matched tools gives you better control than a crowded finishing kit.
Choose a blunt needle with enough room
A blunt point slides between strands instead of piercing the yarn. Meanwhile, the eye should hold the seaming strand without crushing or repeatedly scraping it. If the yarn frays while threading, move to a larger eye.
Usually, the project yarn gives the least noticeable seam. However, very fragile, fuzzy, or loosely spun yarn may weaken after repeated passes. In that case, choose a smoother yarn with similar thickness and color, then test it on a swatch.
Therefore, cut a manageable length rather than sewing directly from the ball. As a result, the strand twists less and is easier to replace if it becomes worn.
Before sewing
Prepare the pieces so rows stay aligned
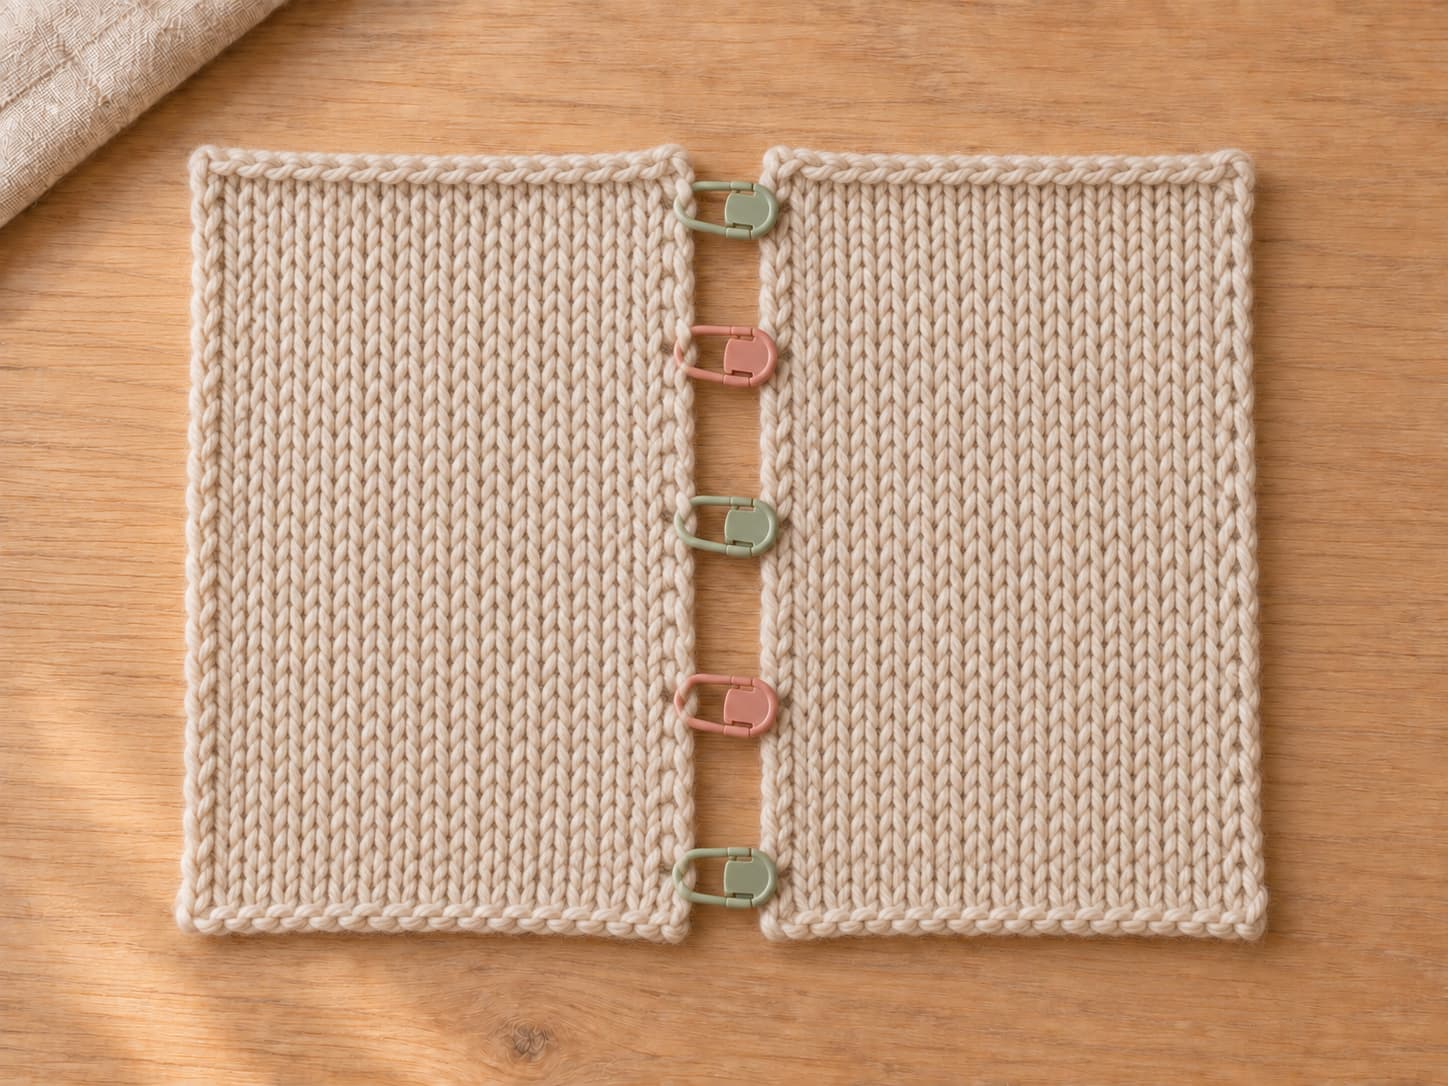
First, lay the pieces in the position they will have after assembly. For a side seam, place them right side up with the two vertical edges next to each other. For a seam sewn inside the project, place right sides together only after you have confirmed the alignment.
Image 03 · Align the panels firstSuggested file: knitsoul-knit-panels-aligned-with-stitch-markers.jpgReplace only the img src value above with the full HTTPS WordPress Media URL.
Markers at both ends, the center, and visible shaping points prevent one panel from creeping ahead.
Match fixed points before individual rows
First, connect the beginning and end of the seam. Next, mark the center. Add more markers at stripe changes, shaping points, and other features that must meet.
If one edge is slightly longer, do not pull the shorter piece. Instead, divide both edges into smaller marked sections and ease the difference across those sections.
Decide whether to block first
In some cases, blocking before assembly makes lace, curled stockinette, and separate motifs easier to compare. However, follow the yarn label and the project instructions. If the finished object needs a final block, use that step to settle the completed seams rather than to hide poor alignment.
Method 1 · Knitting
How to seam knitting with mattress stitch
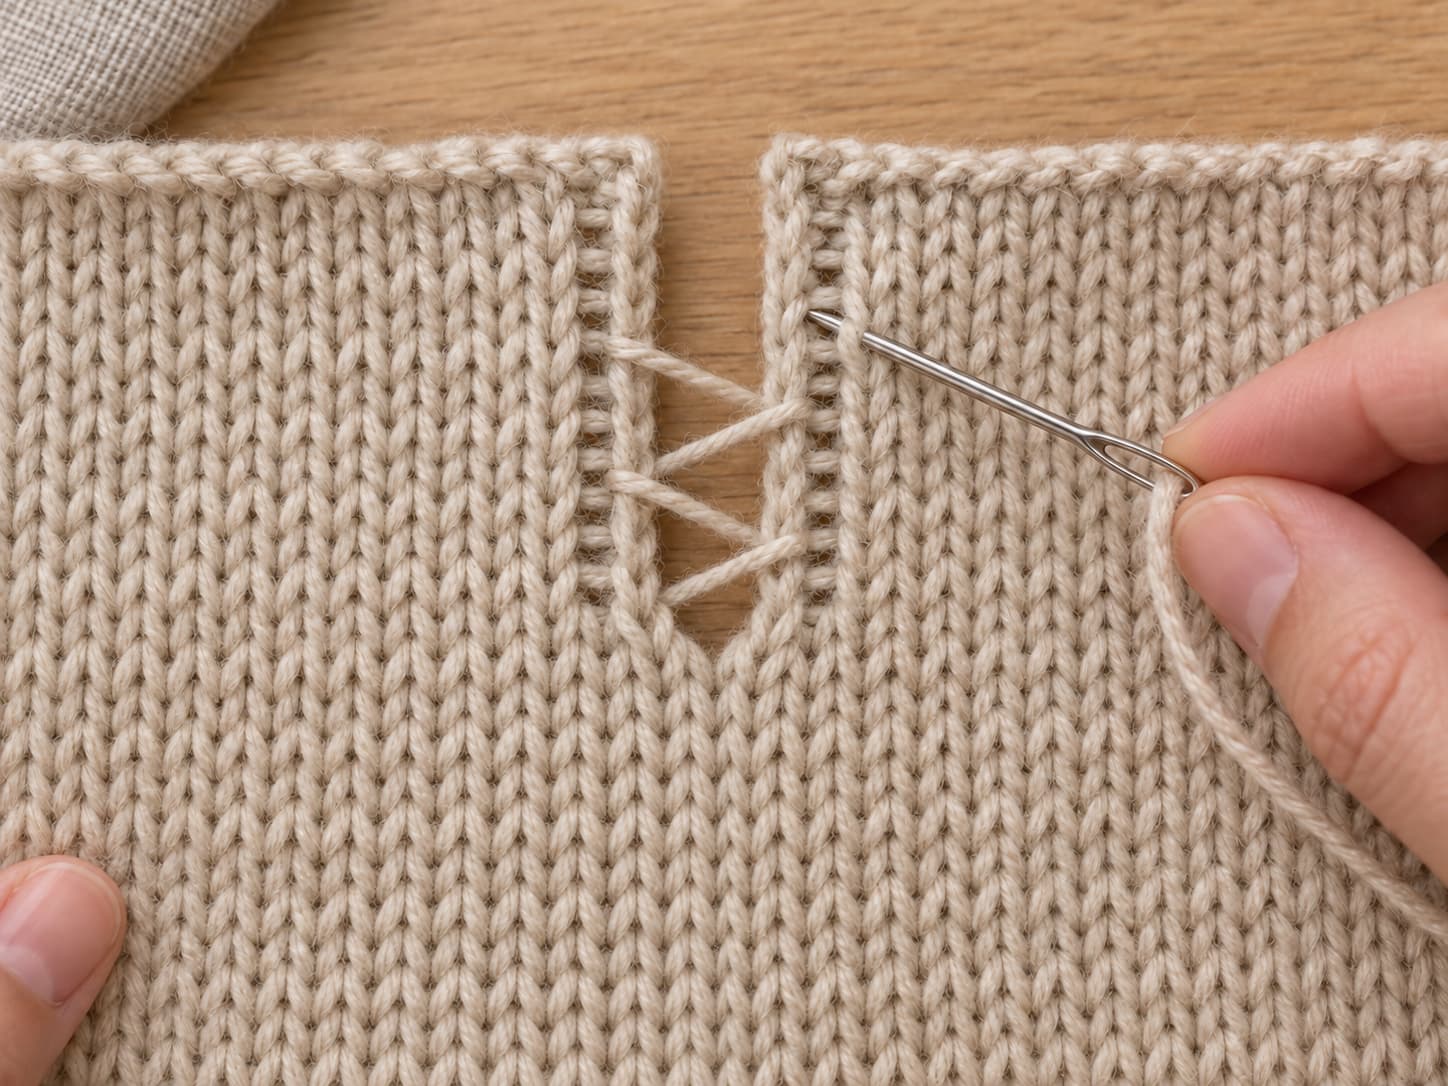
Mattress stitch joins matching vertical stockinette edges from the right side. Specifically, the needle travels under horizontal bars between the edge stitch and the next stitch. Once tightened, the alternating ladder closes and hides between the panels.
Image 04 · Pick up the mattress barsSuggested file: knitsoul-knitting-mattress-stitch-horizontal-bars.jpgReplace only the img src value above with the full HTTPS WordPress Media URL.
Use the same column of horizontal bars on both pieces so the visible stitches meet cleanly.
1
Place both pieces right side up. Set the vertical edges side by side, then clip the matched points together without overlapping them.
2
Anchor at the lower corner. Bring the threaded needle from the wrong side to the right side near the first matched edge loops. Leave a tail for weaving in.
3
Find the first bar. Gently separate the edge stitch from the next stitch on the left panel. Insert the needle under one complete horizontal bar.
4
Cross to the matching bar. Pick up the bar at the same height on the right panel. Then return to the next bar on the left.
5
Build a short ladder. Alternate sides for a small section while leaving the joining strand loose enough to see each pickup.
6
Close the ladder gradually. Hold the panels flat and pull the seaming yarn until the edges meet. Stop before the fabric gathers.
Tighten the ladder without puckering
Pull from the last open section rather than from the needle tip. Consequently, tension travels through several pickups instead of concentrating in one stitch. Then, open the fabric after each section and compare its length with the unseamed edge.
If the seam feels hard or short, ease a little yarn back through the recent pickups. The join should close, yet the fabric should still move naturally.
Adjust for garter stitch and textured edges
However, garter stitch does not show the same vertical ladder as stockinette. Therefore, choose matching edge bumps and test which loops create the flattest join. Ribbing also needs careful alignment because the knit and purl columns must continue across the seam.
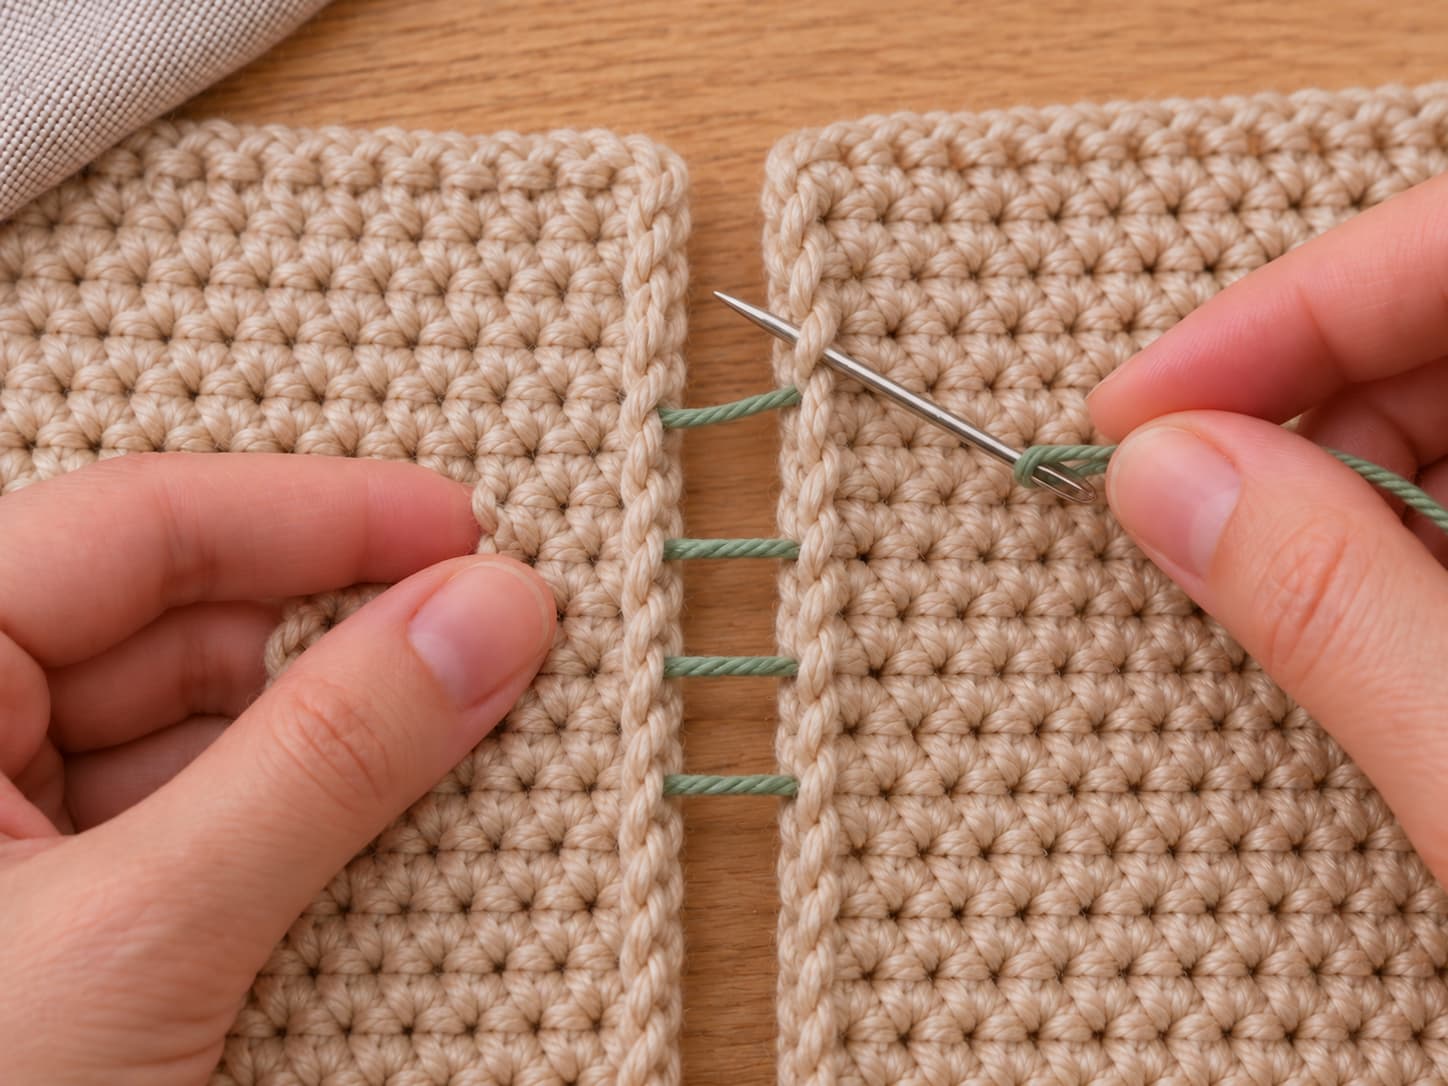
Method 1 · Crochet
Work crochet mattress stitch through matching edge loops
Similarly, crochet mattress stitch uses an alternating movement, but the pickup points come from the panel edges. First, look for one consistent loop or bar beside each row. Then repeat that choice on the second piece.
Image 05 · Crochet mattress stitchSuggested file: knitsoul-crochet-mattress-stitch-edge-loops.jpgReplace only the img src value above with the full HTTPS WordPress Media URL.
Matching the same part of each row creates a flatter join and keeps stripe changes level.
1
Place the panels right side up. Align the two edges and add markers at the ends, center, and any color changes.
2
Choose one edge loop. Identify a clear loop or bar beside the first row on each panel. Use the equivalent loop every time.
3
Alternate sides. Pass under the selected loop on the left, then the matching loop on the right. Continue one row at a time.
4
Close short sections. Pull the ladder until the edges touch. Meanwhile, check that the row tops remain level.
5
Secure the final end. Weave the tail into nearby stitches on the wrong side, changing direction so it does not slip free.
Handle uneven crochet row ends
Turning chains and tall stitches can make one edge look less regular than the other. For example, a double-crochet panel may show long side posts instead of compact loops. Select repeatable pickup points, then count rows between markers so both sides advance together.
If you are joining motifs, review the construction order in the beginner granny square guide before arranging the final layout.
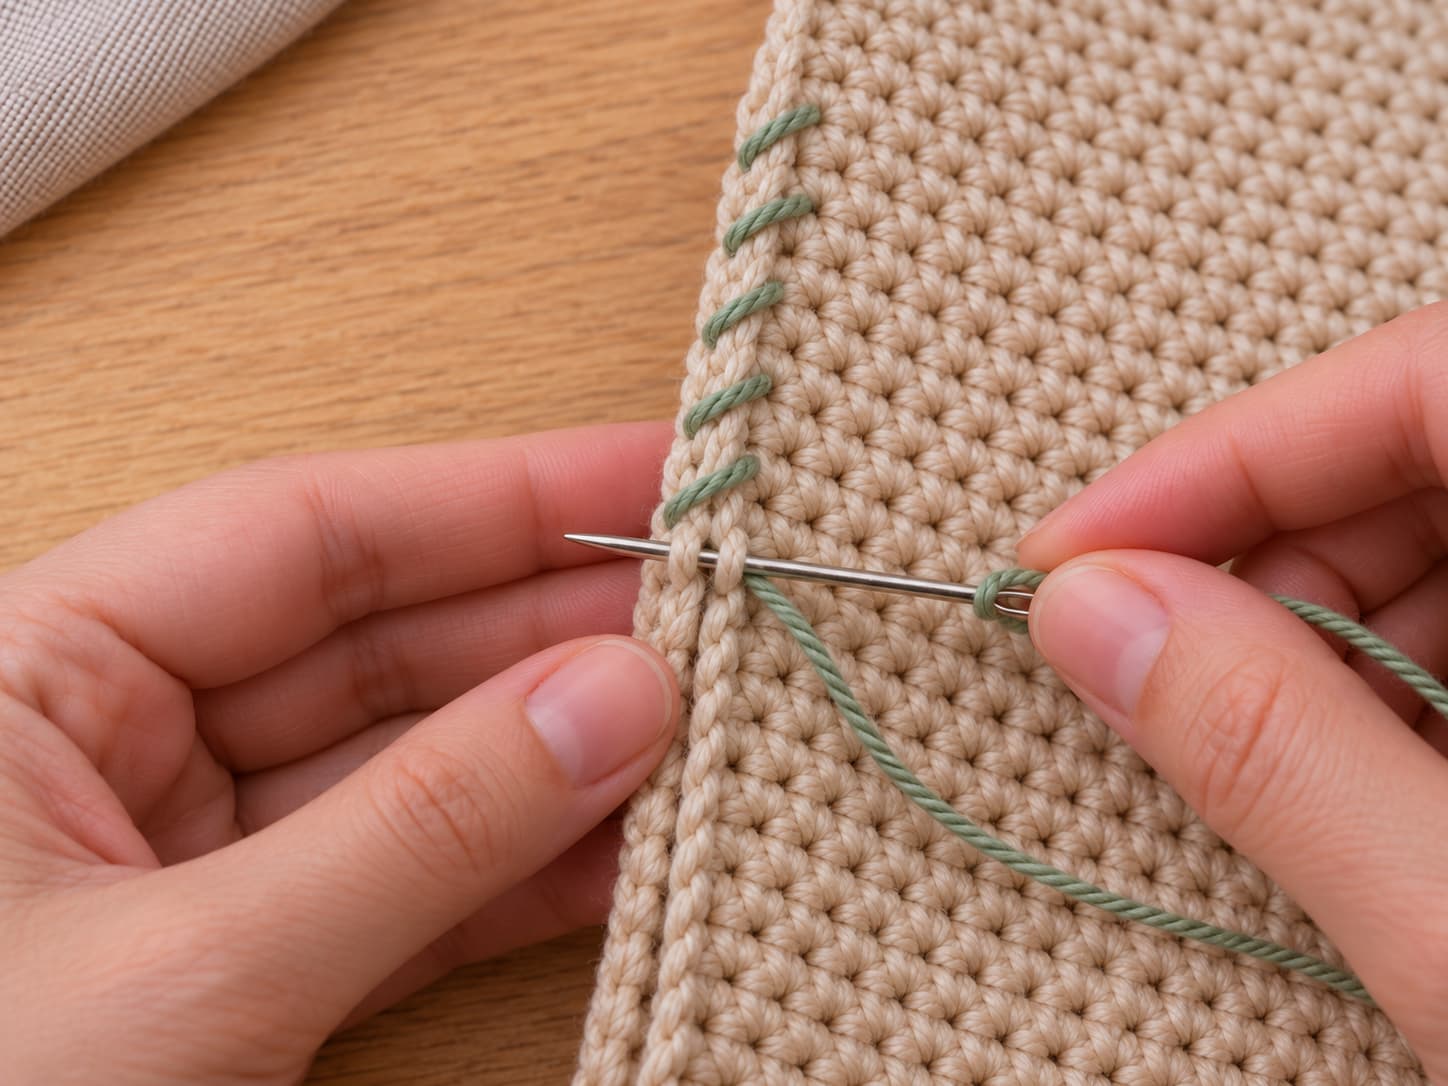
Method 2
Use whip stitch for a simple, secure join
Whip stitch passes around two aligned edges in the same direction each time. For example, every stitch remains visible and easy to inspect while you work. However, its ridge and stretch depend on how the pieces are positioned and how tightly you pull.
Image 06 · Even whip stitch spacingSuggested file: knitsoul-whip-stitch-crochet-seam-close-up.jpgReplace only the img src value above with the full HTTPS WordPress Media URL.
Equal bite depth and equal spacing matter more than pulling each stitch tightly.
1
Choose the seam placement. Put right sides together for a ridge that stays inside. Instead, place wrong sides together when the wrap should remain visible outside.
2
Align and anchor. Match both edges with markers, then bring the needle through the first paired loops.
3
Wrap in one direction. Move to the next matched loops and pass through both layers in the same direction as the first stitch.
4
Repeat equal bites. Keep the distance from the edge consistent. In addition, keep the spaces between stitches visually even.
5
Open and test. After a short section, unfold the pieces and flex the seam. Adjust before the next section if it feels stiff.
Control whether the seam shows
Matching yarn helps the wraps blend into the edge. In contrast, a deliberate contrast color turns the seam into an outline. Use that decorative option only when the raised line suits the project.
Join shoulders and top-to-side edges without distortion
Not every seam connects two vertical row edges. Meanwhile, shoulder seams often join two horizontal bind-off edges, while a set-in sleeve connects a shaped sleeve top to an armhole edge. Therefore, these joins need structural markers before individual stitches are matched.
Join two horizontal bind-off edges
Place both edges together in the finished orientation and match the shoulder endpoints. For a low-profile hand-sewn join, work through corresponding bind-off loops. Alternatively, use backstitch with right sides together when the pattern calls for a firmer interior seam.
Image 07 · Horizontal shoulder edgesSuggested file: knitsoul-knitted-shoulder-seam-bound-off-edges.jpgReplace only the img src value above with the full HTTPS WordPress Media URL.
A shoulder seam should support the garment while keeping the neckline and armhole endpoints aligned.
Ease a top edge into a side edge
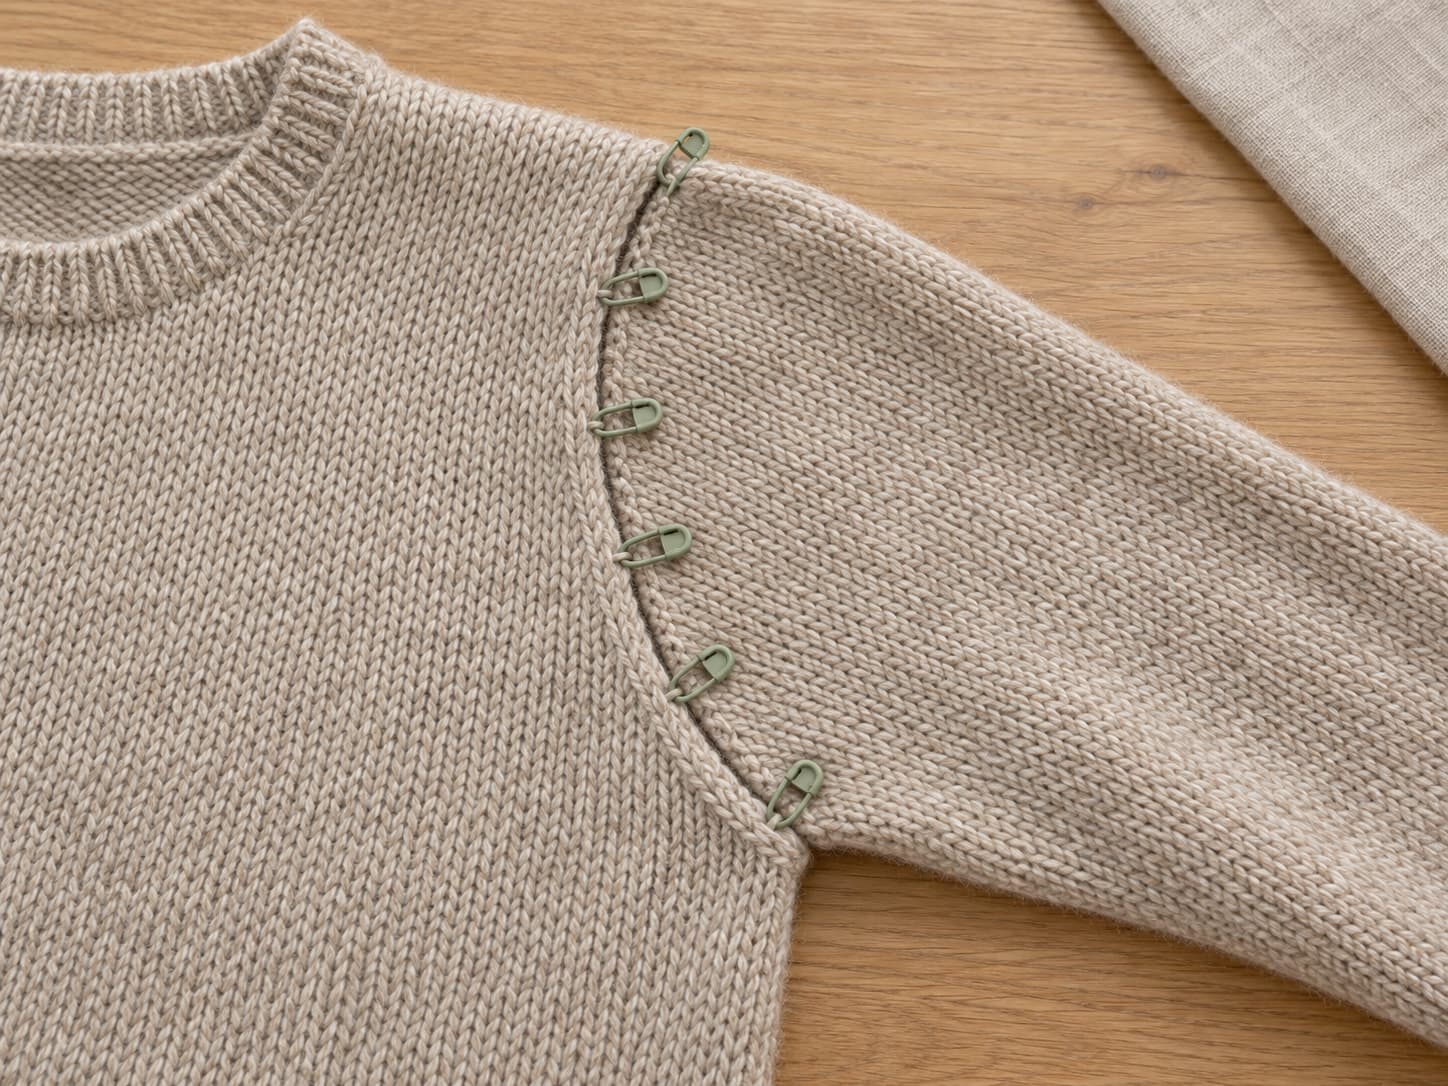
First, mark the center of the sleeve top and the shoulder point of the armhole. Next, match the beginning and end of the seam. Then divide each remaining section again until the fabric sits evenly between markers.
The stitches and rows may not match one for one because their dimensions differ. Therefore, distribute the pickups by section and follow the pattern's shaping rather than inventing a fixed ratio.
Image 08 · Top-to-side alignmentSuggested file: knitsoul-top-to-side-sleeve-armhole-seam.jpgReplace only the img src value above with the full HTTPS WordPress Media URL.
Section markers distribute the sleeve cap across the armhole without stretching one edge to fit.
Decision guide
Compare crochet and knitting seaming methods
Choose by edge direction, desired visibility, and the amount of structure the project needs. The table gives a starting point; however, a pattern's assembly instructions take priority.
Method
Best edge
Visible result
Flexibility
Beginner note
Knitting mattress stitch
Matching vertical stockinette edges
Low-profile from the right side
Moderate when relaxed
Pick the same bar column on both panels.
Crochet mattress stitch
Matching panel or motif edges
Discreet joining line
Depends on stitch and yarn
Use the same edge loop beside every row.
Whip stitch
Matching flat or shaped edges
Hidden inside or decorative outside
Usually firmer
Keep bite depth and spacing consistent.
Backstitch
Shoulders and firm interior seams
Ridge stays on the wrong side
Low
Useful when structure matters more than stretch.
Top-to-side seam
Sleeve top to armhole
Low-profile when evenly eased
Varies with construction
Match sections instead of forcing a fixed ratio.
For most matching side seams, begin with mattress stitch. Meanwhile, choose whip stitch when you want the simplest repeated motion. Use a firmer sewn seam when the project needs support at a shoulder or another load-bearing join.
Troubleshooting
Fix common seam problems before weaving in
The seam puckers
You pulled the joining strand too firmly or picked up too little fabric. Ease yarn back through the latest section, then close the seam with less tension.
One piece finishes early
The alignment drifted between markers. Undo to the last matched point, divide the remaining edges into smaller sections, and distribute the difference evenly.
A ridge shows outside
The needle may be entering too close to the edge or catching inconsistent loops. Therefore, reopen the seam and move each pickup one stable strand inward.
The seam has gaps
The pickups are too far apart or the ladder remains loose. Add more evenly spaced pickups, then tighten only until the edges meet.
The yarn frays
The needle eye may be too small, or the strand may be too long. Switch to a larger eye and replace worn yarn before it breaks inside the seam.
Stripes do not meet
Color changes were not secured as fixed points. In this case, undo the nearby section, clip matching stripe boundaries together, and resew between them.
Finishing
Secure the ends, then settle the seam
Weave each tail into the wrong side through several nearby stitches, then change direction before trimming. However, avoid knots unless the pattern specifically requires one. As a result, the woven path spreads tension and keeps the end from forming a hard bump.
Image 09 · Finished and gently blockedSuggested file: knitsoul-finished-seams-after-gentle-blocking.jpgReplace only the img src value above with the full HTTPS WordPress Media URL.
After gentle blocking, a balanced seam settles into the fabric without becoming rigid or wavy.
Complete a three-part final check
Alignment: hems, stripes, shaping points, and corners meet where intended.
Movement: the seam flexes with the fabric and does not shorten the edge.
Finish: tails are secure, the right side looks clean, and the wrong side has no loose loops.
Finally, block or wash the assembled piece only as its yarn label and pattern allow. Shape the seam gently and let the project dry in its intended form.
Practice and continue
Build confidence with two small swatches
For practice, make two matching squares in a smooth, light-colored yarn. First, join half the edge with mattress stitch. Then reopen the pieces, compare the result, and use whip stitch on the remaining edge.
Because the swatches are expendable, you can test loose and firm tension without risking a finished project. As a result, your hands learn how a balanced seam feels before garment assembly begins.
Whip stitch is usually the easiest because the repeated wrapping motion is visible and simple to correct. However, mattress stitch is worth learning next when you want matching vertical edges to meet with a lower-profile finish.
2. Can I use mattress stitch for both knitting and crochet?
Yes, although the pickup points differ. On stockinette knitting, pick up horizontal bars between stitch columns. On crochet, choose corresponding edge loops or bars beside each row and repeat that choice consistently.
3. Should I block pieces before or after seaming?
Block separate pieces first when curling, lace, or uneven shapes make alignment difficult. Then assemble the project and use a gentle final block if the pattern and yarn-care label allow it.
4. How much yarn should I cut for a seam?
Cut a manageable strand that passes through the needle without excessive twisting or wear. Because yarn and seam construction vary, treat any length formula as an estimate and add a new strand if needed.
5. Why does my mattress stitch seam pucker?
The joining yarn is probably too tight, or the pickups are uneven. Ease yarn back through the latest section, flatten the pieces, and tighten only until the edges meet without gathering.
6. Can I join pieces with a crochet hook instead?
Yes. Slip-stitch and single-crochet joins can create sturdy, visible ridges. In contrast, a tapestry-needle mattress seam usually produces a flatter result on matching panel edges.
7. How do I seam a sleeve top to an armhole?
Match the sleeve center to the shoulder, secure both endpoints, and divide the remaining edges into marked sections. Then distribute pickups within each section instead of forcing stitches and rows to match one for one.
Conclusion
A clean seam comes from consistent choices
To understand how to seam knitting and crochet, focus on alignment, repeatable pickup points, and relaxed tension. Mattress stitch makes many matching side edges discreet, while whip stitch gives beginners a clear and dependable joining motion.
Finally, check the seam before weaving in. If the fabric lies flat, the reference points meet, and the join moves with the project, the seam is doing its job.